Upgrading a prebuilt gaming PC starts with checking your power supply’s headroom, not shopping for a new GPU — every upgrade path depends on how much wattage and how many power connectors your PSU has available, and skipping that check is the most common way upgrade budgets get wasted on a component that then can’t run safely. This guide walks through the checks and swaps in the order that actually matters, from diagnosis to installation.
I’m Marcus Reilly, and I’ve upgraded and stress-tested hundreds of prebuilt and custom systems over nine years, first at a regional PC shop and now full-time reviewing, using a two-bench test lab with calibrated power meters and thermal probes to verify exactly what a given upgrade actually delivers rather than assuming it based on spec sheets alone.
As an Amazon Associate we earn from qualifying purchases at no extra cost to you. Product prices and availability are accurate as of the date shown and are subject to change.


Top 3 picks at a glance
Check your power supply before buying anything else
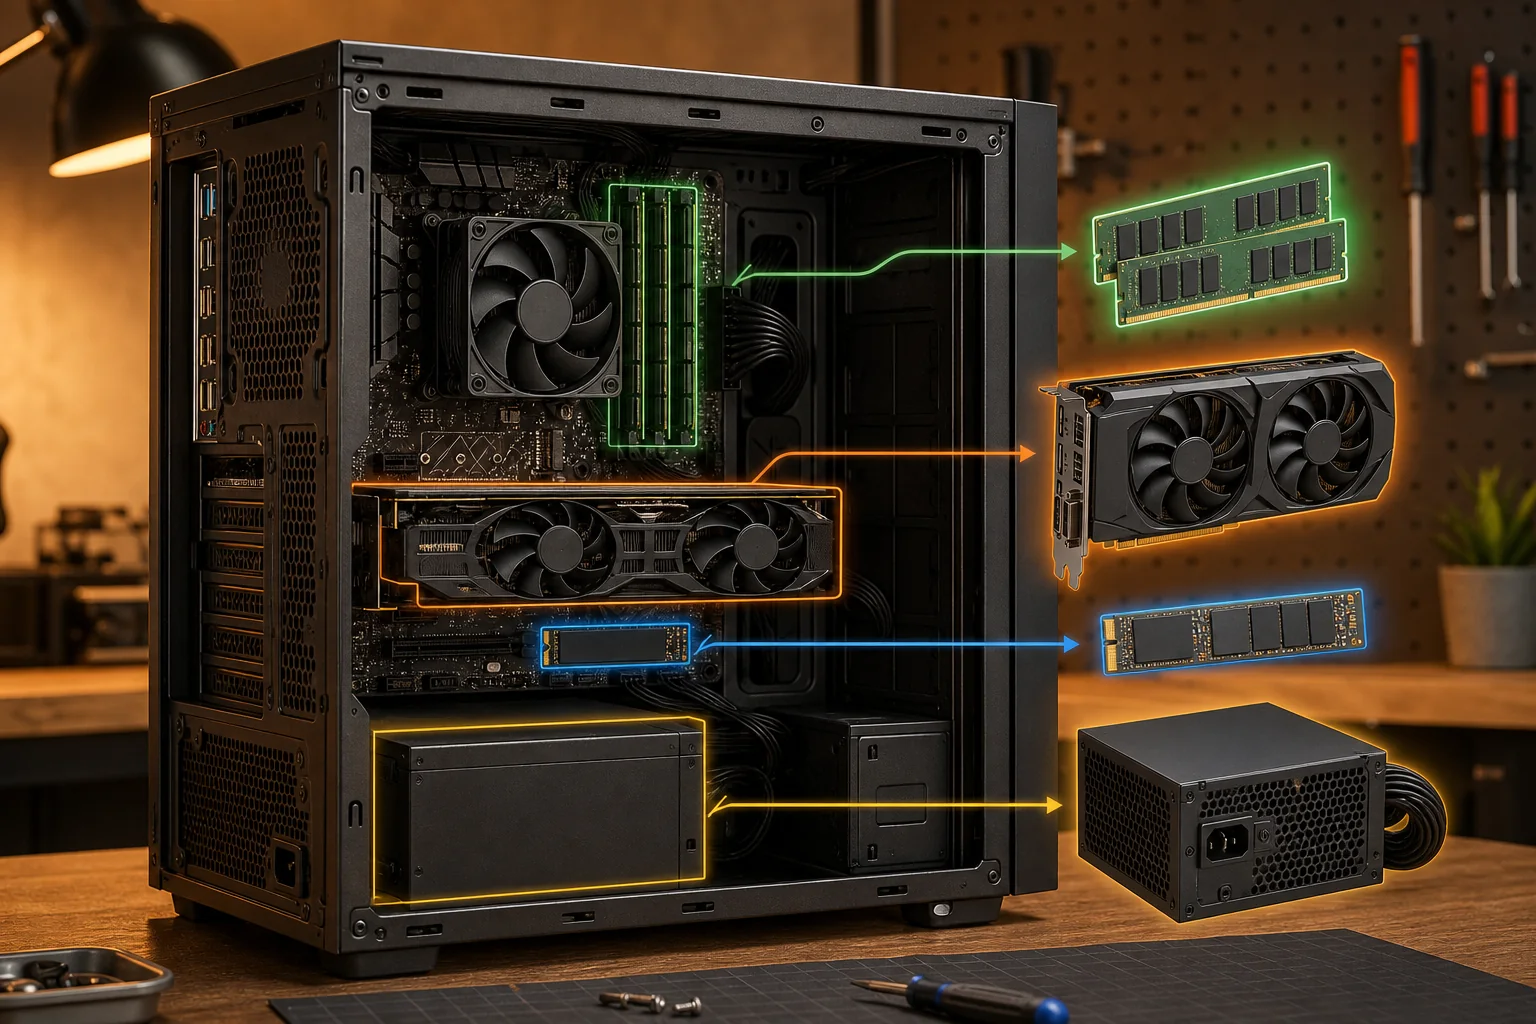
Your PSU’s wattage and connector availability determines what upgrades are safely possible, so this is the mandatory first step regardless of which component you plan to upgrade. Open your case (or check the seller’s original spec sheet) to find the PSU’s wattage and, ideally, its 80 Plus efficiency rating, both usually printed on a label on the unit itself.
Modern GPUs draw meaningfully different amounts of power — an RTX 4060 draws around 115W, an RTX 4070 around 200W, an RTX 4070 Ti Super around 285W, and an RTX 4080 around 320W under load — and adding roughly 100-150W of headroom above your GPU’s rated draw for the rest of the system (CPU, drives, fans) is a reasonable safety margin most builders follow.
Connector availability matters as much as raw wattage: many budget prebuilts ship with a 500-550W PSU that has only a single 6+2 pin PCIe power connector, which is insufficient for GPUs requiring dual 8-pin or a 12VHPWR connector, meaning a wattage-sufficient PSU can still be physically unable to power a specific new GPU without an adapter or replacement.
Proprietary PSUs, more common in the lowest-cost prebuilt lines and small-form-factor systems, use non-standard shapes or mounting that prevent swapping in an off-the-shelf ATX or SFX unit — check whether your PSU is a standard removable unit (four screws, rectangular, rear-panel mounted) before assuming a PSU upgrade is straightforward.
We cover realistic wattage draw by GPU tier and how to calculate total system headroom in detail in our gaming PC power consumption explained guide, which is worth reading fully before any upgrade purchase.
RAM upgrades: the best value-per-dollar for most systems
Adding RAM capacity or upgrading to faster RAM is usually the least risky and most cost-effective upgrade available, typically costing $40-$90 for a meaningful capacity increase, and it rarely requires touching anything beyond the RAM slots themselves, making it a reasonable starting point for anyone new to hardware upgrades.
Capacity matters more than speed for most gamers: moving from 8GB to 16GB produces a clearly measurable improvement in games and background multitasking, since many current titles recommend 16GB as a baseline, while moving from 16GB to 32GB benefits streaming, heavy multitasking, and a handful of memory-intensive titles more than typical single-game performance.
Matching your existing RAM’s speed and timings when adding capacity avoids the system defaulting to the slower stick’s speed for the whole kit — check your installed RAM’s exact model using CPU-Z (free download) before ordering a matching or compatible kit, since mismatched RAM can run at reduced speed or, in rare cases, cause instability.
Dual-channel configuration (two matched sticks in the correct paired slots, typically slots 2 and 4 counting from the CPU) delivers meaningfully more memory bandwidth than a single stick of the same total capacity — if your prebuilt shipped with a single stick, adding a second matched stick in the correct slot is a common and worthwhile upgrade even without increasing total capacity.
Consult your motherboard’s manual (searchable by model number if not included) for the correct dual-channel slot configuration, since installing two sticks in adjacent slots rather than the correct alternating pattern will not enable dual-channel mode even though the system will still boot normally.
Storage upgrades: adding or replacing drives without data loss
Adding a second NVMe or SATA SSD alongside your existing boot drive is usually simpler than replacing the boot drive itself, since it avoids any operating system migration — check your motherboard for an available M.2 slot (for NVMe) or SATA port and power connector before buying, since some budget boards include only a single usable M.2 slot.
NVMe drives (PCIe interface) offer substantially higher speeds than SATA SSDs — commonly 3,500-7,000 MB/s sequential read versus SATA’s roughly 550 MB/s ceiling — but confirm your available slot supports the NVMe protocol specifically rather than just physically accepting an M.2-format drive, since some boards include M.2 slots that only support SATA-protocol M.2 drives.
If you’re replacing rather than adding a boot drive, cloning software (many SSD manufacturers, including Samsung and Crucial, provide free cloning tools with drive purchase) copies your existing Windows installation and files to the new drive without requiring a fresh install, saving significant setup time compared to reinstalling the operating system and all applications.
A reasonable storage upgrade budget: a 1TB NVMe PCIe 4.0 drive typically costs $55-$80, while a 2TB drive runs $90-$140 depending on brand and controller quality — spending slightly more for a drive from an established brand (Samsung, Crucial, WD, Kingston) generally provides more consistent sustained write performance than the cheapest unbranded options.
After installing new storage, verify it’s running at its rated interface speed using CrystalDiskInfo or CrystalDiskMark (both free), since a drive physically installed correctly can still underperform if the BIOS is set to a compatibility mode that limits NVMe speed — this is worth a two-minute check after any storage upgrade.
GPU upgrades: clearance, power, and bottleneck checks
Before ordering a new GPU, measure your case’s available length clearance from the PCIe slot to the front panel or drive cage, since modern high-end cards frequently exceed 300-330mm in length and can physically not fit in compact prebuilt cases designed around a shorter, less powerful original card.
Confirm PSU connector compatibility for your target GPU specifically — an RTX 4070 typically needs a single 8-pin or 12VHPWR connector, while an RTX 4080 or 4090-class card needs dual 8-pin or a higher-rated 12VHPWR connection, and budget PSUs shipped in lower-tier prebuilts sometimes include only one PCIe power connector.
CPU bottleneck risk increases with a significant GPU upgrade — pairing a new RTX 4070 Ti Super with an aging quad-core CPU from an older prebuilt generation can prevent the GPU from reaching its full frame rate potential in CPU-sensitive titles, since the processor can’t feed the GPU data fast enough regardless of the card’s raw capability.
A rough guideline from testing on my bench: pairing a GPU with a CPU released more than roughly two generations earlier increasingly risks a meaningful bottleneck at 1080p and 1440p resolutions specifically, while 4K gaming is more GPU-bound and somewhat more forgiving of an older CPU pairing.
Our how to check if a prebuilt has bottlenecks guide covers the specific monitoring steps to confirm whether your CPU is limiting a new GPU’s performance before or after installation, and our best gaming PC with RTX 5070 and best gaming PC with RTX 5080 guides show what a well-matched system looks like at those GPU tiers.
CPU and motherboard upgrades: the most complicated path
Upgrading a CPU is straightforward if your prebuilt uses a standard motherboard socket with a newer, more powerful CPU available for that same socket — check your exact motherboard model (visible in BIOS or via CPU-Z) against the manufacturer’s supported CPU list before purchasing, since a socket match alone doesn’t guarantee compatibility without a BIOS update.
Prebuilts using a proprietary or OEM-only motherboard — more common in the budget tier of major manufacturers — often restrict CPU upgrade options to a narrower list than the socket would normally support, or lack BIOS options standard boards include, so verify compatibility through the specific manufacturer’s support documentation rather than general socket compatibility charts.
Upgrading to a new CPU generation entirely (a different socket) requires a motherboard replacement too, which typically also means reinstalling Windows due to fundamental hardware changes, and at that point the upgrade approaches the scope and cost of a near-complete rebuild rather than a targeted improvement.
Cooler compatibility is worth checking during any CPU upgrade — a stock cooler adequate for your original CPU’s thermal design power (TDP) may be insufficient for a higher-TDP replacement CPU, risking thermal throttling under sustained load even if the CPU itself is compatible and correctly installed.
Given the complexity and cost of a full CPU/motherboard swap, it’s worth calculating whether that budget would go further toward a complete new build rather than an upgrade at this scope — our gaming PC under $1,500 and gaming PC under $2,000 guides provide a comparison point for full-system cost at that investment level.
Cooling upgrades that support a bigger hardware change
A GPU or CPU upgrade that increases total system power draw also increases heat output, and a case with marginal airflow to begin with can become a genuine thermal bottleneck after a significant component upgrade, even if each individual part is rated to handle its own thermal load in isolation.
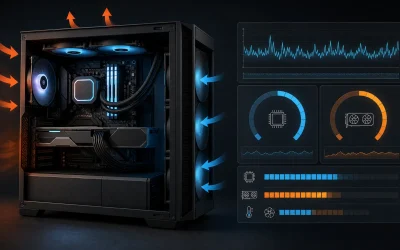
Adding one or two case fans in a proper intake-front, exhaust-rear configuration is a low-cost fix, typically $10-$20 per fan, and often resolves marginal thermal headroom without requiring a full case replacement — check your case for unpopulated fan mounts, which budget prebuilts frequently include but don’t fill by default.
CPU cooler upgrades matter specifically when increasing CPU load through overclocking or a higher-TDP CPU swap — a $35-$55 tower air cooler typically outperforms stock coolers by 10-15°C under sustained load, and a budget 240mm AIO liquid cooler in the $70-$100 range offers further headroom for higher-TDP CPUs.
Case airflow direction matters as much as fan count: mismatched or purely decorative fan placement (all fans blowing the same direction without a clear intake/exhaust path) creates turbulence rather than effective airflow, so verify fan orientation using the small directional arrows typically printed on fan blades or housing before assuming more fans automatically means better cooling.
If you’re planning a significant GPU or CPU upgrade specifically, checking baseline thermals before and after with HWiNFO64 (free monitoring software) confirms whether cooling needs addressing alongside the primary component swap or was already adequate.
Upgrade priority order: what to spend on first
For most players on a limited budget, the priority order that delivers the best return typically runs: confirm PSU headroom first (a prerequisite, not optional), then RAM if under 16GB, then storage if under 500GB free space or running on a SATA-only drive, then GPU, and finally CPU/motherboard only if a clear bottleneck is confirmed.
This order reflects both cost and impact — RAM and storage upgrades typically cost $40-$140 and remove clear, measurable bottlenecks in multitasking and load times, while a GPU upgrade costs significantly more ($300-$800+) but delivers the largest single jump in gaming performance once the cheaper prerequisites are handled.
| Upgrade | Typical cost | When it’s worth it |
|---|---|---|
| RAM (8GB to 16GB) | $40-$60 | Almost always, if currently under 16GB |
| Storage (add NVMe SSD) | $55-$90 (1TB) | If low on space or on SATA-only storage |
| Case fans (2x) | $20-$40 | Before or alongside a GPU upgrade |
| GPU (mid-range) | $300-$600 | After confirming PSU and CPU can support it |
| CPU + motherboard | $300-$500+ | Only if bottleneck confirmed on current GPU |
Skipping ahead to a GPU upgrade before confirming PSU headroom and checking for a CPU bottleneck is the most common way an upgrade budget underperforms expectations, since the new GPU can’t reach its potential frame rate if either prerequisite is unaddressed.
Warranty and support considerations before opening the case
Check your prebuilt’s specific warranty terms before performing any upgrade — most major sellers explicitly permit component swaps and upgrades without voiding the base system warranty, since these are common and expected, but a minority of sellers restrict coverage to unmodified systems or require documented pre-approval.
Keep your original components (stock RAM, stock storage drive, original GPU if replaced) in case a warranty claim requires reverting to the original configuration to diagnose whether an issue is related to the seller’s original build or your subsequent upgrade — this is standard practice most support teams will ask for if a claim arises.
Document your system’s condition with photos before beginning any upgrade, particularly cable routing and component seating, both to reference during your own installation and as evidence if a dispute arises about pre-existing condition versus damage from the upgrade process.
If your warranty is close to expiring, consider whether extending or purchasing supplemental coverage makes sense before performing upgrades that could complicate a future claim, particularly for more invasive changes like a CPU or motherboard swap versus a simple RAM or storage addition.
Our gaming PC warranty and support compared guide covers what’s typically covered after self-performed upgrades across different sellers’ policies, which is worth checking against your specific warranty documentation.
Troubleshooting: system won’t boot or shows new issues after an upgrade
If the system won’t power on at all after a GPU or RAM upgrade, first reseat the component fully — a GPU not fully seated in the PCIe slot, or RAM not fully clicked into place, are the most common causes of a no-boot state and are easy to overlook even when a component looks correctly installed at a glance.
If the system powers on but shows no display after a GPU upgrade, confirm the monitor cable is connected to the new GPU’s output rather than the motherboard’s integrated graphics port, which is a surprisingly common mistake, and confirm all required PCIe power connectors are attached to the new card, not just resting nearby.
If RAM causes boot issues after an upgrade, check that sticks are installed in the motherboard-recommended slot configuration for dual-channel mode (refer to your specific motherboard’s manual), and try booting with a single stick installed at a time to isolate whether one specific stick or slot is causing the issue.
If the system boots but performance doesn’t improve as expected after a GPU upgrade, check Windows Task Manager or HWiNFO64 during gameplay to see whether the CPU is running near 100% while the GPU sits well below full utilization, which indicates the CPU bottleneck scenario covered earlier in this guide rather than a faulty installation.
If instability (random restarts, crashes under load) appears after increasing power draw through a GPU or CPU upgrade, revisit the PSU headroom check from the start of this guide — insufficient wattage or a marginal-quality PSU under new, higher load is the most common cause of post-upgrade instability that wasn’t present before.
Knowing which parts to swap first only helps if you also know when those swaps are actually worth the money — our upgrade timeline breakdown maps out realistic replacement intervals by component.
Frequently asked questions
What’s the first thing I should upgrade on a prebuilt gaming PC?
Check your power supply’s wattage and 80 Plus rating before buying any new component, since a GPU or CPU upgrade that exceeds your PSU’s safe capacity risks instability or damage; after confirming PSU headroom, RAM and storage upgrades typically deliver the best value-per-dollar before a GPU upgrade.
Can I upgrade the GPU in any prebuilt gaming PC?
Usually yes if the case has a free PCIe x16 slot and enough physical clearance, but check three things first: PSU wattage and connector availability, case length clearance for the new card, and whether the prebuilt uses a proprietary motherboard that some manufacturers use in their lowest-cost lines, which can limit slot spacing or power delivery.
How do I know if my prebuilt’s PSU is proprietary or standard ATX?
Standard ATX and SFX power supplies are removable rectangular units secured by four screws on the case’s rear panel, while proprietary PSUs are typically a non-standard shape or integrated into the case in a way that prevents swapping with an off-the-shelf unit; checking your case manufacturer’s specifications or a quick model number search confirms which type you have.
Will upgrading RAM or a GPU void my prebuilt’s warranty?
Most major sellers explicitly allow component swaps without voiding the base system warranty, since RAM and GPU upgrades are common and expected, but always check your specific warranty terms first, since a small number of sellers restrict warranty coverage to unmodified systems or require pre-approval for internal changes.
Is it worth upgrading a prebuilt or better to sell it and build new?
If the CPU and motherboard are still reasonably current (within the last two to three CPU generations) and the case has good airflow, targeted upgrades usually cost less than a full rebuild; if the CPU platform is aging and would bottleneck any GPU upgrade, selling the system and building fresh often makes more financial sense.