
Designing a beautiful home office or a minimalist living room setup always comes down to one primary enemy: clutter. For years, powerful home computers meant giant, flashing plastic-and-steel towers hidden away under desks or taking up half of your workspace. However, the modern home aesthetic demands clean lines, open space, and high performance. Enter the small form factor (SFF) PC, built around a Mini-ITX motherboard.
For beginners, the allure of a tiny, powerful computer that takes up no more desk space than a couple of books is incredibly strong. But diving into the world of SFF cases without a roadmap is a recipe for frustration. The most common mistakes beginners make include buying components that physically cannot fit together, underestimating how hot a compact system can run, and failing to plan for cable management. Unlike building a standard mid-tower PC where you can easily hide excess cables and oversized parts, a Mini-ITX build requires millimeter-level precision. This mini itx pc case buying guide for beginners will help you navigate these hurdles to select a chassis that looks stunning on your desk and performs beautifully.
As an Amazon Associate we earn from qualifying purchases at no extra cost to you.


Our Top Picks

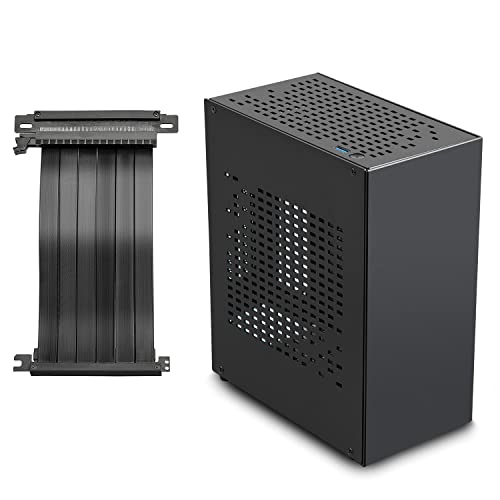

Top 3 picks at a glance
Decide These 3 Things First
Before you start browsing online storefronts or adding eye-catching cases to your shopping cart, you must lock in three fundamental decisions. These parameters will dictate your entire component shopping list and prevent expensive return shipping fees.
- Your Maximum Desk Footprint: Decide exactly where the PC will sit. Will it live on top of your desk next to your monitor, inside a shallow media console, or on a floating shelf? Measure the height, depth, and width of this space. A vertical, tower-style ITX case occupies very little desk area but requires vertical clearance, while a console-style case lies flat but takes up more surface area.
- Your Graphics Card (GPU) Dimensions: The graphics card is almost always the largest and heaviest component in your system. You must know its exact dimensions in millimeters: length, height, and width (often referred to in “slots,” such as 2-slot, 2.5-slot, or 3-slot). Many ultra-compact cases only support cards up to 200mm in length, while high-end gaming cases can accommodate massive 330mm triple-slot GPUs.
- Power Supply Unit (PSU) Standard: Standard desktop power supplies use the ATX format, which is far too bulky for true SFF cases. Most dedicated Mini-ITX cases require a smaller SFX or SFX-L power supply. While some budget-friendly, larger hybrid cases—such as the 38-liter Cooler Master Q300L (which is actually a Micro-ATX case often looked at by beginners)—can accommodate standard ATX power supplies, true sub-15-liter cases require a dedicated SFX unit, which generally costs more.
Factor 1: Case Volume and Footprint
In the SFF community, cases are categorized by their internal volume in liters (L) rather than vague terms like “mid-tower” or “mini-tower.” Understanding these volume tiers helps you set realistic expectations for your build process and thermal performance.
Ultra-Compact (Under 10 Liters): Cases like the Metalfish T40 (approx. 5.5L) or the Metalfish T60 (approx. 8.5L) represent the extreme end of space-saving design. These cases are incredibly light (often under 4 pounds empty) and occupy a microscopic footprint on your desk. However, they require highly specialized components, such as low-profile CPU coolers (often under 45mm in height) and shorter, ITX-sized graphics cards (typically under 200mm).
Standard SFF (10 to 15 Liters): This is the golden sweet spot for beginners. Cases in this range, such as the JOYJOM Mini ITX Case (approx. 11L), strike a perfect balance. They are small enough to look sleek on any desk but spacious enough to house standard-sized, dual-slot graphics cards up to 300mm in length. They also provide enough clearance for more robust cooling options, making them much easier to assemble and keep cool.
Compact Towers and Hybrids (15 to 40 Liters): These are larger cases that still occupy a relatively small footprint. While some beginners look at entry-level options like the Cooler Master Q300L (approx. 38L) because of their low price point (around $39), it is important to note that these are actually Micro-ATX cases. They are much easier to build in and accommodate cheaper, full-sized ATX parts, but they lose the true space-saving magic of a dedicated sub-15L Mini-ITX chassis.
Factor 2: Materials, Aesthetics, and Build Quality
Because a Mini-ITX case is designed to sit in plain sight—on your writing desk, a bookshelf, or alongside your television—its material composition and visual style are just as important as its technical specs. Looking forward to 2026, home office design trends are moving away from aggressive “gamer” aesthetics with heavy plastics and moving toward premium, tactile materials that match modern residential furniture.
Anodized Aluminum: If you want an elegant, Apple-like aesthetic, look for cases constructed primarily from CNC-machined or sandblasted aluminum. Aluminum is incredibly lightweight, structurally rigid, and naturally assists with heat dissipation. Cases like the Metalfish series utilize aluminum alloy panels to achieve a clean, metallic look while keeping the overall system weight low enough for easy transport.
SGCC/SPCC Steel: Steel is the backbone of budget and mid-tier cases. It is exceptionally strong and prevents the chassis from flexing when you install heavy components. However, steel is significantly heavier than aluminum. A steel-framed ITX case can easily weigh 8 to 10 pounds empty, compared to just 3 to 5 pounds for an aluminum equivalent.
Tempered Glass vs. Acrylic vs. Mesh: Acrylic side panels, often found on ultra-budget cases, scratch very easily and tend to attract dust via static electricity. Tempered glass offers beautiful clarity to show off your internal components, but it is heavy and completely blocks airflow. For a quiet, cool-running system, precision-perforated metal mesh is the superior choice for side panels, as it allows your components to pull fresh air directly from outside the case.
Factor 3: Airflow, Ventilation, and Cooling Clearance
In a large computer case, heat easily dissipates into the vacant internal space. In a Mini-ITX case, your components are packed tightly together, creating concentrated pockets of heat. If your case does not have adequate ventilation, your CPU and GPU will quickly reach high temperatures, causing their internal fans to spin at maximum speed, creating a noisy and distracting environment.
When evaluating a case’s cooling capabilities, pay close attention to these three dimensions:
- CPU Cooler Clearance: This is the maximum distance from the motherboard CPU socket to the side panel of the case. In ultra-compact cases, this might be as low as 35mm to 45mm, restricting you to specialized low-profile coolers. In larger ITX cases, you might have up to 150mm of clearance, allowing for quiet, high-performance tower coolers.
- AIO Liquid Cooling Support: If you want to use an All-In-One (AIO) liquid cooler, the case must have dedicated mounting brackets for a radiator. Standard sizes are 120mm (single fan) or 240mm (dual fan). Liquid cooling is excellent for keeping powerful CPUs cool in tight spaces, but it requires careful routing of stiff rubber tubes.
- Exhaust Fan Mounts: Fresh air needs a clear path out of the case. Look for a chassis that supports at least one or two 120mm or 140mm exhaust fans at the top or rear to pull rising heat away from your motherboard and graphics card.
Factor 4: Internal Layout and Riser Cables
How your components are arranged inside the chassis dictates both the assembly difficulty and the thermal performance. Mini-ITX cases generally fall into two layout designs:
The Traditional Layout: In this setup, the motherboard is mounted flat against the back or side panel, and the graphics card plugs directly into the PCIe slot, extending horizontally or vertically. This is the easiest layout for beginners because it mimics a standard, large PC. It eliminates the need for extra adapter cables and generally offers more room for larger CPU air coolers.
The Sandwich Layout: Popularized by ultra-compact cases like the JOYJOM Mini ITX Case, this layout places the motherboard on one side of a central spine and the graphics card on the opposite side, mounted parallel to the motherboard. This “sandwich” design allows both the CPU and GPU to pull fresh air directly through the left and right side panels of the case, offering excellent thermal performance in a very slim profile.
However, the sandwich layout requires a PCIe riser cable to connect the graphics card to the motherboard around the central divider. When buying a case that requires a riser cable, verify whether it includes a PCIe 3.0 or PCIe 4.0 cable. If you are using a modern PCIe 4.0 graphics card and motherboard with a PCIe 3.0 riser cable, you may need to manually change your motherboard’s BIOS settings to PCIe 3.0 mode before assembly to prevent display issues.
Factor 5: Price Tiers and Budget Realities
Building a small form factor PC comes with what enthusiasts call the “SFF tax.” Because manufacturing highly precise, compact cases requires tighter tolerances and lower production volumes, they generally cost more than standard mid-towers.
Under $50 (Budget/Entry): In this range, you will find larger, hybrid cases that use cheaper materials like acrylic panels and basic steel frames. Options like the Cooler Master Q300L (around $39) sit here. These are highly forgiving for beginners but do not offer a true, ultra-compact footprint.
$50 to $100 (Value SFF): This is an excellent tier for budget-conscious SFF builders. Here you will find compact aluminum and steel chassis like the Metalfish T40 (around $59), Metalfish T60 (around $64), and the JOYJOM Mini ITX Case (around $68). These cases offer true small form factor volumes (under 12L) and solid build quality, though they may lack premium features like toolless panel removal or USB-C front panel ports.
$100 to $200 (Mid-Range SFF): This tier features highly engineered, mass-produced ITX cases from major brands (such as the Cooler Master NR200 series or SSUPD Meshlicious). These cases offer exceptional airflow, modular brackets that make installation easier, and high-quality PCIe 4.0 riser cables included in the box.
$200+ (Premium/Boutique): These are low-volume, boutique cases made from thick, CNC-milled aluminum. They offer modular layouts that can be adjusted down to the millimeter to fit specific components, premium finishes, and incredibly compact sizes without compromising on compatibility.
Factor 6: Ease of Assembly and Box Contents
As a beginner, the physical act of building your PC can be intimidating. Some Mini-ITX cases arrive as a “flat-pack” kit (similar to Swedish flat-pack furniture), requiring you to screw the actual frame of the case together before you can even begin installing your computer parts. While this can be a fun DIY project, it adds an extra layer of complexity.
When purchasing your case, check what accessories are included in the box. A beginner-friendly case should come with:
- A detailed, illustrated instruction manual.
- Clearly labeled bags of screws (motherboard standoffs, PSU screws, and fan screws).
- Zip ties or hook-and-loop cable straps to help manage routing.
- An integrated front I/O cable harness to easily connect your power button and USB ports to the motherboard.
Spec Checklist
Use this quick reference table to understand what specifications you should expect at different price points when shopping for a Mini-ITX case.
| Specification | Budget Tier ($30 – $65) | Mid-Range Tier ($65 – $150) | Premium Tier ($150 – $300+) |
|---|---|---|---|
| Average Volume | 15L to 38L (Larger, hybrid layouts) | 10L to 15L (True SFF sweet spot) | 5L to 11L (Ultra-compact optimization) |
| Primary Materials | SGCC Steel, Acrylic, Basic Plastics | SPCC Steel, Aluminum accents, Tempered Glass | Thick CNC-milled Aluminum, Premium Mesh |
| Max GPU Length | Up to 280mm (often restricted by ATX PSUs) | Up to 300mm – 320mm | Up to 330mm+ (highly optimized layouts) |
| PSU Support | Standard ATX or SFX (with adapter) | SFX or SFX-L exclusively | SFX or custom Flex-ATX power supplies |
| Included Riser Cable | Rarely included; must buy separately | Often included (typically PCIe 3.0 or basic 4.0) | High-quality, shielded PCIe 4.0 riser included |
| Typical Weight (Empty) | 8 to 12 lbs | 5 to 8 lbs | 3 to 5 lbs |
Red Flags to Avoid When Shopping
Not all small cases are created equal. Keep an eye out for these design warning signs that indicate a case will be difficult to build in or perform poorly:
- Solid Acrylic or Glass Front Panels with No Side Vents: If a case is sealed on three sides with solid plastic or glass and only has tiny ventilation slits, avoid it. Your components will choke for fresh air, leading to thermal throttling and loud fan noise.
- No Mention of GPU Thickness Support: Many cases list maximum GPU length (e.g., 300mm) but fail to mention thickness. If you buy a modern 2.5-slot or 3-slot graphics card, it may press directly against the side panel, preventing the fans from spinning or preventing the case from closing entirely.
- Unbranded Riser Cables: If a cheap sandwich-style case includes a generic, unbranded PCIe riser cable, be cautious. Low-quality riser cables are notorious for causing signal degradation, random blue screens, or games crashing.
- Lack of Dust Filters: Because SFF cases pull air directly from their side panels, they act as vacuum cleaners for your desk. Ensure the case has fine mesh panels or removable magnetic dust filters to protect your components from dust buildup.
FAQ
Can I use a regular ATX power supply in a Mini-ITX case?
In most true small form factor cases (under 15 liters), you cannot use a standard ATX power supply because they are simply too large, leaving no room for your motherboard, cables, or graphics card. You will need to purchase a smaller SFX or SFX-L power supply. However, some larger, hybrid compact cases do support ATX power supplies at the expense of a larger overall footprint.
Do Mini-ITX PCs run hotter and louder than standard PCs?
They can if they are not planned correctly. Because components are packed tightly together, heat builds up quickly. However, if you choose a case with well-ventilated mesh side panels, use a high-quality CPU cooler within the recommended height limits, and configure your fans to pull cool air in and push hot air out, a Mini-ITX system can run just as cool and quiet as a massive desktop tower.
What is a PCIe riser cable, and why does the version matter?
A PCIe riser cable is a flexible ribbon cable that allows you to mount your graphics card away from the motherboard, which is necessary for “sandwich” layout cases. The version (PCIe 3.0 vs. PCIe 4.0) matters because if you connect a PCIe 4.0 motherboard and GPU using a PCIe 3.0 cable, your system may fail to display an image or crash constantly. You must match the cable version to your hardware or manually set your motherboard’s PCIe slot speed to Gen 3 in the BIOS before installing the riser.
How do I make sure my graphics card will fit in a specific case?
You must compare three measurements of your graphics card against the case specifications: length (in millimeters), height (from the bottom of the PCIe connector to the top of the card), and width (measured in “slots” or millimeters). Always leave a buffer of 5mm to 10mm beyond the manufacturer’s listed limits to account for power cables that plug into the top of the graphics card, which can require extra clearance to bend safely.
Related guides
- Best Gaming PC for Fortnite: Eight Prebuilt Desktops Sorted by Refresh Rate Goal (2026)
- Best RX 9070 XT Prebuilt Gaming PCs: Seven Desktops and Three Cards Compared: 10 Compared (2026)
- CyberPowerPC vs iBUYPOWER Gaming PC: How the Two Brands Compare
- Best RX 9070 XT Prebuilt Gaming PC (2026): 5 Picks Compared









