An upgradeable mid-range gaming PC is mostly the result of five early decisions: a current platform with room to grow, a quality power supply sized above today’s needs, a roomy case with good airflow, a memory and storage layout with spare slots, and a budget that puts money where upgrades cannot reach later. Get those right and the graphics card, memory and drives become simple swaps over the following years. Get them wrong and a single upgrade can trigger a chain of replacements.
Why planning beats buying the fastest part
Mid-range builds rarely fail because one part was too slow. They fail because a surrounding part blocks the next upgrade: a motherboard on a dead socket, a power supply that cannot feed a larger graphics card, or a case where a longer card simply does not fit. Each of those costs more to fix than the original saving.
So the aim is not the highest performance today but the lowest cost per year of use. Spending a little more on the platform and power supply, and a little less on the CPU, usually lets you keep the machine for longer. If you want a concrete starting budget to compare against, our guide to a mid-range build for 1440p shows how the parts typically balance.
Choose a platform with a visible upgrade path
The CPU socket sets how far you can upgrade the processor without replacing the motherboard. Before choosing, look up the socket and read the manufacturer’s statement on future chip support. Vendors differ in how long they keep a socket in service, and promises about the future are not guarantees, so treat any estimate as hedged.
Also check the memory type. A newer memory standard has higher prices at first but a longer life, while an older one can be cheap today and a dead end later. Then check the board itself: a BIOS update path, at least two M.2 slots, four memory slots, a full-length PCIe x16 slot and enough fan headers. Boards that skimp on those make later upgrades awkward.
| Platform trait | What to look for | Why it helps upgrades |
|---|---|---|
| Socket | Current generation with stated future support | Lets you swap the CPU later without a new board |
| Memory type | Current standard, four slots | Add or replace kits without starting over |
| M.2 slots | Two or more | Add a second drive without a cable |
| PCIe slot | Full-length x16 | Accepts any modern graphics card |
| BIOS updates | Active manufacturer support | New chips work on the old board |
| USB and headers | Spare internal headers | Room for new fans, lighting or front ports |
Size the power supply for the next graphics card
Choose the PSU for the graphics card you may buy in two or three years. For most mid-range builds that means a quality 750W to 850W unit with the connectors newer cards use. Our roundup of the best 750W power supplies for mid-range gaming builds covers that tier.
Buy from a reputable maker with a long warranty, a recognized efficiency rating and enough modular cables. Cheap units are the one part where false economy appears quickly, because a failing PSU can take other parts with it. Remember that power draw grows with each GPU generation in the higher tiers, and a PSU with headroom stays quieter while it runs at a lower load.
Pick a case with room and airflow
A case is the one component that rarely changes, so size it generously. Check the maximum graphics card length and thickness, CPU cooler height, radiator support and the number of fan mounts. A mesh front panel generally helps airflow, and dust filters on every intake make long-term maintenance easier.
Keep in mind the room itself. A powerful build in a warm space throttles earlier, and our guide on planning a gaming PC build for a hot room without AC shows what to change. Leave space between the card and the front fans, and never crowd cables across intakes.
Memory and storage: plan the slots, not just the capacity
For memory, a pair of matching modules totalling 32GB is a comfortable starting point for a new mid-range build. Two modules usually run faster and more stably than four, so adding a matching pair later is a safe expansion. If your board has only two slots, buy the capacity you need up front, because the only upgrade is replacement.
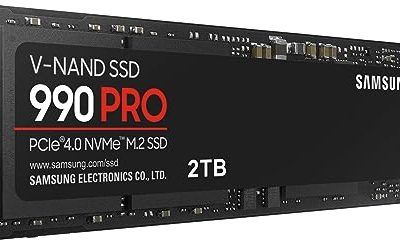
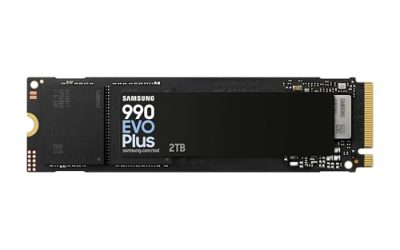
For storage, start with one fast NVMe drive for the system and games, and leave the second M.2 slot free. A game library tends to fill faster than expected. A second drive can be installed in minutes later, and it costs less per gigabyte than overbuying now. Keep SATA ports free for a bulk drive, too.
Real upgrade path: what changes and when
| Part | Typical upgrade trigger | What to check first |
|---|---|---|
| Graphics card | Frame rates fall below your target in new games | PSU wattage and connector, card length, case airflow |
| Memory | Games stutter with many background apps open | Free slots, matching speed and the board’s supported kits |
| Storage | Library no longer fits | Free M.2 slot or SATA port |
| CPU | Frame rates cap out even with a strong GPU | Socket support, BIOS version, cooler compatibility |
| Cooler and fans | Temperatures or noise rise | Case clearance and header count |
| PSU | Planning a much stronger GPU | Wattage, connector, and remaining warranty |
A worked budget split with stated assumptions
Take a build aimed at 1440p with a total budget you set yourself. The percentages below are planning assumptions that fit many mid-range builds, not fixed rules, and prices shift by region and time.
| Part | Share of budget | Reasoning |
|---|---|---|
| Graphics card | 35 to 40 percent | Largest effect on game performance, first to upgrade |
| CPU | 15 to 18 percent | Mid-range chip on a socket with room to grow |
| Motherboard | 10 to 12 percent | Solid mid-tier with slots, not extreme features |
| Memory | 6 to 8 percent | 32GB in a matching pair |
| Storage | 6 to 8 percent | One fast NVMe, second slot free |
| Power supply | 8 to 10 percent | Quality 750W to 850W unit |
| Case and cooling | 6 to 8 percent | Roomy case with good airflow |
Notice the trade-off: you spend more on power and the board than a pure value build would, and you accept a slightly slower CPU today. Those choices are what stop the next two upgrades from becoming rebuilds.
When to stop upgrading and replace the whole system
An upgradeable build still has a lifespan. When the socket has reached the end of its supported chips, the memory standard is a generation behind and the motherboard lacks the PCIe features new drives and cards use, further upgrades add cost without proportional gain. At that stage, keep what carries over, usually the case, the power supply and the drives, and replace the platform in one step.
A practical test: if the next upgrade needs a new motherboard to unlock the CPU and new memory to match, price the whole bundle. If that bundle approaches what a fresh mid-range platform would cost, move to the new platform and reuse the graphics card, PSU, case and storage. That reuse is exactly what the planning above is meant to protect.
Common misconceptions
- Future-proof means buying everything top-tier. It does not. It means buying the parts that are hard to change and saving on the parts that are easy to replace.
- More RAM slots filled is better. Two modules are often simpler and faster than four, so leave slots free.
- Any PSU of the right wattage will do. Quality, connectors and warranty matter as much as the number on the label.
- The case does not matter. Clearance and airflow decide which graphics cards fit and how they behave.
- A 4K display needs a rebuild. Not necessarily. If you plan one, see our guide to a 4K 120Hz build for an OLED TV to see which parts need to change.
How to evaluate a build before you buy
- Write down the graphics card you would buy in two years and check your PSU, case length and slot space against it.
- Look up the motherboard’s supported CPUs and the maker’s BIOS update notes.
- Count free M.2 slots, SATA ports, memory slots and fan headers.
- Confirm cooler height and radiator support against the case specifications.
- Read buyer reviews for noise, coil whine and fit complaints on each part.
- Compare against a complete shortlist such as our roundup of mid-range gaming PCs to see whether a prebuilt offers the same room to grow.
This guide rests on published specifications and manufacturer documentation, so confirm each fit on the product pages before ordering.
Frequently asked questions
What makes a gaming PC upgradeable?
Four things: a motherboard platform with a long socket life and spare slots, a power supply with headroom and the connectors a future graphics card needs, a case with room and airflow for larger parts, and a parts list that avoids dead ends such as proprietary connectors. Upgradeability is mostly decided before you buy the first part.
Should I buy 32GB of RAM now or start with 16GB?
For new mid-range builds, 32GB is the more comfortable starting point because modern games and background apps use more memory than a few years ago. If budget is tight, 16GB works but plan to add a matching kit later. Buy two modules now and keep slots free only if the board has four.
How much power supply headroom should I leave for upgrades?
Size the PSU for the graphics card you might buy in two or three years, not just the one you start with. A 750W to 850W quality unit is a common sweet spot for mid-range builds. Check it has the PCIe power connector style newer cards use, and confirm it carries a long warranty from a reputable maker.
Which part gets upgraded first in most mid-range builds?
The graphics card usually, because it limits frame rates the most in games and is a drop-in swap. Storage and memory come next since they are cheap and simple. The CPU is third, and it only makes sense if the motherboard supports the newer chip. The motherboard and case tend to stay for the build’s whole life.
Is it worth paying more for a better motherboard to future-proof?
Only up to a point. A solid mid-priced board with a good power delivery design, enough M.2 slots and a current socket is usually enough. Paying extra for features you will not use, such as many extra ports or extreme overclocking support, rarely pays off. Spend the difference on the graphics card or PSU instead.