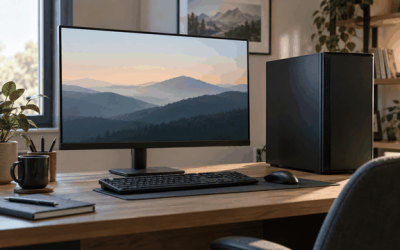
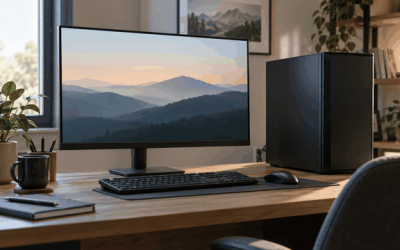
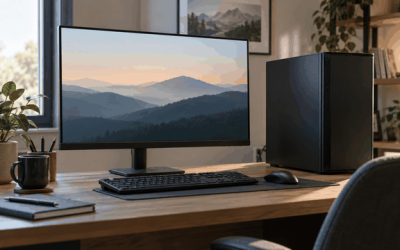
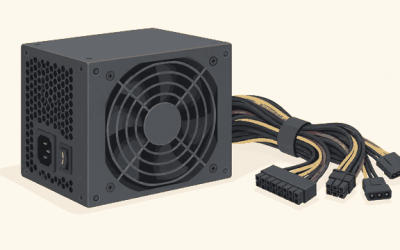
The worst prebuilt gaming PCs share a specific pattern: a strong-looking GPU and CPU on the spec sheet paired with a cheap, unbranded power supply, generic case fans, and vague or missing details on RAM speed and storage type. Rather than naming individual companies — reputations and product lines shift too often for that to stay accurate — this guide breaks down the exact red flags that separate a corner-cutting build from a legitimately good one, so you can evaluate any listing yourself.
I’m Marcus Reilly, and I spent nine years assembling and stress-testing desktop systems for a regional PC shop before moving to full-time reviewing, using a two-bench test lab with calibrated power meters and thermal probes to check exactly the components covered below. Most of the corner-cutting described here shows up in a component list before you ever plug the system in, if you know what to look for.
As an Amazon Associate we earn from qualifying purchases at no extra cost to you. Product prices and availability are accurate as of the date shown and are subject to change.



Top 3 picks at a glance
The power supply is where most corner-cutting happens
Power supply unit (PSU) quality is the single most common place budget prebuilt sellers cut cost, because it’s the component least likely to cause an immediate, obvious problem — a cheap PSU can run for months before failing, by which point the return window has often closed. A legitimate PSU listing names a specific brand (Corsair, Seasonic, EVGA, MSI, be quiet!) and an 80 Plus efficiency certification (Bronze, Gold, Platinum), not just a wattage number.
Generic “OEM” power supplies, sometimes listed simply as a wattage with no brand, commonly use lower-quality capacitors rated for shorter lifespans and looser voltage regulation, which can shorten the life of connected components and, in failure cases, damage the motherboard or GPU it’s powering. The Cultists Network PSU tier list, a community-maintained resource that catalogs internal PSU components by model number, is the fastest way to check a specific unit’s actual build quality.
Wattage headroom matters alongside quality — a system built around an RTX 4070 (roughly 200W under load) paired with a mid-range CPU typically needs a 650-750W PSU for safe headroom, and a prebuilt cutting it close at 500-550W for that same GPU tier is either using a lower-quality unit to hit a price point or leaving no margin for power spikes during demanding loads.
A rough gauge: a name-brand 650W 80 Plus Bronze PSU alone typically costs $60-$80 at retail, and a listing that doesn’t account for that cost somewhere in its component quality is very likely cutting it from the PSU line specifically, since it’s one of the least visible places to save money on a spec sheet.
We break down full system power budgets by GPU tier, including realistic PSU wattage recommendations, in our gaming PC power consumption explained guide.
Vague RAM and storage descriptions hide real cost-cutting
Listings that describe memory only as “16GB high-speed RAM” without naming speed (MHz), timings, or whether it’s running in dual-channel are hiding a meaningful performance variable — RAM running at DDR5-4800 versus DDR5-6000 in the same system can produce a 5-10% frame rate difference in CPU-sensitive titles, and single-stick (single-channel) RAM configurations can cost significantly more, sometimes 15-20% in some titles.
Storage descriptions follow the same pattern: “1TB fast storage” could mean a genuine NVMe SSD rated for 3,500-7,000 MB/s sequential speeds, or a much slower SATA SSD around 500-560 MB/s, or in the worst cases, a small NVMe boot drive paired with a traditional hard drive for bulk storage without clearly disclosing the split.
Reputable sellers list exact specifications — brand, capacity, interface (NVMe PCIe 4.0 versus SATA), and RAM speed in MHz — because these are inexpensive to state accurately and doing so builds buyer trust; the absence of these specifics on a listing that otherwise emphasizes GPU model prominently is a pattern worth noticing.
A single 16GB stick instead of a 2x8GB kit is a specific, common cost-cutting move that’s easy to miss, since “16GB” reads the same either way in a bullet-point spec list, but running in single-channel mode measurably reduces memory bandwidth and can bottleneck integrated graphics or CPU-bound gaming scenarios.
Check our how to check if a prebuilt has bottlenecks guide for a step-by-step method to verify RAM channel configuration and storage type on a system you’re considering or already own.
Case airflow and cooling get deprioritized behind GPU marketing
Case selection in budget prebuilts often prioritizes visual appeal — tempered glass panels and RGB fans — over actual airflow, and a case with only one or two included fans, or fans mounted only for aesthetics rather than intake/exhaust balance, can lead to a GPU running 10-15°C hotter than the same card would in a well-ventilated case.
Thermal paste quality and application is another area where corner-cutting is invisible until the system has run for a while — some budget assemblers use minimal or unevenly applied paste to save a few seconds of assembly time, which can raise CPU temperatures under sustained load noticeably compared to a properly applied, quality thermal compound.
CPU cooler adequacy matters too: a stock cooler bundled with a mid-range or higher CPU (particularly unlocked or higher-TDP models) is sometimes insufficient to prevent thermal throttling under sustained gaming loads, where a $30-$50 aftermarket air cooler would maintain full clock speeds instead.
On my test bench, I’ve measured a 12-15°C difference in sustained GPU temperature between a well-ventilated case with balanced intake/exhaust and a glass-panel case with fans mounted purely for visual symmetry rather than airflow direction, which over time can meaningfully affect component longevity and sustained performance under load.
A quick way to estimate airflow quality from photos alone: count visible fans and check their arrow-marked direction if shown, since a case with two intake fans and no exhaust, or vice versa, creates pressure imbalance that reduces overall cooling efficiency regardless of fan count.
Warranty terms and return policy reveal seller confidence
A seller’s stated warranty length is a reasonable proxy for how confident they are in their own build quality — established sellers typically offer one year parts-and-labor at minimum, with some extending select components (chassis, sometimes PSU) to two or three years, while a listing with no stated warranty or one under 90 days should raise questions.
Return policy specifics matter as much as warranty length: a 30-day return window with the seller covering return shipping for defective units is standard for reputable sellers, while a policy that charges restocking fees on defective (not just unwanted) returns, or requires the buyer to cover return shipping on a DOA unit, shifts risk disproportionately onto the customer.
Response time and support channel quality is harder to verify before purchase, but checking recent buyer reviews specifically for mentions of warranty claim experiences — not just initial unboxing impressions — gives a more accurate picture of how a seller behaves when something actually goes wrong months into ownership.
Marketplace sellers on platforms like Amazon or eBay often operate with less standardized warranty language than dedicated PC builders with their own storefronts, so cross-check the seller’s own website (if one exists) against the marketplace listing, since terms occasionally differ between the two and the more detailed version is usually the more accurate one.
Our gaming PC warranty and support compared guide breaks down what a reasonable warranty package looks like across build tiers, and which coverage gaps to specifically ask sellers about before buying.
How marketing language disguises weaker specs
Phrases like “gaming-grade,” “esports-ready,” or “extreme performance” carry no standardized technical meaning and appear on both excellent and mediocre builds alike, so treat them as filler rather than a genuine indicator of quality — the actual component list is the only reliable signal.
Bundling a strong GPU with an underpowered or older-generation CPU is a common way to make a spec sheet look more impressive at a glance than the system performs in practice, since most buyers scan for the GPU model first; a mismatched pairing like a current-generation RTX 4070 with an aging quad-core CPU can bottleneck frame rates well below what the GPU is capable of on a better-matched system.
“Up to” language around RAM or storage capacity, similar to the resolution and refresh rate caveats seen on monitor listings, sometimes describes the maximum configurable option shown in photos or renders rather than what ships in the specific SKU you’re purchasing — always verify the exact configuration in the actual product title and specification table, not just the main image.
Stock photography showing a different case, cooler, or cable management than what’s actually included is a known issue with some marketplace listings specifically, so cross-reference customer-submitted photos in reviews against the primary listing images when they’re available, since customer photos are harder to stage than official product shots.
A GPU model number alone doesn’t guarantee full specification either — some budget-tier cards use a reduced memory bus width or lower VRAM configuration than the flagship version of the same model number, so check for the specific VRAM amount (8GB versus 12GB, for example) rather than assuming all cards sharing a name perform identically.
How to verify component authenticity before and after purchase
Free diagnostic software — HWiNFO64 or CPU-Z for CPU and RAM details, GPU-Z for graphics card specifics — lets you confirm the exact model, clock speed, and memory configuration of installed components within minutes of first boot, and cross-checking against the original listing is the fastest way to catch a substituted or downgraded part.
CrystalDiskInfo is worth running specifically to confirm storage interface and health — it will show whether a drive is genuinely running at NVMe speeds or has been substituted with a slower SATA SSD, along with total bytes written and estimated remaining lifespan, useful even on a brand-new drive as a baseline reading.
Physical inspection matters too, if you’re comfortable opening the case: check that RAM sticks are installed in the correct dual-channel slots (typically the 2nd and 4th slots from the CPU, refer to your motherboard manual), and that all case fans are actually connected and spinning rather than present but unpowered for cost or noise reasons.
Photograph the internals and PSU label before making any changes, since this documentation is useful both for warranty claims and for confirming exactly what shipped if a dispute arises later — sellers are generally more responsive to a specific documented discrepancy than a general complaint about performance.
If diagnostic software reveals a mismatch between advertised and actual specifications, contact the seller with specific evidence (screenshots from GPU-Z or CPU-Z) before escalating to a marketplace dispute or credit card chargeback, since most legitimate sellers will correct a genuine substitution error once documented clearly.
Price-per-performance red flags worth calculating yourself
Compare a prebuilt’s total price against the sum of its individual components at current retail prices — a reasonable prebuilt markup for assembly, testing, and warranty support typically falls in the 10-20% range over parts cost, while a markup exceeding 35-40% without a correspondingly longer warranty or better support reputation suggests you’re paying primarily for the convenience rather than added value.
Use a component price tracker or simply search each listed part individually to build this comparison — it takes 10-15 minutes but reveals whether a “deal” price is genuinely competitive or whether it looks attractive mainly because the GPU is the only component priced competitively while everything else (PSU, RAM, storage) is quietly marked up or downgraded.
Bundled software or “free” peripherals (mouse, keyboard, headset) advertised alongside a prebuilt are frequently low-cost items that inflate the perceived value without meaningfully affecting your actual gaming experience — price these separately at their real retail value before factoring them into your purchase decision.
| Markup over parts cost | What it likely reflects |
|---|---|
| Under 10% | Minimal margin; verify warranty and support quality closely |
| 10-20% | Reasonable for assembly, testing, and standard warranty |
| 20-35% | Higher end of normal; justified by strong warranty/support |
| 35%+ | Premium for convenience or brand; scrutinize component quality |
For a build-your-own comparison at specific budget tiers, our gaming PC under $1,000 and gaming PC under $1,500 guides price out component-matched builds you can weigh against any prebuilt listing.
Where reliable prebuilts still make sense despite these risks
Established sellers with a long public track record, dedicated customer support lines, and transparent component listings mitigate most of the risks above, and paying a modest premium for that transparency and support infrastructure is often reasonable, particularly for buyers who don’t want to self-build or troubleshoot hardware issues independently.
Sellers who publish full component lists including exact PSU model, RAM speed, and storage interface — not just GPU and CPU — are demonstrating the kind of transparency that correlates with fewer corner-cutting issues elsewhere in the build, since a seller confident in every component has no reason to hide any of them.
Third-party review coverage from established tech outlets or YouTube channels that physically open and test units (rather than just unboxing) is one of the most reliable ways to verify a specific model’s real-world build quality before buying, since these reviewers often catch issues — poor cable management, thermal paste application, PSU substitutions — that photos alone don’t reveal.
Our own tested picks across budget tiers, evaluated on my bench for the exact PSU, thermal, and component-quality issues covered in this guide, are compiled in our best prebuilt gaming PC roundup if you’d rather start from a pre-vetted shortlist.
Troubleshooting: what to do if you already bought a corner-cutting prebuilt
If diagnostic software confirms a genuine specification mismatch — wrong RAM speed, substituted storage, or an unbranded PSU where a named brand was advertised — document it with screenshots and contact the seller first, since most marketplaces (Amazon, eBay) side with buyers on documented misrepresentation claims within the return window.
If the system is outside its return window but experiencing symptoms consistent with a weak PSU (random shutdowns under load, failure to boot with a new GPU, coil whine under stress), a PSU replacement is often the most cost-effective single upgrade, typically $60-$100 for a quality 650-750W unit, and resolves the highest-risk component first.
If cooling is inadequate and causing thermal throttling, confirmed by monitoring software like HWiNFO64 showing sustained temperatures above 85°C on the CPU or 83°C on the GPU under load, adding one or two case fans ($10-$15 each) in a proper intake/exhaust configuration is a low-cost fix before considering a full case replacement.
If you’re past the point where individual fixes make sense and considering a full upgrade path instead, our how to upgrade a prebuilt gaming PC guide covers which components typically offer the best return for a system built on a compromised foundation.
Frequently asked questions
What is the single biggest red flag in a bad prebuilt gaming PC?
An unbranded or “OEM” power supply with no listed wattage certification (80 Plus rating) is the clearest warning sign, since PSU failures can damage every other component in the system, and reputable builders always list a named PSU brand and efficiency rating rather than a generic line item that just says “500W power supply.”
How can I check a prebuilt PC’s PSU quality before buying?
Search the exact model number listed in the specifications against Cultists Network’s PSU tier list, a community-maintained resource ranking power supplies by internal component quality, and if the listing doesn’t name a specific PSU model or brand at all, treat that omission itself as a red flag worth asking the seller about directly.
Are marketplace prebuilts from small sellers worse than big-name brands?
Not automatically, but they carry more variance, since a small seller’s build quality depends entirely on that individual assembler’s standards with no corporate quality control layer behind it, so check seller ratings, return policy length, and whether they disclose specific component brands before assuming a lower price reflects only lower markup.
Should I avoid all prebuilts and just build my own PC instead?
Not necessarily — a well-specced prebuilt from a transparent seller can save real time and often costs similarly to self-building once you factor in a builder’s bulk component pricing, but only if the listing discloses PSU brand, RAM speed, and storage type clearly rather than hiding them behind vague terms like “high-speed RAM” or “fast storage.”
What warranty length should I expect from a legitimate prebuilt seller?
One year parts-and-labor is the baseline most established sellers offer, with some extending to two or three years on the chassis and select components; a prebuilt with no stated warranty, or one shorter than 90 days, is a signal to look elsewhere regardless of how attractive the listed specs appear.