Shopping for a barebones keyboard kit looks simple until you hit the product pages. Dozens of listings promise gasket mounts, hot-swap PCBs, and tri-mode wireless, yet the difference between a $50 kit you’ll love and a $90 kit you’ll regret usually comes down to a handful of specs that most people skip past. The most common mistakes are predictable: buying a size that doesn’t fit your desk habits, choosing “barebones” without realizing it means no switches or keycaps included, and paying a premium for features you’ll never use. This guide breaks down what actually matters so you can spend your money on the board, not the marketing.
Our Top Picks


Top 3 picks at a glance
Decide These 3 Things First
1. Your layout size. A barebones kit is a commitment — you’re building around a specific footprint. Full-size (100%) boards run roughly 17.5 inches wide and include a number pad, which matters if you work in spreadsheets or accounting. TKL (87%) drops the numpad and saves about 4 inches of width. A 65% board like the BOYI GMK67 is around 12.8 inches wide and keeps arrow keys and a few navigation keys — the sweet spot for most people who want desk space without losing function keys entirely. If you constantly hit delete, page up, or enter numbers all day, don’t talk yourself into a 65%.
As an Amazon Associate we earn from qualifying purchases at no extra cost to you.
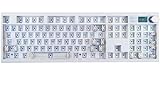


2. Your connectivity needs. Tri-mode kits (Bluetooth 5.0, 2.4GHz dongle, and USB-C wired) are now standard even at budget prices, so decide whether you actually need wireless. A wired-only build is simpler and never needs charging. If you go wireless, check the battery capacity — anything under 2000mAh will need weekly charging with RGB on; 4000mAh (as on the GMK67) is the practical minimum for multi-day use.
3. What “barebones” includes — and doesn’t. Every kit in this category ships without switches and keycaps. Budget an extra $25–$60 for those parts on top of the kit price. Some kits include stabilizers, a switch puller, a cable, and foam; others include almost nothing. Read the “in the box” list before comparing prices, because a $47 kit with stabilizers and foam may be a better deal than a $60 kit that ships bare.
Size and Layout: Match the Board to Your Desk, Not Your Aesthetic
Measure before you buy. A full-size board like the GMK104 needs roughly 18 inches of width and 6 inches of depth once you account for the wrist rest position — that’s real estate many desks can’t spare alongside a mouse pad. Full-size suits data entry and workflow-heavy users. Tenkeyless boards (about 14 inches wide) free up room for lower mouse sensitivity in games. Compact boards (60–65%, roughly 11.5–13 inches) suit small desks and travel, but check for dedicated arrow keys; a 60% board without them forces layer shortcuts that some users never adapt to.
Also check keycap profile compatibility. Most kits in this class accept standard Cherry-profile MX keycaps, but verify the bottom row layout (typically 6.25u or 7u spacebar). A mismatched bottom row is the most common keycap return reason.
Case Material: Weight, Sound, and Price
Case material drives both feel and cost. Here’s what to expect:
- Plastic (ABS or polycarbonate): Found on most kits under $60. Lighter (1.5–2.5 lbs assembled), slightly flexier, and more prone to a hollow sound unless the kit includes foam. The upside: lower cost and easier modding.
- Aluminum: Usually pushes kits to $150–$300+. Heavier (4–6.5 lbs), denser sound, better heat dissipation for RGB. Only worth it if you never plan to move the board and want a premium typing feel.
- Acrylic (common in low-profile kits): Inexpensive and lets underglow shine through, but scratches easily and flexes more.
For a first build, a well-executed plastic case is completely fine. Spend the savings on better switches — the switches affect typing feel far more than case metal does.
Construction: Gasket Mount, PCB Quality, and Stabilizers
Mounting style. Gasket mount — where the PCB sits on rubber strips sandwiched between case plates — is now standard even on sub-$50 kits like the GMK67. It produces a softer, quieter typing feel than tray-mount designs. All else being equal, choose gasket mount, but don’t pay a large premium for it; it’s table stakes in 2026.
PCB and hot-swap sockets. A hot-swap PCB lets you change switches without soldering — essential for a DIY kit. Check that sockets are rated for 3- and 5-pin switches, and look for south-facing switch openings if you plan to use Cherry-profile keycaps with RGB (north-facing sockets can cause interference on certain keycap rows). QMK/VIA programmability is another near-must: it means you can remap keys and set macros through a browser-based tool without flashing firmware. Every kit in this class now claims it, but confirm VIA support is native rather than requiring a manual JSON file.
Stabilizers. These keep long keys (spacebar, shift, enter) level. Cheap rattly stabilizers are the number-one complaint on budget builds. Look for kits that include screw-in or clip-in stabilizers with factory lube, or budget $10–$20 for a set of screw-ins yourself.
Included foam. Case foam, plate foam, and switch pads tame hollow case ping. A kit that includes all three layers saves you a $10–$15 aftermarket purchase and a disassembly session.
Typing Comfort and Performance
Since barebones kits exclude switches, your typing feel depends on what you install. Plan on 5-pin linear switches (like common red variants) for gaming, tactile (brown-style) for mixed use, or clicky if you work alone. A pack of 70 switches for a full-size board runs $18–$35.
Polling rate matters if you play competitive games: look for at least 1000Hz in wired mode. Wireless modes typically run 125–250Hz on boards in this price class, which is fine for office work but noticeable in fast-paced games — use the 2.4GHz dongle rather than Bluetooth for anything latency-sensitive. Latency over Bluetooth can reach 20–30ms versus 2–5ms wired.
Extra features worth having: a rotary knob for volume control (genuinely useful, present on the GMK67 and the screen-equipped GMK104), and a small display for connection status or custom readouts — nice-to-have, not essential. An adjustable or built-in wrist rest earns its keep on boards wider than 14 inches.
Price Tiers: What Your Budget Actually Buys
- Under $50 ($35–$50): Compact layouts, plastic cases, gasket mount, VIA support, and included knob (GMK67 territory). Expect a basic stabilizer set and limited foam. This is where most first-time builders should start.
- $50–$90: Full-size layouts, better foam layering, screens and knobs, larger batteries (3000–4000mAh), and more polished stabilizers (GMK104/GMK108 territory). The value ceiling for plastic-case kits.
- $90–$150: Better weight, upgraded internal dampening, and occasionally aluminum weight bars added to plastic cases. Diminishing returns unless you know exactly which feature you’re paying for.
- $150+: Full aluminum construction, better stock sound, and higher polling rates. Only for builders who’ve finished at least one board and know their preferences.
Warranty and Seller Support
Kits have more failure points than prebuilt boards — sockets, PCBs, and batteries can all be duds. Look for at least a 12-month warranty covering the PCB and defects, and confirm the seller answers troubleshooting questions. Because you’re assembling the board, manufacturers can deny claims as “user damage,” so favor sellers with a 30-day no-questions return window. Keep the packaging; hot-swap sockets and ribbon cables are the two components most often dead on arrival, and a replacement claim without original packaging gets messy. Check that replacement parts (extra sockets, spare knob, replacement PCB) are actually available rather than requiring you to buy a whole new kit.
Assembly and Delivery Considerations
Budget 45–90 minutes for your first build: installing stabilizers, placing foam layers, seating 60–104 switches, and snapping the case together. No soldering is required on hot-swap kits, but you’ll want a switch puller (included with most kits — verify) and a clean, flat surface. On delivery, inspect immediately: a cracked acrylic diffuser or bent case corner is only returnable within the seller’s window, often 15–30 days. If a few keys don’t register at first, reseat the switch — 90% of “dead key” complaints are a bent switch pin, not a faulty PCB.
Spec Checklist
| Spec | Budget ($35–$50) | Mid ($50–$90) | Premium ($90–$150) |
|---|---|---|---|
| Layout | 60–65% | 65%–full size | TKL/full size |
| Case material | Plastic | Plastic, better finish | Plastic with metal weight, or entry aluminum |
| Mounting | Gasket | Gasket with poron strips | Gasket, dual-stage |
| Hot-swap sockets | 3/5-pin | 3/5-pin, south-facing | 3/5-pin, south-facing, socket-tested |
| Programmability | VIA | VIA/QMK native | VIA/QMK native |
| Connectivity | Tri-mode BT 5.0/2.4GHz/USB-C | Tri-mode | Tri-mode, higher polling |
| Battery | 1500–3000mAh | 3000–4000mAh | 4000mAh+ |
| Foam layers | 1–2 | 2–3 | 3+ |
| Stabilizers included | Clip-in | Clip-in, pre-lubed | Screw-in, pre-lubed |
| Extras | — | Knob, sometimes screen | Screen, knob, wrist rest |
Red Flags
- No stabilizers included and no mention of them. You’ll pay extra and wait another shipping cycle.
- VIA “support” that requires downloading a custom JSON file. Native VIA means plug-and-play remapping; anything else is friction.
- Proprietary cable ports or non-USB-C charging. Avoid entirely in this day and age.
- Battery capacity not listed. If the seller won’t state mAh, assume it’s small.
- North-facing sockets combined with Cherry-profile keycap marketing. A known interference issue.
- Listings with fewer than 50 reviews or no assembly photos. Barebones kits live or die on community feedback — check the model name on keyboard forums before committing.
- “Hot-swap” without 5-pin compatibility. Limits your switch options later.
FAQ
What’s actually included in a barebones kit?
The case, PCB, plate, foam (sometimes), stabilizers (sometimes), and cable. Switches and keycaps are never included — budget $25–$60 extra for those. Always read the “in the box” list; it varies more than the price does.
Is a barebones kit cheaper than buying a prebuilt keyboard?
Usually, yes — but not dramatically at the budget end. A $47 kit plus $30 in switches and keycaps lands around $77, comparable to a decent prebuilt. The real value is choosing your exact switch feel and layout rather than the savings.
Do I need to solder anything?
No, not on hot-swap kits. Assembly is seating switches into sockets and stacking foam and plates — a 45–90 minute job for a first-timer. Soldered PCBs only appear on advanced kits, which will say so explicitly.
How long do barebones keyboard kits last?
The PCB and case should last 5–10 years of daily use. Hot-swap sockets are rated for roughly 100 insertion cycles per socket — since you’ll rarely change switches more than a handful of times, that’s not a practical limit. Batteries are the first component to degrade, typically after 2–3 years of heavy wireless use.