Building your first PC is a genuine rite of passage. It transforms a computer from an intimidating, mysterious metal box into a custom-tailored engine for your work, digital hobbies, and home entertainment. However, many beginners fall into classic traps when selecting their first setup. They buy flashy, color-shifting components over reliable performance, mismatch high-draw processors with bargain-basement power supplies, or realize too late that their massive graphics card physically cannot squeeze inside their compact desk setup.
As a home editor, I often compare assembling a PC to putting together high-end flat-pack furniture. Without a clear blueprint, compatible components, and the correct tools, you will end up with a wobbly, frustrating, and potentially expensive headache. When researching what to look for in first pc build kit options, success comes down to balancing component compatibility, workspace logistics, thermal control, and user-friendly assembly tools. This guide will demystify the technical specs and spatial requirements so you can build your system with complete confidence.
As an Amazon Associate we earn from qualifying purchases at no extra cost to you.



Our Top Picks


Top 3 picks at a glance
Decide These 3 Things First
Before you start browsing components or purchasing specialized toolsets, you must establish the boundaries of your project. Answering these three questions will instantly narrow down your choices:
- Your Primary Use Case: Are you building a dedicated gaming station, a quiet home office workstation, or a compact media center for your living room credenza? This determines your hardware priorities—such as prioritizing a heavy-duty discrete graphics card (GPU) versus a high-core-count processor (CPU) for multitasking.
- Your Spatial Footprint: Where will this computer live? A massive tower requires a spacious, sturdy desk that can easily support 30 to 40 pounds of hardware. Conversely, a small-form-factor build fits neatly on a bookshelf but demands surgical precision and patience during assembly.
- Your Assembly Comfort Level: Do you want a curated “barebones” hardware kit where all internal components are pre-verified for compatibility, or do you want to purchase a comprehensive electronics toolset and select every single computer part individually?
1. Case Size and Desk Footprint
The computer case (or chassis) determines where your components go and how much space remains on your desk. For a first-time builder, physical size translates directly to ease of assembly. Larger cases are much more forgiving to work inside.
- Full Tower (ATX): Typically measuring around 22 x 9 x 22 inches, these cases offer massive interior clearance. They make it incredibly easy to route thick power cables and install large cooling fans. However, they can weigh up to 35 pounds when fully loaded and take up substantial desktop real estate.
- Mid Tower (ATX or Micro-ATX): This is the ideal sweet spot for beginners, usually measuring roughly 18 x 8 x 18 inches. They accommodate standard, widely available components without requiring tiny hands or needle-nose pliers, and they fit comfortably on a standard 48-inch writing desk.
- Mini-ITX: These ultra-compact cases (often under 12 x 7 x 12 inches) are beautiful but challenging. Managing cables in a space smaller than a shoe box is an exercise in extreme patience and is not recommended for your very first build.
2. Component Compatibility and Power Budget
A common rookie mistake is pairing a high-performance, 300-watt graphics card with an underpowered, 450-watt power supply unit (PSU). When evaluating a hardware kit, look closely at the power overhead and socket compatibility.
Your motherboard’s CPU socket (such as AMD’s AM5 or Intel’s LGA1700) must match your processor perfectly. Furthermore, your power supply should operate at roughly 50% to 80% of its maximum capacity under load for optimal efficiency and longevity. For a modern mid-range build utilizing a 65-watt CPU and a 220-watt GPU, a high-quality 650W to 750W PSU with an 80-Plus Gold certification is the safety standard you should demand.
3. Thermal Performance and Airflow Dynamics
Heat is the ultimate enemy of computer silicon. A well-designed PC build kit must account for thermal dissipation to prevent your system from slowing down under heavy use. Look for cases that prioritize mesh front panels over solid glass panels.
While solid glass panels look sleek in a modern home office, they force intake fans to draw air through tiny side slits, which can increase internal temperatures by as much as 10 to 15 degrees Celsius. A proper starter kit should include at least two or three pre-installed 120mm or 140mm cabinet fans to establish positive air pressure (more air blowing in than being pulled out), which naturally repels household dust. To keep your work environment peaceful, look for fans rated under 28 decibels (dB) at maximum speed.
4. Essential Assembly Tools and Safety Gear
You cannot assemble a modern PC with a kitchen butter knife or a giant household screwdriver. If your hardware kit does not come with assembly tools, you must invest in a dedicated precision electronics toolset.
Look for a kit containing a magnetic Phillips #2 screwdriver with a shaft of at least 6 inches. The magnetic tip is crucial for preventing tiny, fragile screws from falling into the dark, inaccessible crevices of your case. You also need an anti-static wrist strap to prevent electrostatic discharge (ESD) from frying sensitive motherboard traces. Much like a model-building hobby kit requires precise snips, your PC kit requires small zip ties or hook-and-loop straps to tame the bird’s nest of cables behind the motherboard tray.
5. Budget and Performance Tiers
Setting realistic expectations for your budget prevents mid-build buyer’s remorse. PC hardware generally falls into three clear performance brackets:
- Entry-Level ($500 – $800): Focuses on smooth 1080p gaming and everyday home office multitasking. Expect a 4-to-6 core processor, 16GB of DDR4 or entry-level DDR5 RAM, and integrated graphics or a budget-friendly discrete GPU.
- Mid-Range ($1,000 – $1,500): This is the sweet spot for longevity. This budget nets you an 8-core processor, 32GB of fast DDR5 RAM, a robust mid-tier GPU capable of high-frame-rate 1440p gaming, and fast PCIe Gen 4 NVMe storage.
- Premium ($2,000+): Designed for 4K video editing, heavy rendering, and ultra-settings gaming. This tier includes top-of-the-line GPUs, liquid cooling loops, and high-wattage (850W+) power supplies.
6. Warranty and Customer Support Ecosystem
When you buy a pre-built PC, you get a single warranty covering the entire machine. When you buy a build kit or individual components, you are dealing with multiple manufacturers. This makes customer support a vital consideration.
Look for kits curated by reputable retailers or single brands that offer unified customer support for the bundle. At a minimum, look for a 3-year warranty on the CPU and motherboard, a 5-to-10-year warranty on the power supply (a long warranty indicates high-quality internal Japanese capacitors), and lifetime warranties on RAM modules. Avoid gray-market sellers who cannot offer domestic customer support if a component arrives Dead On Arrival (DOA).
7. Delivery, Unboxing, and Workspace Setup
The logistics of receiving and unboxing your kit are highly relevant to your home environment. A full PC build kit arrives in several large, heavy boxes. The case box alone can weigh over 25 pounds, while delicate components like the motherboard and GPU are shipped in smaller, static-shielded packaging.
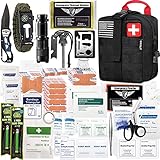
Prepare a clean, non-carpeted workspace—ideally a wooden dining table or a dedicated workbench measuring at least 48 x 30 inches. Avoid working on carpets, as shuffling your feet can build up static electricity. Keep a small first aid kit nearby, as unfinished metal edges inside budget-friendly PC cases can easily nick your fingers during tight cable routing.
Spec Checklist
Use this baseline specification checklist to ensure your kit components are balanced, modern, and ready for software demands in 2026 and beyond.
| Component | Budget Tier ($500-$800) | Mid-Range Tier ($1,000-$1,500) | Premium Tier ($2,000+) |
|---|---|---|---|
| Processor (CPU) | 4 to 6 Cores (e.g., AMD Ryzen 5 / Intel Core i3) | 6 to 8 Cores (e.g., AMD Ryzen 7 / Intel Core i5) | 8+ Cores (e.g., AMD Ryzen 9 / Intel Core i7 or i9) |
| System Memory (RAM) | 16GB DDR4 / DDR5 | 32GB DDR5 (6000MHz speed) | 32GB to 64GB DDR5 (Low Latency) |
| Storage | 512GB to 1TB NVMe M.2 SSD | 1TB to 2TB PCIe Gen 4 NVMe SSD | 2TB+ PCIe Gen 5 NVMe SSD |
| Power Supply (PSU) | 500W – 600W (80-Plus Bronze) | 650W – 750W (80-Plus Gold, Modular) | 850W – 1000W+ (80-Plus Platinum) |
| Cooling | Stock Air Cooler | Tower Air Cooler (120mm fan) | 240mm – 360mm Liquid AIO Cooler |
| Chassis (Case) | Budget Mid-Tower (Basic acrylic panel) | Airflow-focused Mid-Tower (Mesh front) | Premium Dual-Chamber Glass/Aluminum Case |
Red Flags
When shopping for your first build kit, be on the lookout for these warning signs that indicate potential assembly frustration or hardware failure:
- Proprietary Motherboards or Power Supplies: Some OEM or refurbished kits use non-standard power connectors or custom motherboard shapes. Avoid these, as they prevent you from upgrading your system in the future. Stick to standard ATX, Micro-ATX, or Mini-ITX form factors.
- Unbranded Power Supplies: Never compromise on the power supply. An unbranded “gray box” PSU lacking basic safety certifications (such as Over-Voltage Protection and Short-Circuit Protection) can fail catastrophically and fry your entire system.
- Cases with Zero Cable Management Space: Look for cases that offer at least 0.75 inches (20mm) of clearance behind the motherboard tray. Without this space, you will struggle to close the side panel once your power cables are plugged in.
- Inadequate CPU Coolers: Modern high-performance CPUs run hot. If a kit pairs a power-hungry processor with a tiny, basic aluminum heatsink, your computer will quickly overheat and slow down under heavy loads.
FAQ
Do I need a specialized anti-static mat to build a PC?
No, you do not absolutely need a specialized anti-static mat, though it can be a helpful addition to your home workspace. As long as you assemble your PC on a clean, uncarpeted surface (like a wooden or laminate dining table) and wear an anti-static wrist strap clipped to the metal chassis of your PC case, you will be perfectly safe from static discharge.
Is thermal paste included in PC build kits?
Yes, in almost all cases, thermal paste is either pre-applied to the bottom of the included CPU cooler or included in a small, single-use syringe inside the cooler’s packaging. However, keeping a small, inexpensive spare tube of high-quality thermal compound in your drawer is always a smart backup plan in case you need to re-mount the cooler.
How long does it take a beginner to build their first PC?
For a first-time builder, you should budget roughly 3 to 5 hours of uninterrupted time. This allows you to carefully read the motherboard manual, route your power cables neatly, install the delicate processor, and double-check all of your connections before plugging the system into the wall.
What is the most common mistake made during physical assembly?
The most common physical mistake is forgetting to install the motherboard standoffs (the small brass spacers that keep the motherboard from touching the bare metal of the case) or failing to plug the dedicated 8-pin CPU power cable into the top-left corner of the motherboard. Always double-check your motherboard manual’s layout diagram before your first boot attempt.