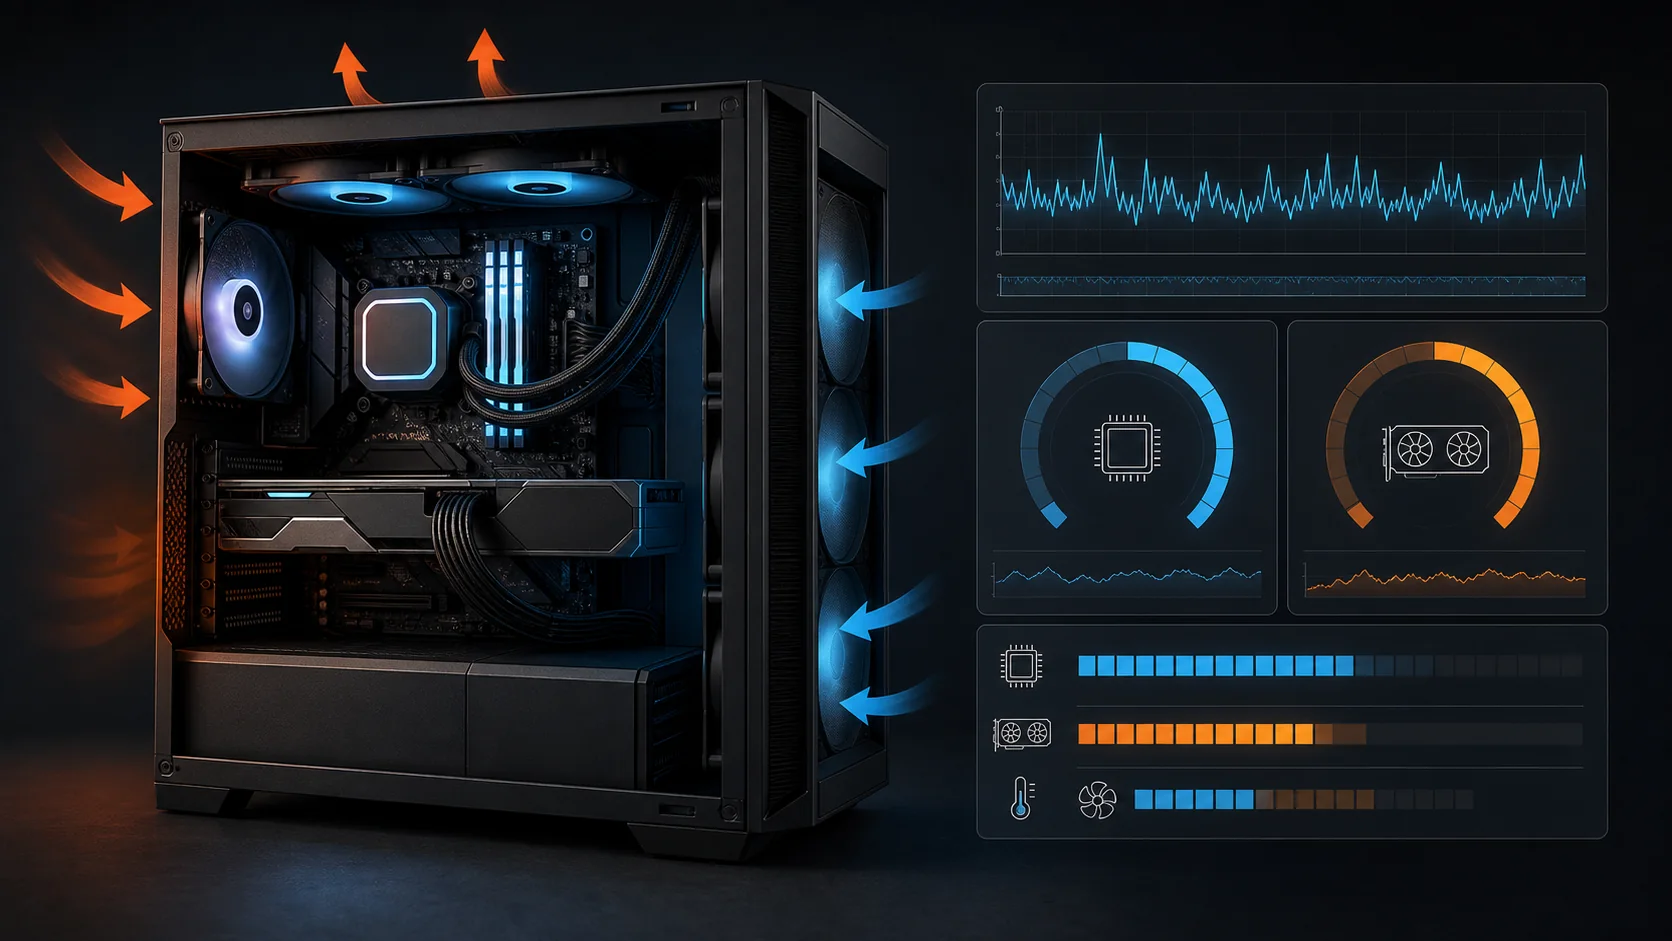
A thorough burn-in pass is the single best insurance policy against a costly surprise after your return window closes. OCCT and Prime95 are the two most commonly used tools for burn-in testing a new PC, both free and both capable of loading your CPU (and, for OCCT, your GPU and power supply) at sustained maximum levels to reveal instability or thermal problems that casual use might not surface. Run at least one focused test per component for 20-30 minutes as a baseline, and one longer session — several hours or overnight — sometime in your first week to catch intermittent issues that shorter tests can miss.
Do this early in your ownership, not late in your return window, since a genuine problem found on day three leaves you weeks to act on it, while the same problem found on day twenty-eight leaves almost none. Start the very first weekend you own the machine.
As an Amazon Associate we earn from qualifying purchases at no extra cost to you. Product prices and availability are accurate as of the date shown and are subject to change.




Top 3 picks at a glance
Quick answer
Run OCCT’s combined CPU/GPU test, or Prime95 for a CPU-focused deep stress test, for at least 20-30 minutes as an initial check, monitoring temperatures throughout with HWiNFO64 if the tool’s own readout isn’t detailed enough. Follow up with one longer overnight session in your first week for a more thorough stability check.
| Tool | Covers | Typical use |
|---|---|---|
| OCCT | CPU, GPU, power supply, memory (varies by test mode) | Combined system stress test with built-in monitoring |
| Prime95 | CPU specifically | Deep, long-established CPU stability test |
| HWiNFO64 | All sensors | Monitoring alongside either stress test |
Why burn-in testing catches what casual use doesn’t
Normal gaming and everyday use rarely push every component to its absolute sustained maximum simultaneously for an extended period — a game might stress your GPU heavily while your CPU sits at moderate load, or vice versa, and even demanding games have natural lulls that give components brief recovery periods. A dedicated burn-in test removes those lulls, applying sustained maximum load continuously, which is exactly the condition most likely to reveal a marginal component, an inadequate cooling solution, or a power delivery issue that intermittent real-world use might not trigger for weeks or months.
This matters specifically within a return window because you want to find problems fast, not wait for them to show up naturally during normal use after your ability to return the system has already expired. A component that’s going to fail under sustained stress is far more likely to reveal that during a deliberate 30-minute to several-hour stress test than during typical gaming sessions with natural breaks.
Running OCCT
Download and install OCCT, and select a test mode appropriate to what you want to check — a combined CPU and GPU test for overall system stability, or a more focused test on just one component if you’re specifically investigating something you noticed during benchmarking. OCCT includes built-in monitoring and, in many of its test modes, automatic error detection that flags calculation errors indicating instability, rather than requiring you to watch for a crash as the only failure signal.
Set the test duration to at least 20-30 minutes for an initial check, watching temperatures and any error count the tool reports throughout. OCCT’s error-detection tests are particularly useful because they can catch subtle instability that produces incorrect results without an outright crash, which is a failure mode that’s easy to miss if you’re only watching for the system to freeze or shut down.
A zero-error result across the full duration is the clear pass condition to look for — even a single reported error during an otherwise completed test is worth taking seriously and re-running, rather than treating it as a fluke, since OCCT’s error detection is specifically designed to catch subtle miscalculations that would otherwise go completely unnoticed during normal use.
Running Prime95
Prime95 is a long-established, CPU-specific stress test known for being particularly demanding on CPU stability, historically used by overclockers to validate settings before trusting them for daily use. Download it, select one of its standard torture test modes (different modes stress slightly different aspects of the CPU and memory subsystem), and run it for at least 20-30 minutes as a baseline, watching for any error reported by the tool or an outright system crash.
Because Prime95 is specifically demanding, it can run CPUs hotter than typical gaming workloads would, which is useful for finding a cooling margin problem early, but also means you should watch temperatures closely rather than assuming any temperature reading is automatically fine just because the test completes without crashing.
Monitoring during the test
Run HWiNFO64 alongside either stress test if you want more detailed temperature and clock-speed data than the stress tool’s own built-in readout provides, particularly useful for catching thermal throttling (a drop in clock speed correlating with hitting a temperature ceiling) that a simple pass/fail result might not clearly show on its own.
Watch for temperatures that climb steadily without stabilizing, rather than leveling off at some sustained value — a temperature that keeps rising throughout the entire test duration without plateauing suggests the cooling system isn’t keeping pace with heat generation, which is worth flagging even if the test technically completes without an outright crash.
A practical anchor point for judging whether a sustained stress-test temperature is actually concerning: check the published maximum safe operating temperature for your specific CPU and GPU models, typically found on the manufacturer’s official specification page, and compare your logged HWiNFO64 peak against that figure rather than an arbitrary personal guess. Most mainstream desktop CPUs and GPUs are rated for maximum operating temperatures in roughly the 90-100°C range, though this varies by model, so checking the exact published number for your specific hardware is more reliable than assuming a single universal threshold applies to every component.
Testing memory stability separately
A pure CPU-focused stress test doesn’t always fully exercise system memory the way a workload specifically designed to hammer RAM does, and a subtly faulty or improperly configured RAM module can cause instability that looks like a CPU or GPU problem — random crashes, corrupted files, or failed installations — without a CPU-focused test ever flagging it directly. OCCT includes a dedicated memory test mode alongside its CPU and GPU tests specifically for this reason, and running it as its own separate pass, rather than assuming a clean CPU stress test result also validates memory, adds coverage the CPU-focused modes don’t fully replicate.
A completely clean pass through OCCT’s memory test over a reasonable duration is a strong sign your RAM is both correctly identified and correctly configured at its stated speed and timings. Any error reported during this specific test is worth taking seriously and re-running to confirm, since memory errors have a habit of causing seemingly unrelated and hard-to-diagnose problems elsewhere in the system if left unaddressed, well beyond the memory test itself.
Extended and overnight testing
A single 20-30 minute test catches many outright failures and obvious thermal problems, but some instability is intermittent and doesn’t reliably appear in every short run. Running one significantly longer session — several hours, or overnight while you’re not using the PC — at some point during your first week adds meaningful confidence beyond what short tests alone provide.
Set up monitoring (HWiNFO64’s logging feature, if available, or the stress test’s own log) before starting an overnight run, so you have a record to review in the morning rather than only knowing whether the system was still running when you checked, without detail on what happened during the hours in between.
Running a burn-in test
- Install OCCT and/or Prime95.
- Run an initial 20-30 minute test, monitoring temperatures with HWiNFO64 alongside if desired.
- Check for any error reported by the test tool, not just an outright crash, as a sign of instability.
- Compare peak logged temperatures against your CPU and GPU’s published maximum operating temperature.
- Confirm temperatures stabilize rather than climbing continuously throughout the test.
- Schedule one longer session — several hours or overnight — sometime in your first week.
- Review any logged data from the extended session the following day.
- Document and report any crash, error, or concerning temperature pattern to the seller promptly, within your return window.
When burn-in tests don’t catch a real problem
Some instability only appears under very specific conditions — a particular game’s engine, a specific combination of background software, or after many hours of continuous varied use rather than one sustained maximum-load test — that a burn-in test, however thorough, doesn’t perfectly replicate. Burn-in testing significantly reduces the risk of missing a problem within your return window, but it isn’t an absolute guarantee against every possible failure mode.
A system that passes burn-in testing cleanly but later develops symptoms during actual use over subsequent weeks may be experiencing a genuinely separate, later-developing issue (like thermal paste degradation) rather than one the original testing should have caught — this is a limitation of testing generally, not a sign the test was done incorrectly.
It’s also worth being realistic about power supply testing specifically, since a marginal or failing power supply is one of the harder failure categories for a home burn-in test to catch conclusively. OCCT includes a power supply test mode that monitors voltage stability under load, which is a genuinely useful signal, but home testing can’t fully replicate the kind of precision voltage measurement a dedicated bench power meter provides. A power supply that passes OCCT’s test cleanly is reasonably likely to be fine; one that shows voltage instability during the test is worth treating as a serious finding, since power delivery problems can cause a wide range of seemingly unrelated symptoms elsewhere in the system.
Re-testing after any hardware change
If a seller replaces a component under your return or exchange process — swapping a faulty stick of RAM, for instance — the fix itself doesn’t automatically confirm the rest of the system is still stable, since a repair technician working under time pressure occasionally introduces a new, unrelated issue while addressing the original one (a loose cable, an improperly reseated component). Running your burn-in test sequence again after any hardware swap or repair, rather than assuming a fix for one specific reported issue means everything else is still fine, is the safer approach within whatever remains of your return window.
This full re-test doesn’t need to be as extensive as your original day-one testing if the repair was narrowly scoped and clearly documented, but it should at minimum include a fresh spec check confirming the replaced component matches what was promised, plus a shorter stress test to confirm the system as a whole is still stable following the physical work done on it.
Troubleshooting
Symptom: System crashes or reboots during a stress test. Cause: likely a power delivery, cooling, or component stability issue under sustained load. Fix: document the exact test, duration until failure, and temperatures logged up to that point, then report to the seller as evidence within your return window.
Symptom: Stress test completes without crashing, but temperatures are very close to the component’s maximum rated limit throughout. Cause: cooling may be adequate for typical gaming loads but marginal for sustained maximum stress specifically. Fix: monitor real gaming sessions too, since sustained-maximum stress test temperatures don’t always reflect typical gaming temperatures, but flag it if you also see high temps in actual games.
Symptom: OCCT reports calculation errors without a full system crash. Cause: this indicates instability that doesn’t necessarily crash the system but does produce incorrect results, a subtler but still real stability problem. Fix: treat error-count results as seriously as a crash, and report them to the seller with the specific error count and test conditions.
Symptom: Temperatures climb continuously throughout an extended stress test without ever plateauing, right up to the point the test ends. Cause: the cooling system is likely not keeping pace with sustained heat generation, a genuine thermal design concern rather than a momentary spike. Fix: document the full logged temperature curve over the session, since a continuously rising trend is a stronger piece of evidence than a single peak number when reporting to the seller.
Balancing thoroughness against your own schedule
A genuinely thorough burn-in routine, including an overnight session and follow-up testing after any repair, takes a meaningful chunk of your first week of ownership. That time investment is worth weighing against the alternative — discovering a serious defect after the return window closes — which makes even a moderately time-consuming testing routine a reasonable trade against the risk of an unreturnable, genuinely faulty system.
Frequently asked questions
Is OCCT or Prime95 the better choice for a burn-in test?
Both are widely used and effective. OCCT has a more modern interface with built-in monitoring and automatic error detection across CPU, GPU, and power supply tests in one tool. Prime95 is a long-established CPU-focused stress test known for being particularly demanding on stability specifically.
How long should a burn-in test run for a new PC?
A single test of at least 20-30 minutes per component is a reasonable minimum baseline, but running one longer session of several hours, or overnight, at some point in your first week catches more intermittent instability than short tests alone.
Is it safe to run a burn-in test on a new PC still under warranty?
Yes. Stress testing keeps components within their rated operating limits — it doesn’t push voltage or clocks beyond factory specifications unless you’ve separately applied a manual overclock, so it doesn’t void a standard warranty on its own.
What temperature is too high during a burn-in test?
This varies by specific CPU and GPU model, but sustained temperatures very close to a component’s maximum rated operating temperature during a stress test, especially if throttling occurs, is worth investigating rather than dismissing as normal.
Should I burn-in test before or after installing all my games?
Burn-in testing works fine at any point, but doing it early, before you’ve invested time installing and configuring everything else, means you catch a genuine hardware issue while you still have the most time left in your return window to act on it.
Marcus Reilly runs the same combined stress-test approach on review units using calibrated power meters and thermal probes in his two-bench test lab, scaled down here to what’s achievable with free software at home. For the step that should come before a burn-in test, see how to check if a prebuilt has bottlenecks and what specs matter most in a gaming PC. If a stress test turns up a real problem, gaming PC warranty and support compared covers what to expect from different sellers’ return processes.