Getting RGB lighting wrong on a custom PC does more than look messy. Poorly routed strips block airflow and trap heat, overdrawn headers can kill motherboard lighting channels, and cheap adhesive fails within weeks leaving strips dangling onto fans or hot GPUs. A rushed setup also creates uneven color, flickering, and software conflicts that take longer to fix than doing it right the first time. The good news is that most modern cases and motherboards make RGB installation straightforward if you plan power, control, and placement before you peel any backing.
In this guide, you will learn how to set up RGB lighting on a custom PC build cleanly and safely, from choosing compatible hardware to routing and syncing everything for a polished, even glow.
As an Amazon Associate we earn from qualifying purchases at no extra cost to you.

Our Top Picks


What You Need
| Item | Why You Need It | Optional? |
|---|---|---|
| RGB LED strips (12V 4-pin or 5V 3-pin ARGB) | Provides the actual lighting. Standard 12V strips are 19 to 20 inches long and work with 4-pin headers; 5V ARGB strips offer per-LED control. Most mid-tower builds need 1 to 2 strips. | No |
| Compatible motherboard with RGB header or RGB controller hub | Powers and controls the lights. Check whether your board has a 12V 4-pin RGB header or a 5V 3-pin ARGB header. Many builders in 2026 use boards with both. | No – one or the other required |
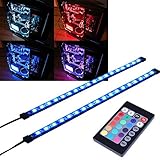
| Magnetic RGB strip kit with remote/controller | Alternative for cases without free headers. Magnet-mounted strips like 30 cm (approx. 11.8 in) bars attach without adhesive and run off SATA power. | Yes, if motherboard headers are unavailable |
| Microfiber cloth and isopropyl alcohol (90%+) | Cleans mounting surfaces so adhesive strips stay put and magnets make full contact. | No |
| Zip ties and cable clips (small, 4 to 8 inch) | Secures excess cable, prevents sag into fans, and keeps 12V/5V wiring away from sharp edges. | No |
| Phillips-head screwdriver | Removes side panels and helps mount controller hubs in towers that need them. | No |
| RGB splitter or extension cable (12 inch / 30 cm) | Lets you run two strips from one header without stretching or stressing the connector. | Yes, for multi-strip layouts |
Budget-wise, simple header-powered strips typically cost $8 to $12 for a 2-pack, while magnet-mounted kits with a controller and remote run $15 to $25. Both options draw very little power, usually 2 to 6 watts per strip, so you do not need a larger power supply.
Step-by-Step
Step 1: Confirm Compatibility and Header Type – 10 minutes
Power down, unplug, and open your case. Locate your motherboard’s RGB headers along the top or bottom edge and read the silkscreen. A 12V 4-pin header has four pins with a 12V label and is often white plastic, while a 5V 3-pin ARGB header has three pins with one blank space and a 5V label. Mixing them will damage LEDs. Check your motherboard manual for the header amperage limit, commonly 2 to 3 amps per header, and note the software it uses such as ASUS Aura Sync, Gigabyte RGB Fusion, or MSI Mystic Light. If all headers are occupied, plan to use a SATA-powered controller hub instead.
Step 2: Plan Your Layout Dry – 10 minutes
Before removing any adhesive backing, hold strips in place with painter’s tape to test the look. For even diffusion, most builders place one strip along the top interior edge and a second along the bottom or vertically on the front shroud, keeping LEDs facing inward away from direct eye line. Keep strips at least 0.5 to 1 inch away from fans, RAM latches, and GPU fans, and leave 2 to 3 inches of slack near the header for strain relief. For mid-tower cases (approx. 17 to 19 inches tall) two 19.7-inch strips are usually enough to frame the interior without overlap. Take a quick photo of the planned path so you can replicate it after cleaning.
Step 3: Prep Surfaces and Power Off Completely – 5 minutes
Flip the power supply switch off and hold the case power button for 5 seconds to drain residual power. Wipe mounting surfaces with isopropyl alcohol and let dry for 60 seconds. Good contact prevents the most common failure: strips falling after two weeks. If you are using magnetic strips such as 30 cm bars that weigh about 1.5 to 2.5 ounces each, make sure the mounting area is bare steel. Powder-coated or heavily textured surfaces may need a small adhesive helper strip.
Step 4: Mount the Strips – 10 minutes
Starting from the end closest to the RGB header, peel 3 to 4 inches of adhesive at a time and press firmly for 10 to 15 seconds as you go. Avoid sharp 90-degree bends; instead make a gentle loop with a radius of at least 0.75 inches to prevent LED damage. For magnetic kits, place the bar, then slide slightly to engage the magnet fully. Route the pigtail cable toward the rear cable-management channel, not across the motherboard. If the cable must cross an airflow path, tuck it along the case frame and secure with a clip.
Step 5: Connect Power and Control – 10 minutes
For 12V 4-pin strips, align the arrow on the connector with the 12V pin on the header and press straight down without rocking. The connector should seat flush with no exposed pins. For ARGB 5V 3-pin strips, align the blank pin. If you are daisy-chaining two strips, use a splitter so each strip shares the header evenly rather than stretching one strip’s cable. For hub or remote-controlled magnet kits, connect the SATA power plug from the power supply and the controller’s input, then plug the light bars into the controller outputs. Keep controller boxes in the rear chamber or PSU shroud where they will not trap heat.
Step 6: Cable Management and Clearance Check – 10 minutes
Bundle excess RGB wiring with zip ties and trim tails. Ensure no cable touches fan blades or rests on heatsinks or M.2 drives that can exceed 140 degrees Fahrenheit. Verify that the side panel closes without pinching wires. Manually spin each case fan with one finger to confirm nothing rubs. A clean run typically adds less than 0.25 inches of bulk in the cable channel and keeps the main chamber open for airflow.
Step 7: Test, Sync Software, and Tune – 15 minutes
Reconnect power, boot, and test. For header-connected strips, open your motherboard RGB software and set the strip type correctly (RGB vs ARGB) before changing colors. Start with static white at 50 percent brightness to check for dead LEDs or uneven segments. Then test effects and sync with other components. For remote kits, test all colors and modes with the included 24-key remote from 6 to 10 feet away to confirm the IR receiver is not blocked by tinted glass. Adjust brightness to 60 to 80 percent for daily use, which extends LED life and reduces glare through tempered glass.
Mistakes to Avoid
The most expensive error is plugging a 5V ARGB strip into a 12V header, which can instantly burn out the LEDs and the header fuse. Double-check voltage markings every time. Another common mistake is overloading a single header. Two standard strips at 1.2 watts per foot are usually safe, but adding a third or fourth without a powered hub can exceed the 24 to 36 watt limit of a 2 to 3 amp header. Avoid mounting strips directly over exhaust vents or on the GPU backplate where sustained heat softens adhesive to the point of failure. Do not daisy-chain more strips than the manufacturer rates, even if the connectors physically fit. Finally, do not rely on RGB software from multiple vendors at once. Running two control apps can cause conflicts, so choose one ecosystem and disable the others.
How Often
Once installed correctly, RGB strips need little regular maintenance. Dust the interior every 2 to 3 months with compressed air, holding fans still to avoid overspin, and wipe the strip diffuser gently if color looks dim. Check adhesive or magnetic mounts every 6 months, especially if you move the PC frequently. Re-seat any loose connector and replace zip ties that have become brittle. LEDs are rated for 30,000 to 50,000 hours, so you can expect 3 to 5 years of daily use at moderate brightness before noticeable dimming. If you notice yellowing on white or a single color dropping out, plan for replacement rather than repair.
When to Call a Pro or Replace
Call a technician or experienced builder if you smell burning plastic, see scorch marks near a header, or the system fails to boot after connecting RGB. These signs point to a short or voltage mismatch that can damage the motherboard if you keep troubleshooting powered on. Replace strips if sections stay dark after testing on a known-good header, if the adhesive no longer holds after surface prep, or if flickering continues after swapping cables and updating software. Replace a controller hub if the remote only works intermittently within 2 feet or if it only holds one color regardless of settings. When upgrading to a new motherboard, verify header type again before reusing old strips, as platforms still mix 12V and 5V standards across product lines.
FAQ
What is the difference between 12V RGB and 5V ARGB?
12V RGB uses a 4-pin header and controls the entire strip as one color at a time. 5V ARGB uses a 3-pin header with a blank pin and can control individual LEDs for rainbow and wave effects. They are not interchangeable. Use 12V strips such as the BTF-LIGHTING 19.7-inch 4-pin type for basic Aura Sync, RGB Fusion, or Mystic Light control, and 5V strips only on ARGB headers.
Can I add RGB if my motherboard has no free RGB headers?
Yes. Use a magnet-mounted kit with its own controller that powers from a SATA connector, like a dual 30 cm R Series style kit with a 24-key remote. It operates independently from motherboard software, so you keep lighting even with no spare headers. Just ensure you have an open SATA power lead from your supply and space in the rear chamber for the small controller box, typically about 2.5 x 1.5 x 0.5 inches.
How many RGB strips can I run on one header?
Most headers support 2 to 3 amps, which is roughly 24 watts at 12V or 15 watts at 5V. Two standard 19 to 20-inch strips drawing 4 to 12 watts total are usually safe on one header via a splitter. For three or more strips, large case setups, or high-density LED counts above 30 LEDs per foot, use a powered hub that draws directly from SATA or Molex instead of the header.
Why are my RGB lights not syncing or showing the wrong color?
First, confirm the software is set to the correct header type and that you have not left two RGB apps running. Check that the arrow or notch on the connector aligns with the 12V or 5V pin, as a one-pin offset shifts colors. Update motherboard firmware and RGB software, then do a full shutdown rather than a restart so the controller resets. If the issue persists, test the strip on a different header or controller to isolate whether the strip or the board is at fault.