Many shoppers buy a PC case by looking at the front panel, tempered-glass window, or the number of RGB fans included. Those details matter, but they do not determine whether a system stays cool without becoming distracting. The biggest mistakes are choosing a sealed-looking case for a high-wattage graphics card, assuming more fans always means less noise, and buying a compact chassis before checking GPU, cooler, radiator, and power-supply clearances.
Knowing how to choose a case for airflow and quiet starts with balancing intake area, fan size, component heat output, and practical build space. A well-designed airflow case can be quiet because it allows fans to run at lower speeds. A “silent” case with dense sound-damping panels can become louder if restricted ventilation forces its fans to work harder. For a gaming or work PC in 2026, prioritize an unobstructed front intake, large PWM fans, sensible dust filtration, and enough room to avoid crowding hot components.
As an Amazon Associate we earn from qualifying purchases at no extra cost to you.

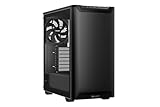
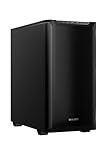

Our Top Picks


Top 3 picks at a glance
Decide These 3 Things First
- Estimate your heat load. A basic office PC with a 65W processor and integrated graphics can work comfortably in most ventilated micro-ATX cases. A gaming PC with a 150W to 250W graphics card needs a substantially more open intake path. For systems with a 300W to 450W GPU and a 125W to 250W CPU, choose a case that supports at least three 120mm or two 140mm front intake fans, plus rear and top exhaust positions.
- Choose your motherboard size. ATX is the mainstream choice for expansion and easier cable routing. Micro-ATX can reduce desk footprint and cost without major compromises. Mini-ITX is compact but demands more attention to cooler height, graphics-card thickness, and cable space. Never assume “mid-tower” means every ATX part will fit.
- Set your noise priority. If the computer will sit on a desk within 2 to 3 feet of you, larger 140mm fans, PWM control, and a mesh front panel are usually better investments than decorative lighting. If it will sit farther away or you use headphones, cooling capacity and upgrade space may deserve more of the budget.
Size and Component Clearance
Case dimensions affect cooling, installation difficulty, and how much room the system takes on your desk. Typical compact micro-ATX cases measure roughly 15 to 18 inches tall and 8 to 10 inches wide. Standard ATX mid-towers commonly measure 17 to 20 inches tall, 8 to 10 inches wide, and 17 to 22 inches deep. Full towers can exceed 22 inches in height and depth, but are unnecessary for most single-GPU builds.
Check internal clearance figures rather than relying on exterior dimensions. A current midrange graphics card can be 300mm to 340mm long; high-end models may reach 360mm to 400mm. Look for at least 20mm to 30mm beyond your card’s stated length, especially if front-mounted fans or a radiator reduce clearance. GPU thickness matters too: many cards occupy 2.5 to 4 slots, so verify that bottom intake fans, capture cards, and vertical-mount hardware will not interfere.
For air cooling, a CPU cooler clearance of 160mm handles many popular tower coolers, while 170mm offers a more comfortable margin. If using liquid cooling, confirm both radiator length and thickness. A 240mm radiator is usually straightforward in an ATX mid-tower; a 360mm radiator plus 25mm fans can require 55mm to 70mm of total clearance and may conflict with motherboard heatsinks or long graphics cards.
The be quiet! Pure Base 501 models are examples of compact ATX-oriented cases in the roughly $90 to $100 range. Their format and included pair of 140mm fans can make sense for builders who want ATX compatibility without stepping up to a large, heavy tower. Still, verify the exact version’s clearance specifications before ordering, particularly if you plan a vertical GPU installation or a front radiator.
Airflow Design and Noise Control
The front panel is the most consequential design choice. A full mesh or generously perforated front panel lets intake fans pull air through with less resistance. This is generally the best option for gaming systems and high-performance workstations. A solid front panel with side vents can work for lower-power systems, but it is less forgiving when components are upgraded later.
Fan diameter matters because larger fans can move useful amounts of air at lower rotational speeds. A 140mm PWM fan running around 600 to 900 RPM is often a good starting point for a quiet desktop. Smaller 120mm fans can also work well, but they may need higher RPM to produce comparable airflow. Avoid setting all fans to a fixed 100% speed; use motherboard fan curves tied to CPU or GPU temperatures.
A sensible baseline layout is two front intakes and one rear exhaust. For higher heat loads, add one or two top exhaust fans. Do not automatically populate every fan mount. More fans can add motor noise, turbulence, cost, and cables. Start with three quality fans, monitor temperatures during real use, and add fans only if needed.
Positive or slightly positive air pressure is often helpful: use a little more intake capacity than exhaust capacity. For example, two 140mm front intakes and one 120mm rear exhaust is a practical arrangement. It encourages air to leave through small openings rather than drawing unfiltered dust inward. Keep front filters clean; a dust-clogged mesh panel can undo the advantage of a strong airflow design.
Materials and Panel Construction
Steel is the standard structural material and is usually preferable to thin plastic for rigidity and long-term durability. A typical steel-and-glass ATX mid-tower weighs about 14 to 22 pounds empty. Heavier is not automatically better, but a case that flexes when you remove the side panel may be frustrating to build in and more prone to vibration.
Tempered glass offers a clean view of components, but it adds weight and can reflect sound back into the case. A solid steel side panel may be a better fit if the PC will live under a desk or if you prefer a more subdued appearance. Acrylic windows are lighter but scratch more easily.
Sound-damping foam can reduce some high-frequency noise, yet it should not be treated as a substitute for airflow. In a low-power office system, padded panels and narrow vents can be effective. In a PC with a 250W-plus graphics card, a mesh-front case with slower fan speeds is usually the quieter real-world choice.
Build Quality, Cable Management, and Everyday Comfort
A quiet case should also be pleasant to assemble and maintain. Look for at least 20mm to 25mm of cable-routing space behind the motherboard tray, several tie-down points, and a power-supply shroud. These features keep cables away from intake paths and make it easier to close the rear panel without force.
Tool-less side panels, captive thumbscrews, removable dust filters, and a removable front panel save time during cleaning. Expect to clean exposed front filters every 1 to 3 months in a home with pets, carpet, or open windows; in a cleaner room, every 3 to 6 months may be enough. Make sure filters can be removed without disconnecting fans or moving the computer.
Front I/O should suit your desk placement. At minimum, look for two USB-A ports and a combined 3.5mm audio jack. A USB-C port is increasingly useful for newer external SSDs, docks, and phones. Some versions of the Pure Base 501 include a USB 3.2 Gen 2 Type-C port, but check the specific model number because front I/O can vary between closely related cases.
Price Tiers and Where Your Money Goes
Budget cases: $55 to $85. Expect steel construction, basic mesh ventilation, one or two included 120mm fans, and limited cable room. These can be excellent for a 65W to 150W CPU paired with a mainstream GPU, but factor in $20 to $45 for one or two additional PWM fans if the included fans are non-PWM or sparse.
Midrange cases: $85 to $140. This is the sweet spot for most builders. Look for two or three included PWM fans, 140mm fan support, better filters, a roomier cable channel, and more reliable panel fit. Cases around $90 to $100, including the referenced Pure Base 501 options, are often strong values when they include two quality 140mm PWM fans rather than low-cost fixed-speed units.
Premium cases: $150 to $280. Higher prices should buy a distinctive layout, thicker panels, more refined cable management, better radiator support, or exceptionally easy access—not merely extra glass and lighting. Spending above $200 is most justified for custom liquid cooling, multiple storage drives, very large GPUs, or a specific compact form factor.
Warranty, Support, and Replacement Parts
A case has no processor or graphics chip to fail, but warranty coverage still matters for front-panel USB boards, power buttons, fan hubs, glass panels, and included fans. A 2-year warranty is common; 3 years or more is a reassuring sign, especially on a premium chassis. Read whether the warranty covers included fans separately and whether shipping costs apply to replacement parts.
Also check whether the manufacturer sells replacement dust filters, glass panels, drive trays, and vertical GPU brackets. A broken glass panel or lost drive sled should not force you to replace an otherwise good $100 to $200 case. Keep your receipt, serial number, spare screws, and unused brackets in one labeled bag.
Delivery, Assembly, and Placement
Most mid-towers arrive in cartons weighing roughly 20 to 30 pounds. Inspect the box before building, especially if it contains tempered glass. Photograph visible damage, check that the glass panel is intact, and confirm that accessory boxes and preinstalled fans are present before discarding packaging.
For assembly, allow a clear 3-by-4-foot work surface and 2 to 4 hours for a first complete build. Install the CPU, memory, and primary M.2 SSD on the motherboard before mounting it in the case. Route the CPU power cable before installing a top radiator or top exhaust fans, since that connector can become difficult to reach afterward.
Place the finished PC on a hard, stable surface whenever possible. Thick carpet can restrict bottom power-supply intake and collect dust. Leave at least 4 to 6 inches of open space in front of a mesh intake and 3 inches behind the rear exhaust. A case pushed tightly into a cabinet will run warmer and often louder.
Spec Checklist
| Spec | Budget | Mid | Premium |
|---|---|---|---|
| Typical price | $55-$85 | $85-$140 | $150-$280 |
| Front intake | Mesh preferred; 2 x 120mm support | Open mesh; 2 x 140mm or 3 x 120mm | High-flow mesh or engineered venting |
| Included fans | 1-2, often 120mm | 2-3 PWM fans, ideally 140mm capable | 3-5 quality PWM fans or premium fan support |
| GPU clearance | 300-330mm minimum | 340-380mm minimum | 380mm+ or flexible layouts |
| CPU cooler clearance | 155-160mm | 165-170mm | 170mm+ or broad radiator support |
| Cable space | 15-20mm | 20-25mm | 25mm+ with channels and covers |
| Best for | Office and mainstream gaming | Most gaming and creator PCs | High-end parts and custom cooling |
Red Flags
- A solid front panel with only thin side slits for a PC using a 250W or higher GPU.
- Only one preinstalled exhaust fan in a case marketed for gaming.
- No stated GPU length, CPU cooler height, or radiator thickness clearance.
- Front USB-C advertised without confirming the required motherboard header is available.
- Tempered glass shipped with no clear replacement-part policy.
- A “quiet” claim paired with fixed-speed fans and restricted intake vents.
- Vertical GPU support that does not include adequate spacing from the glass panel or a compatible riser cable.
FAQ
Is a mesh case always louder than a closed case?
No. Mesh exposes internal sound more directly, but it also reduces airflow resistance. With a good fan curve, a mesh case often lets fans run slower and can be quieter under gaming or rendering loads than a closed case with hotter components.
How many fans do I need for a quiet gaming PC?
For most systems, start with two front intake fans and one rear exhaust fan. Use 140mm PWM fans where supported. Add top exhaust only if CPU or GPU temperatures remain higher than you want during sustained workloads.
Should I choose a 120mm or 140mm fan case?
Choose 140mm support when possible. A case that accepts two 140mm front fans is versatile and often quieter at comparable cooling levels. However, a well-designed 120mm-only mesh case is still better than a poorly ventilated case with larger fan mounts.
Do I need a full tower for a powerful graphics card?
Usually not. Many ATX mid-towers support 340mm to 400mm graphics cards and 360mm radiators. Buy a full tower only when you need extensive liquid cooling, many drives, multiple expansion cards, or unusually large components.