As a home design and furniture specialist, I often see enthusiasts focus entirely on their digital parts list while completely ignoring the physical space where the actual assembly happens. Knowing how to prepare work area for first pc build is just as critical as selecting the right processor or graphics card. If you skip this step, a highly anticipated project can quickly turn into an expensive nightmare.
What exactly goes wrong when you build in a poorly prepared space? For starters, you risk scratching a costly dining table with a sharp metal chassis edge or losing a crucial 3mm M.2 screw in a high-pile carpet. More seriously, assembling a heavy, 35-pound computer on a low, cramped coffee table will leave you with severe back strain. Worst of all, a single spark of electrostatic discharge (ESD) from a synthetic rug can instantly ruin a delicate motherboard or a graphics card. Taking the time to curate, clean, and organize your environment protects your financial investment and ensures a smooth, stress-free building process.
As an Amazon Associate we earn from qualifying purchases at no extra cost to you.


Our Top Picks

What You Need
Before you begin unboxing your hardware, you need to gather the right workspace tools and protective gear. Having these items organized beforehand prevents you from scrambling mid-build with sensitive components exposed on your desk.
| Item | Why You Need It | Optional? |
|---|---|---|
| Large wooden or MDF table | Provides a stable, non-conductive surface. Minimum recommended dimensions are 48 inches wide by 24 inches deep. | No |
| Phillips #2 magnetic screwdriver | The universal tool for PC building. The magnetic tip keeps tiny screws from falling into deep chassis crevices. | No |
| Anti-static wrist strap or mat | Safely grounds you to prevent static electricity from frying sensitive microchips. Mats typically cost $20 to $35. | Yes (But highly recommended) |
| Magnetic parts tray or small cups | Keeps case screws, motherboard standoffs, and drive mounts sorted and prevents them from rolling away. | Yes (Can substitute clean ceramic bowls) |
| Bright desk lamp (800–1,200 lumens) | Illuminates dark corners inside the computer case, helping you read tiny front-panel header labels. | No |
| Cable ties or Velcro straps | Essential for securing loose wiring to ensure optimal airflow and a clean aesthetic. | Yes |
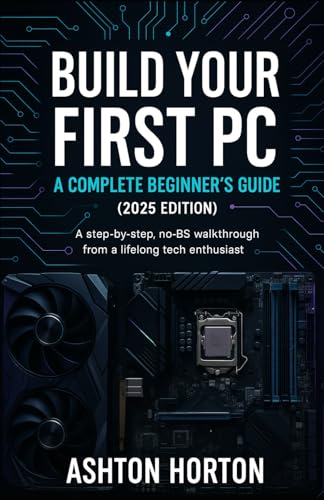
| Build Your First PC: A Complete Beginner’s Guide | A step-by-step, no-BS walkthrough handbook from a lifelong tech enthusiast. Priced at around $14. | Yes |
| Build Your First PC: The Complete Beginner’s Handbook | An incredibly detailed reference guide covering hardware compatibility and setup. Priced at around $19. | Yes |
Step-by-Step Workspace Preparation
Preparing your workspace is a sequential process. Follow these steps to transform any standard room into a safe, efficient, and comfortable assembly station.
Step 1: Select and Position Your Work Surface (Time: 10 Minutes)
Choose a spacious, solid table or desk located in a non-carpeted room, such as a space with hardwood, laminate, or vinyl flooring. Your work surface should be at least 30 inches off the ground to prevent back strain. Ensure you have 360-degree access to the table, or at least enough clearance to easily spin a heavy computer chassis around without hitting walls. If you must use a dining table with a delicate wood veneer, lay down a large, clean, lint-free cotton sheet or a dedicated anti-static building mat to protect the finish from scratches.
Step 2: Clear and Clean the Area (Time: 10 Minutes)
Remove all unnecessary items from the table, including food, drinks, decorative objects, and loose paperwork. Vacuum or dust the surface thoroughly. Dust particles can find their way into the wet thermal paste or settle on exposed circuit boards during the build. Ensure there are no liquids nearby; even a small condensation ring from a water glass can damage bare electrical contacts.
Step 3: Establish Your Anti-Static Defense (Time: 5 Minutes)
Static electricity is the silent killer of computer components. If you are using an anti-static mat, roll it out flat and connect its grounding clip to a metal portion of your computer case (with the power supply installed but turned off and plugged into a grounded outlet). If you are using an anti-static wrist strap, wrap it snugly around your wrist and attach the alligator clip to an unpainted metal surface of the computer chassis. Avoid wearing wool sweaters, socks on carpet, or synthetic fabrics while setting up your station.
Step 4: Set Up Lighting and Power (Time: 10 Minutes)
Position your desk lamp so that it casts direct light into the interior of the PC case. Shadows inside a dark chassis make it incredibly difficult to align the motherboard with its standoffs or plug in tiny 2-pin power switch cables. Next, run an extension cord or surge protector to your work area. You will need a reliable, grounded power outlet nearby to test the system once the core components are assembled.
Step 5: Unbox and Stage Your Components (Time: 15 Minutes)
Place your PC components (motherboard, CPU, graphics card, power supply, RAM, and storage) on a secondary table or nearby shelf. Do not open the anti-static bags yet. Group your tools, screws, and zip ties in your magnetic parts tray. Keep your instructional books, such as Build Your First PC: A Complete Beginner’s Guide, open to the reference pages right at the edge of your workspace for easy, hands-free reading.
Mistakes to Avoid
- Building on Carpet: Walking across carpet generates thousands of volts of static electricity. Always build on hard flooring, or stand on a hard plastic chair mat if your room is fully carpeted.
- Placing Tempered Glass on Tile: Never place your case’s tempered glass side panel directly on ceramic, porcelain, or stone tile floors. The localized thermal and physical stress can cause the glass to instantly shatter into thousands of pieces. Always rest glass panels on a soft towel or cardboard box.
- Using the Wrong Screwdriver: Avoid using a screwdriver that is too small or too large. Stripping a tiny M.2 solid-state drive screw (typically an M2x3mm screw) can permanently trap your drive or ruin the motherboard threads.
- Cluttering the Build Path: Do not open all your component boxes at once. Unbox only what you are currently installing to keep your workspace organized and free of cardboard clutter.
How Often to Prepare and Maintain Your Workspace
Workspace preparation is a project-based task that you should perform every time you assemble a new system or conduct major hardware upgrades. However, a clean environment is also vital for ongoing maintenance. You should clear your desk and wipe down your PC area every 6 to 12 months to perform deep cleaning, such as blowing out accumulated dust from the intake filters and graphics card fans with compressed air. Keeping a clean desk year-round prevents dust from migrating into your system’s 750W or 850W power supply, extending the lifespan of your components.
When to Call a Pro or Replace Your Setup
While building a PC is a highly rewarding DIY project, there are times when you should step back and seek professional help or replace your workspace gear. If you have physical limitations that make lifting a heavy, 40-pound full-tower chassis unsafe, or if you lack a stable, flat surface to work on, ask a friend or professional to assist with the physical assembly.
Additionally, if you accidentally bend the delicate CPU socket pins on your motherboard during installation, do not attempt to fix them with crude household tools. This requires microscopic precision; in this scenario, it is best to take the board to a professional repair technician or replace it entirely. Finally, inspect your tools before starting. If your Phillips #2 screwdriver has a worn, rounded tip, replace it with a high-quality, hardened steel magnetic screwdriver (usually costing $10 to $15) to avoid stripping expensive hardware.
FAQ
Can I build my PC on a cardboard box?
Yes. In fact, using the cardboard box that your motherboard shipped in as a temporary “test bench” is a highly recommended industry practice. Placing the motherboard on top of its cardboard box allows you to safely install the CPU, RAM, M.2 SSD, and CPU cooler before mounting the entire assembly inside the metal computer case.
Do I absolutely need an anti-static wrist strap?
While modern computer hardware is more resilient to static shocks than older components, an anti-static wrist strap is cheap insurance. If you choose not to use one, you must ground yourself frequently by touching a bare metal portion of your computer case while it is plugged into a grounded, turned-off power supply. Avoid wearing static-prone clothing like fleece or wool.
How much physical desk space do I actually need to build a PC?
You need a minimum flat surface area of 4 feet by 2 feet (8 square feet). This provides enough room to lay the computer case flat on its side, place the motherboard box next to it for pre-assembly, and leave a dedicated zone for your tools, screws, and instruction manuals without feeling cramped.
What should I do if I drop a screw inside the power supply unit?
Never turn on the power supply or plug it in if a screw falls inside. A loose metal screw can cause a catastrophic short circuit, destroying the unit and potentially other parts. Gently unplug the power supply, remove it from the case, and tilt it back and forth until the screw falls out. Never open the metal casing of the power supply itself, as the internal capacitors hold lethal electrical charges even when unplugged.
As we look forward to the innovative hardware releases scheduled through 2026, components are becoming more powerful, heavier, and physically larger. Taking the time to properly prepare your work area ensures that your first PC build is a safe, organized, and ultimately successful venture.