
A custom loop or AIO liquid cooler keeps your CPU and GPU running quiet and cool, but only if you maintain it. Skip maintenance and you will see higher CPU temperatures, louder fans, and eventually cloudy coolant, corrosion, or slow leaks. In a custom gaming PC, even a small air bubble or dust-clogged radiator can raise coolant temps by 8 to 15 degrees Celsius, force your fans to run at 100 percent, and put unnecessary stress on the pump, tubing, and fittings. Worse, old coolant can leave residue that clogs micro-fins in the CPU block and reduces flow to a trickle. Regular upkeep takes less than an hour every few months and protects hundreds of dollars in hardware.
Our Top Picks


What You Need
| Item | Why | Optional? |
|---|---|---|
| Lint-free microfiber cloths and cotton swabs | Clean radiators, fittings, and reservoirs without leaving fibers that can clog blocks | No |
| Soft-bristle brush or compressed air can (30 to 70 PSI) | Removes dust from radiator fins and fans without bending fins | No |
| Distilled water (1 to 2 liters, costs $2 to $5) | For flushing and rinsing loops; tap water causes mineral buildup and corrosion | No |
| Replacement coolant such as CORSAIR Hydro X Series, XL8, Performance Coolant, 1L, Translucent Purple | Premixed coolant with biocide and anti-corrosion additives; typical price $18 to $25 per liter | No for custom loops; Yes for sealed AIOs |
| Small funnel, drain bowl, and paper towels | Catches and directs coolant during draining to prevent spills on the PSU or GPU | No for custom loops; Yes for AIO external cleaning only |
| Isopropyl alcohol 90%+ and nitrile gloves | Cleans thermal paste and sanitizes fittings safely | No |
| Screwdrivers (Phillips #1 and #2) and paper or digital notepad | Remove panels, fans, and document tube routing before disassembly | No |
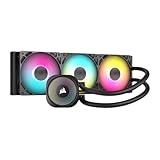
| Replacement AIO unit such as CORSAIR Nautilus 360 RS ARGB Liquid CPU Cooler – 360mm AIO – 397mm x 120mm x 27mm radiator, 3x 120mm RS120 ARGB fans | Reference for full replacement if pump fails or loop is beyond service; typically priced $95 to $160 for a 360mm AIO | Yes |
Step-by-Step
Step 1: Power Down and Prepare Your Workspace — 10 minutes
Shut down Windows, flip the power switch on your PSU to off, and unplug the power cable from the wall. Press and hold the case power button for 5 seconds to discharge residual power. Move the PC to a well-lit table with room to lay it on its side. Put on nitrile gloves and lay paper towels under the case. If your loop has a drain valve, position a bowl (at least 1.5 liter capacity) directly beneath it. Take photos of your tubing runs, fan orientation, and RGB connections before you touch anything. For a standard mid-tower weighing 25 to 45 pounds fully built, get help lifting to avoid stressing fittings.
As an Amazon Associate we earn from qualifying purchases at no extra cost to you.

Step 2: External Dust Removal — 10 to 15 minutes
Remove the side panels, front panel, and dust filters. Use short bursts of compressed air to blow dust from the radiator fins, fans, and case filters. Hold fans still with a finger so they do not spin freely and generate voltage. Brush stubborn dust from between radiator fins with a soft brush. For a 360mm radiator, you will clean three 120mm fan slots and about 396mm of fin length. Do not use a vacuum directly on components. Wipe filters with a damp microfiber cloth and let them dry completely. This step alone often drops idle coolant temperature by 3 to 6 degrees Celsius.
Step 3: Inspect the Entire Loop for Leaks and Wear — 10 minutes
With good lighting, trace every fitting, tube, and block. Look for white or green crust at compression fittings, damp spots around the pump and reservoir, discoloration in soft tubing, and bulging or cracking near bends. Gently wiggle soft tubing at fittings; it should not rotate easily. For hardline tubing, check for hairline cracks near bends. Check coolant level in the reservoir; it should be within 10mm of the full line. If you see cloudy, separated, or particle-filled coolant, plan to flush. Listen for pump noise before draining; a healthy pump hums at 1800 to 2800 RPM, while grinding or clicking suggests air or bearing wear.
Step 4: Drain the Loop (Custom Loops Only) — 15 to 20 minutes
For sealed AIOs like the CORSAIR Nautilus 360 RS ARGB, skip to Step 6. AIOs are not designed to be opened or refilled by the user. For custom loops, place your drain bowl, open the drain valve or remove the lowest plug, and open the fill port at the top of the reservoir to let air in. Let gravity drain for 5 to 10 minutes. Tilt the case slowly forward and side to side to help fluid exit. Collect all fluid and measure it; a typical CPU-only custom loop holds 0.6 to 1.2 liters. If you are switching coolant colors, keep draining until the stream stops completely. Dispose of old coolant according to local regulations and never pour it down the sink.
Step 5: Flush and Refill with Fresh Coolant — 20 to 25 minutes
Close the drain and add distilled water through the fill port using a funnel until the reservoir is three-quarters full. Run the pump briefly by jumping the PSU or using the motherboard pump header at low speed for 30 seconds to circulate water, then drain again. Repeat once if the water comes out discolored. For the final fill, slowly pour in premixed coolant such as CORSAIR Hydro X Series XL8. Fill the reservoir to about 90 percent, run the pump for 15 seconds, stop, and top off. Repeat until the level stabilizes and no large bubbles appear. Most loops need 1 to 2 bottles (1 to 2 liters) depending on radiators and reservoir size. Do not mix different coolant brands or add tap water. Leave a 5 to 10mm air gap at the top of the reservoir to allow for expansion.
Step 6: Bleed Air and Check Flow — 15 minutes
With the fill port loosely capped, run the pump at 50 to 70 percent speed. Tilt the case gently at 15 to 30 degree angles front to back and side to side to move trapped air toward the reservoir. You will see bubbles rising for 5 to 10 minutes. Tap tubing lightly if bubbles cling to the walls. For AIOs, this bleeding happens automatically; simply run the PC with the radiator above the pump for 10 minutes to let air collect in the radiator end tank. Top off the reservoir one last time once bubbles stop. Ensure flow is steady and the coolant is moving visibly.
Step 7: Reassemble, Boot, and Monitor — 10 minutes
Dry any spills thoroughly with lint-free cloths. Reinstall fans with correct airflow direction, usually intake through the radiator and exhaust through the top or rear. Reconnect all fan and pump headers; the Nautilus 360 RS ARGB, for example, uses a direct motherboard connection with daisy-chain fan cabling to reduce clutter. Reinstall panels and filters. Plug in, power on, and enter BIOS to confirm pump RPM reads between 2000 and 3000 and fan RPM responds to temperature. Boot into Windows and use hardware monitoring software to watch coolant or CPU package temperature for 10 minutes at idle. Idle temps should settle to 28 to 40 degrees Celsius depending on ambient temperature, and coolant should stay below 45 degrees Celsius under gaming load. Check again for leaks with paper towels under fittings after one hour of use.
Mistakes to Avoid
Do not use tap water or automotive antifreeze. Both contain minerals and additives that damage nickel plating and acrylic. Do not overtighten compression fittings; hand-tight plus a quarter turn is enough, overtightening cracks acrylic tops and strips threads. Do not run the pump dry for more than a few seconds; it relies on liquid for lubrication and cooling and can overheat in under 20 seconds without fluid. Do not mix metals without inhibitor; aluminum and copper in the same loop without proper coolant will cause galvanic corrosion in months. Do not ignore a slow drop in reservoir level. Losing more than 10mm per month without visible leak often means evaporation through soft tubing or a pinhole leak that will worsen. Finally, do not block radiator airflow with thick front panels or push the case against a wall. Maintain at least 2 to 3 inches of clearance for intake and exhaust.
How Often
For both AIOs and custom loops, dust radiators and filters every 4 to 8 weeks if your PC sits on the floor or in a carpeted room, and every 8 to 12 weeks if it is on a desk in a low-dust environment. Visually inspect tubing, fittings, and coolant clarity every 3 months. Replace custom loop coolant every 9 to 12 months, or sooner if it turns cloudy, changes color, or shows particles. Soft tubing should be inspected yearly and typically replaced every 2 to 3 years as it can leach plasticizer and become cloudy. Pump and fan bearings last 40,000 to 70,000 hours, which is roughly 4 to 7 years of typical gaming use at 4 to 6 hours per day, but replace them at the first sign of persistent grinding or failure to start. As of 2026, most coolants include longer-life biocides, but annual replacement remains the safest schedule for clear tubing and micro-fin blocks.
When to Call a Pro or Replace
Call a professional or consider replacement if you see active dripping, corrosion flakes in the reservoir, or a pump that does not spin despite correct power and BIOS settings. If CPU temperatures spike above 95 degrees Celsius under light load or coolant stays above 50 degrees Celsius at idle, stop using the PC and have the loop serviced. A sealed AIO cannot be serviced internally without voiding warranty, so replace the entire unit if the pump fails, if you hear loud rattling, or if you notice performance loss after 4 to 5 years. When choosing a replacement, match radiator size to case support; a 360mm AIO needs about 400mm of clearance and three 120mm fan mounts, weighs about 2.1 to 2.8 pounds with fans, and draws 5 to 15 watts for the pump plus 3 to 6 watts per fan. For custom loops, a shop can pressure-test the loop at 0.3 to 0.5 bar to find leaks without risking hardware.
FAQ
Do I need to refill or flush an AIO liquid cooler?
No. A sealed AIO like the CORSAIR Nautilus 360 RS ARGB is designed as a closed system and does not require draining or refilling. Your maintenance is limited to dusting the 360mm radiator and three fans, checking tubes for kinks or abrasion, and monitoring temperatures. If coolant has evaporated enough to cause gurgling or high temperatures after several years, replace the whole AIO rather than trying to open it.
What coolant should I use in a custom loop?
Use a premixed coolant made for PC liquid cooling, such as a clear or colored performance coolant that already contains biocide and corrosion inhibitors. Avoid distilled water alone for long-term use unless you add a compatible biocide and inhibitor separately, and never use tap water. Expect to pay $15 to $25 per liter, and buy 2 liters if you have two radiators or a large reservoir so you have extra for topping off.
How do I know if my pump is failing?
Signs include a steady rise in CPU temperature of 10 degrees Celsius or more with no dust buildup, a pump RPM reading of zero in BIOS, loud grinding or high-pitched whine, and no visible flow or bubbles moving in the reservoir. Check power connections first and set the pump header to 100 percent or PWM mode in BIOS. If the pump still does not run, replace it before gaming again to avoid overheating.
Can I keep my PC running while I clean the radiator?
No. Always power off, unplug, and discharge the system before removing panels or blowing out dust. Compressed air can spin fans fast enough to damage bearings, and dislodged dust can short components if the system is live. After any internal work that involves draining or tilting, wait 10 minutes and double-check for leaks before applying power.
Related guides
- Best Gaming PC for Fortnite: Eight Prebuilt Desktops Sorted by Refresh Rate Goal (2026)
- Best RX 9070 XT Prebuilt Gaming PCs: Seven Desktops and Three Cards Compared: 10 Compared (2026)
- CyberPowerPC vs iBUYPOWER Gaming PC: How the Two Brands Compare
- Best RX 9070 XT Prebuilt Gaming PC (2026): 5 Picks Compared









