Small PC cases make CPU cooling less forgiving. The most common mistake is buying a cooler based on its reputation or price, then discovering it is 5 mm too tall for the side panel, blocks the memory slots, or turns a compact build into a noisy heat box. Another frequent error is treating every “120 mm tower cooler” as interchangeable. Two coolers with the same fan size can differ substantially in total height, fin-stack depth, RAM clearance, socket mounting, and the amount of heat they can reasonably handle.
The right choice is not necessarily the biggest cooler that fits. In a small case, the best result usually comes from matching the cooler to the case’s exact clearance, the processor’s realistic power draw, and the airflow available around the socket. In 2026, compact cases range from slim console-style enclosures with 47 mm cooler limits to small towers that accept full 155 mm air coolers, so measuring matters more than category labels.
As an Amazon Associate we earn from qualifying purchases at no extra cost to you.
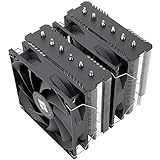
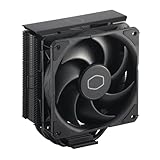
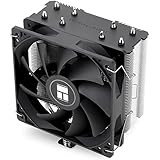
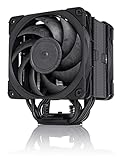
Our Top Picks
 Cooler Master Hyper 212 Black CPU Air Cooler4 Heat Pipes4.7 x 3.1 x 6.3 inches1.54 poundsCheck on Amazon
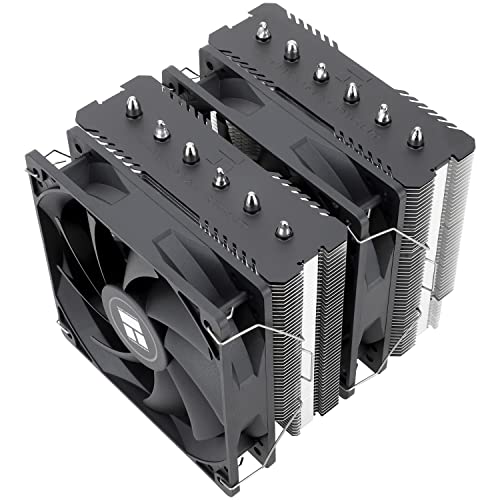


Top 3 picks at a glance
Decide These 3 Things First
- Find the case’s CPU cooler height limit. Look in the case manual or product specifications for “maximum CPU cooler height.” Record that number in millimeters. Do not assume a case that supports a 160 mm cooler will comfortably accommodate one listed at 160 mm; leave at least 3 to 5 mm of margin for panel tolerances, side-panel insulation, and fan adjustments.
- Estimate your CPU’s real heat output. A 65 W processor can often work well with a compact 92 mm tower or a 120 mm single-tower cooler. CPUs that regularly use 125 to 200 W under sustained workloads generally need a larger 120 mm tower, dual-tower cooler, or a compatible liquid cooler. Manufacturer base power figures are useful, but peak turbo power and motherboard power settings matter more.
- Choose air cooling or liquid cooling based on the case layout. Air coolers are simple, durable, and often quieter at modest loads. A 240 mm all-in-one liquid cooler can make sense in a short case that cannot fit a tall tower, but only if the radiator location, tube routing, and GPU clearance all work together.
Size and Clearance: Start With Millimeters, Not Marketing
CPU cooler height is the decisive measurement in most small cases. Measure from the motherboard surface around the CPU socket to the inside of the closed side panel, or use the case manufacturer’s stated maximum. A cooler listed at 154 mm tall should be treated as a poor fit in a case with a 155 mm limit. Aim for a cooler that is at least 3 mm shorter than the limit; 5 to 10 mm is even safer when using tempered glass panels.
Common air-cooler sizes include low-profile models from roughly 37 to 70 mm tall, compact tower models around 120 to 135 mm tall, and standard 120 mm towers at approximately 150 to 158 mm tall. For perspective, the Thermalright Peerless Assassin 120 SE is about 155 mm tall, while the Cooler Master Hyper 212 Black is typically about 159 mm tall. Either can be excellent in a compact tower, but neither belongs in a case limited to 145 or 150 mm.
Also check width and depth. A dual-fan tower may be 125 to 135 mm wide and 110 to 140 mm deep. This can interfere with tall memory modules, motherboard heatsinks, or the first PCIe slot in unusually tight layouts. Standard memory sticks are often 31 to 35 mm tall; RGB modules can reach 42 to 55 mm. If the front fan needs to sit higher to clear tall RAM, the total cooler height may increase by 5 to 20 mm.
Material and Construction: What the Cooler Is Actually Made Of
Most capable air coolers use aluminum fins, copper heat pipes, and a copper or nickel-plated copper contact plate. Aluminum is lightweight and forms the large fin stack that sheds heat into the case airflow. Copper transfers heat efficiently from the CPU into the heat pipes, which is why even affordable coolers commonly use four copper heat pipes.
For a modest 65 W processor, a four-heat-pipe cooler is often enough if the case has a sensible intake and exhaust path. The Thermalright Assassin X120 Refined SE, for example, uses a four-heat-pipe tower design and is priced around $18 to $25. That is the type of cooler that can offer a substantial improvement over many stock coolers without taking over the entire case.
For higher-power processors, look for six heat pipes or a larger fin surface area. The Peerless Assassin 120 SE uses six heat pipes and two 120 mm fans, typically selling around $35 to $45. More heat pipes are not an automatic guarantee of better performance, but they generally indicate a cooler built for heavier sustained loads. Inspect the mounting hardware, too. A firm metal backplate, captive mounting screws, and clear socket-specific brackets are better signs than a flimsy push-pin system.
Cooling Performance and Noise: Match the Cooler to the Workload
A small case has less air volume and often fewer fan positions, so CPU cooler performance depends heavily on the entire system. A cooler cannot keep recycling its own warm exhaust. Ideally, a compact case should have at least one intake fan and one exhaust fan, commonly 92 mm or 120 mm. In a larger small-form-factor case, two 120 mm intakes plus one 120 mm exhaust is a strong starting layout.
For everyday browsing, office work, and light gaming, prioritize low noise and physical fit. A slim 92 mm fan can be appropriate for a lower-power CPU, though it may need to spin faster than a 120 mm fan. For gaming, content creation, code compilation, or long rendering sessions, a 120 mm PWM fan is generally the more comfortable choice because it can move useful air at lower speeds.
Look for PWM fans with a controlled speed range rather than a fixed-speed fan. Many 120 mm CPU fans operate somewhere between roughly 300 and 1,500 RPM, while performance-oriented models may reach 1,800 RPM or more. Higher maximum speed offers thermal headroom, but it can become audible in a desktop placed nearby. A dual-fan cooler is not always quieter: it may reduce the need for extreme fan speed under load, but it also adds another noise source and more space conflicts.
If your processor is allowed to draw 150 W or more during sustained work, do not select a low-profile cooler merely because it technically supports the socket. Consider reducing power limits, improving case ventilation, choosing a larger compatible tower cooler, or using a 240 mm radiator if the case supports one.
Price Tiers: Spend Where It Solves a Real Problem
Budget: about $18 to $35. This tier includes capable four-heat-pipe single-tower models. They are a practical choice for 65 W-class processors and many midrange gaming builds with reasonable airflow. The Thermalright Assassin X120 Refined SE is an example of the value-focused approach. Expect simpler finishes, one fan, and fewer accessories, but not necessarily poor mounting hardware.
Midrange: about $35 to $70. Here, you can find larger single-tower coolers, dual-fan configurations, and some dual-tower designs. The Thermalright Peerless Assassin 120 SE, at roughly $34, often falls at the entry edge of this category despite its dual-tower layout. This tier makes sense when a case can accept around 155 mm of cooler height and the processor benefits from greater sustained cooling capacity.
Premium: about $90 to $130. Premium air coolers emphasize refined mounting systems, high-quality fans, finish, accessories, and long-term support. The Noctua NH-U12A chromax.Black, commonly around $120, is a compact high-performance tower option, but buyers should still compare its dimensions against the case and RAM layout. Paying more does not override a 145 mm height restriction.
The Cooler Master Hyper 212 Black, at around $42, sits in the affordable-to-midrange area. Its familiar single-tower format can be a good fit, but its approximately 159 mm height means it should be selected only for cases with sufficient headroom.
Warranty, Support, and Long-Term Ownership
A CPU air cooler has no pump and few failure points, but the fan and mounting hardware still matter. Look for a warranty of at least 2 years; 5 to 6 years is especially reassuring for a premium model. More importantly, verify that the manufacturer provides updated mounting kits for current and future CPU sockets. A cooler may physically last 8 to 10 years, but it is less useful if an upgrade requires a bracket that is unavailable.
Check whether replacement fans use standard 120 mm mounting holes and a standard 4-pin PWM connector. A standard fan is easier to replace than a proprietary unit. For a small case, confirm that a replacement fan will not be thicker than the original. Most standard fans are 25 mm thick, while slim fans are commonly 15 mm thick.
Delivery, Assembly, and Installation Reality
Before ordering, compare the cooler’s packaged specifications with your actual components: case, motherboard socket, RAM height, and top PCIe slot position. Delivery errors are expensive in compact builds because a cooler that is only a few millimeters too tall is unusable, not merely inconvenient.
Installation is easier if the case has a motherboard-tray cutout behind the CPU socket. Without one, you may need to remove the motherboard to install the backplate. Plan on 30 to 60 minutes for a first installation, including cleaning the CPU, applying thermal paste, routing the fan cable, and checking clearances before closing the panel.
Use a pea-sized dot of thermal paste for most modern desktop CPUs unless the cooler manufacturer specifies another pattern. Tighten mounting screws gradually in an alternating pattern. After the first boot, confirm that the CPU fan is connected to the motherboard’s CPU_FAN header and that the fan curve is not set to run at maximum speed all the time.
Spec Checklist
| Spec | Budget | Mid | Premium |
|---|---|---|---|
| Typical price | $18–$35 | $35–$70 | $90–$130 |
| Typical design | Single tower or low profile | Large single tower or dual tower | Refined single/dual tower |
| Heat pipes | 4 | 4–6 | 6–7 |
| Fan configuration | One 92 mm or 120 mm PWM fan | One or two 120 mm PWM fans | One or two premium 120 mm fans |
| Typical height | 47–155 mm | 135–158 mm | 125–160 mm |
| Best use | Lower-power CPUs and tight budgets | Gaming and sustained mainstream workloads | Noise-sensitive or long-term builds |
| Warranty target | 2 years or more | 3 years or more | 5–6 years preferred |
Red Flags
- A cooler height exactly equal to your case’s stated maximum.
- Claims of broad socket compatibility without a clearly listed mounting kit for your specific socket.
- A front-mounted fan that will sit directly over 45 mm or taller RAM without documented clearance.
- Only one case fan, especially when pairing a high-power CPU and a hot graphics card in a small enclosure.
- A low-profile cooler chosen for a processor that regularly consumes more than 125 W in sustained workloads.
- A used cooler missing its backplate, screws, brackets, or fan clips.
- A liquid cooler purchase based only on radiator size, without checking radiator thickness, fan thickness, and tube clearance.
FAQ
How much clearance should I leave above a CPU cooler?
Leave at least 3 to 5 mm below the case’s listed maximum cooler height. A 10 mm buffer is ideal when possible, especially with tempered glass side panels or a front fan that may need to move upward for RAM clearance.
Is a 120 mm tower cooler too large for a small case?
Not necessarily. Many compact micro-ATX and mini-ITX tower cases accept coolers between 150 and 160 mm tall. The issue is not the 120 mm fan itself; it is the cooler’s total height, width, and depth after accounting for RAM and side-panel clearance.
Can I use a dual-tower cooler in a mini-ITX build?
Yes, if the case supports its height and the motherboard layout leaves room around the socket. Check RAM clearance, the distance to the graphics card, and whether the front fan will overhang tall memory. A dual-tower cooler around 155 mm tall is often better suited to a compact tower than an ultra-small console-style case.
Should I choose an air cooler or a 240 mm liquid cooler for a small case?
Choose an air cooler when the case supports a suitable tower and you want simple installation, fewer moving parts, and easy maintenance. Choose a 240 mm liquid cooler when the case has a well-positioned radiator mount but lacks tower-cooler height, or when your CPU has sustained high power demands. In either case, verify the full clearance stack: radiator, fans, motherboard heatsinks, RAM, GPU, and tubes.