The best heat presses for t shirts are the Cricut EasyPress 3 for occasional home use, a 15-by-15-inch automatic press such as the HTVRONT Auto Heat Press for small-batch production, and the Stahls’ Hotronix Fusion IQ or Geo Knight DK20S for demanding daily work.
As an Amazon Associate we earn from qualifying purchases at no extra cost to you.



Our Top Picks

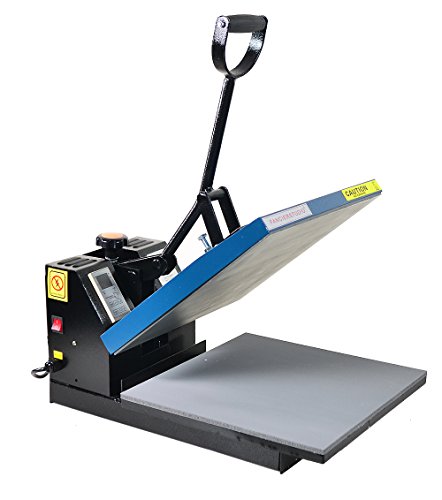

Top 3 picks at a glance
Quick comparison
| Model or class | Platen size | Best for | Pressure adjustment | Typical market range | Workspace requirement |
|---|---|---|---|---|---|
| Cricut EasyPress 3 | 12 x 10 inches | Beginners, occasional shirts, apartments | Manual downward pressure | Usually $150–$250 | Small footprint; store vertically |
| HTVRONT Auto Heat Press | 15 x 15 inches | Home businesses and repeated shirt orders | Automatic pressure setting | Usually $250–$400 | Needs front clearance for the sliding platen |
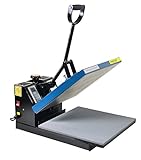
| Manual 15 x 15-inch clamshell press | 15 x 15 inches | Low-cost small-batch production | Adjustable knob or screw | Usually $180–$350 | Sturdy table and overhead clearance |
| Stahls’ Hotronix Fusion IQ | 16 x 20 inches | Frequent production and mixed garments | Digital pressure control | Usually $2,000–$3,000 | Large, heavy workstation |
| Geo Knight DK20S | 16 x 20 inches | Professional shops and long service life | Adjustable mechanical pressure | Usually $2,000–$3,500 | Dedicated production area recommended |
What matters most when choosing a T-shirt heat press
Platen size
A 12-by-10-inch platen is large enough for most adult front designs, provided the artwork is narrower than the platen. It is also easier to carry and requires less table space. The limitation appears when you press oversized graphics, youth and adult garments in the same workflow, or designs that need multiple placements.
A 15-by-15-inch platen is the practical middle ground for small-batch shirt making. It covers most standard adult graphics in one press and gives you room to position transfers without repeatedly reheating adjacent sections. A 16-by-20-inch platen is more useful for large graphics, jacket backs, hoodies, teamwear, and commercial production, but it adds substantial weight, cost, and power demand.
Do not choose a platen solely by shirt size. Measure the actual transfer design, including its carrier sheet. A platen that is only slightly larger than the artwork gives more even pressure and reduces the risk of accidentally pressing over a collar, seam, pocket, or zipper.
Temperature consistency
The displayed temperature is not necessarily the temperature across the entire platen. Inexpensive presses can have warmer and cooler zones, especially near corners. That matters because heat-transfer vinyl, sublimation paper, and direct-to-film transfers need reasonably consistent heat to bond correctly.
For occasional vinyl projects, a reliable temperature display and a short warm-up may be sufficient. For repeated orders, look for digital temperature control, stable electronics, and a platen that recovers quickly after opening. A press that drops noticeably below its target temperature between shirts can make production slower and produce inconsistent results.
A useful quality check is to place heat-sensitive temperature strips or a heat-press temperature sensor at the center and four corners of the platen. Compare readings at the same set temperature. A difference of several degrees may be manageable; a visibly uneven platen should be treated as a production risk, particularly for sublimation and large transfers.
Pressure adjustment
Pressure determines how evenly the transfer contacts the fabric. Too little pressure can leave edges or fine details unbonded. Too much pressure can flatten textured garments, leave a rectangular impression, or squeeze adhesive beyond the design.
Manual clamshell presses usually use a pressure knob. They are inexpensive and flexible, but the operator must reproduce the setting from shirt to shirt. Automatic presses reduce that variation and are helpful when several people share the workflow.
Whatever press you choose, pressure should be judged by the material and garment, not by the handle position alone. A thick hoodie requires a different setup from a thin cotton shirt. Test one sample, allow it to cool as recommended by the transfer manufacturer, and perform a stretch or peel check before pressing a batch.
Best heat presses for t shirts by use case
Best compact option: Cricut EasyPress 3
The Cricut EasyPress 3 is a strong choice for crafters who press a few shirts at a time and need equipment that can be stored in a closet. Its 12-by-10-inch working area handles common adult shirt graphics, while its flat design is easier to manage than a full clamshell machine.
Its main compromise is manual pressure. You must keep the unit level and apply consistent force, and the smaller platen may require careful positioning for larger designs. It is best for heat-transfer vinyl, small names and numbers, tote bags, and occasional custom gifts rather than continuous order fulfillment.
Best home-business size: HTVRONT Auto Heat Press
The HTVRONT Auto Heat Press provides the more useful 15-by-15-inch format for small-batch makers while automating the closing and pressing cycle. That combination is valuable when producing several identical shirts because it makes dwell time and pressure more repeatable.
Measure your table before buying. A sliding or automatically opening platen needs space in front of the machine, not just the area occupied by the base. Leave enough room to load a shirt without brushing the hot surface and to lay transfers flat before pressing.
Best value format: a manual 15-by-15-inch clamshell press
A manual 15-by-15-inch press from an established heat-press manufacturer is often the most economical route into small-batch production. The size handles common adult designs, and the adjustable pressure mechanism accommodates shirts, sweatshirts, bags, and some flat blanks.
The trade-off is operator consistency. Record the temperature, time, pressure setting, garment type, and transfer brand for every successful sample. If multiple operators use the same press, mark the pressure knob and create a short loading guide. This simple process control can matter more than adding a few inches of platen size.
Best for demanding production: Stahls’ Hotronix Fusion IQ or Geo Knight DK20S
The Stahls’ Hotronix Fusion IQ and Geo Knight DK20S are professional 16-by-20-inch presses designed for frequent use. Their larger platens are useful for oversized graphics and bulky garments, while their construction and pressure systems are better suited to repeatable production than entry-level machines.
These presses are difficult to justify for a few personal shirts. They make sense when missed transfers, slow output, or inconsistent results have become more expensive than the machine upgrade. They also need a solid, dedicated workstation; moving one around a lightweight folding table is inconvenient and potentially unsafe.
Decision matrix for home crafters and shirt makers
| Your situation | Recommended size | Best feature to prioritize | Reason |
|---|---|---|---|
| Fewer than 10 shirts per month | 10 x 12 or 12 x 10 inches | Compact storage and simple controls | Low volume does not justify a large permanent workstation |
| 10–50 shirts per month | 15 x 15 inches | Even heating and adjustable pressure | One press cycle covers most standard adult designs |
| Repeated orders of the same design | 15 x 15 inches | Automatic cycle and repeatable pressure | Consistency reduces rejected garments |
| Hoodies, jackets, and oversized artwork | 16 x 20 inches | Large platen and interchangeable lower platens | Seams and pockets are easier to avoid |
| Daily commercial production | 16 x 20 inches or larger | Durability, serviceability, and temperature recovery | Downtime costs more than the initial equipment premium |
Check the electrical and workspace requirements
Most home presses draw roughly 1,000–1,800 watts. Use this calculation before placing one in a craft room:
Required circuit capacity = press wattage + other devices on the circuit.
For example, a 1,500-watt press on a 120-volt circuit draws approximately 12.5 amps: 1,500 ÷ 120 = 12.5. Add a 100-watt heat gun and a 200-watt computer, and the circuit load approaches 15 amps. That leaves little margin on a typical 15-amp circuit, particularly during warm-up. Put the press on a suitable circuit, avoid extension cords unless the manufacturer specifically permits them, and keep the heated platen away from paper, fabric scraps, and plastic.
Also allow room to open the press, load garments, cool finished items, and store the silicone pad. A compact press can still be awkward if the operator must work sideways or reach over the hot platen.
Starter settings and a reliable first test
Use the transfer supplier’s instructions first, because the correct settings vary by adhesive and fabric. As a starting reference, many standard heat-transfer vinyl products fall near 300–320°F for 10–15 seconds, while many direct-to-film transfers fall near 280–320°F for roughly 10–15 seconds. Cotton, polyester, sublimation, and specialty low-temperature materials can require different settings.
- Pre-press the shirt for 2–5 seconds to remove moisture and wrinkles.
- Place the design on a firm, flat area away from seams and pockets.
- Use medium pressure unless the transfer instructions specify otherwise.
- Press for the recommended time, then follow the specified hot-peel, warm-peel, or cold-peel process.
- Wash one test shirt before accepting a large order.
If an edge lifts, first check that the design was not placed across a seam. Then confirm platen temperature with a sensor, increase pressure slightly, and repeat the recommended dwell time. Do not immediately raise the temperature: excess heat can scorch polyester or damage the garment while failing to solve an uneven-pressure problem.
Frequently asked questions
How can I check whether my design will fit on a heat press?
Measure the transfer design, including its carrier sheet, and compare it with the platen. The design should fit without forcing you to press over collars, seams, pockets, or zippers. A platen only slightly larger than the artwork can help provide more even pressure.
How do I check whether a platen heats evenly?
Place heat-sensitive temperature strips or a heat-press temperature sensor at the center and four corners, then compare the readings at the same set temperature. Several degrees of difference may be manageable, but visibly uneven heat can put production at risk, especially for sublimation and large transfers.
What should I record when I find settings that work?
Record the temperature, time, pressure setting, garment type, and transfer brand for each successful sample. If multiple people operate a manual press, mark the pressure knob and make a short loading guide. This can help keep results more consistent from shirt to shirt.
How should I confirm a transfer is ready before making a batch?
Press one sample first, let it cool as the transfer manufacturer recommends, and then perform a stretch or peel check. This can reveal whether the transfer has bonded before you use the same setup on a batch of garments.
What should I consider before putting a heat press in a craft room?
Check the circuit load, available workspace, and the room around the press. Leave space to open it, load garments, and cool finished items; keep the heated platen away from paper, fabric scraps, and plastic. Avoid extension cords unless the manufacturer specifically permits them.
Final buying advice
For most people choosing among the best heat presses for t shirts, a dependable 15-by-15-inch press offers the best balance of design coverage, cost, and workspace. Choose the Cricut EasyPress 3 when portability and occasional use matter most. Choose an automatic 15-by-15-inch model when you are filling repeated orders. Move to a 16-by-20-inch professional press only when garment variety, production volume, and consistency justify its larger footprint and higher cost.