
Good cable management is harder in a compact PC case because every millimeter matters. When cables are piled behind the motherboard tray, pressed against fans, or forced across airflow paths, the side panel may bulge, fan noise can increase, and troubleshooting becomes frustrating. Poor routing can also strain connectors, especially 24-pin motherboard, GPU power, and SATA connections. The goal is not to make every wire invisible—it is to create clear airflow paths, avoid sharp bends, and leave enough slack for safe service later.
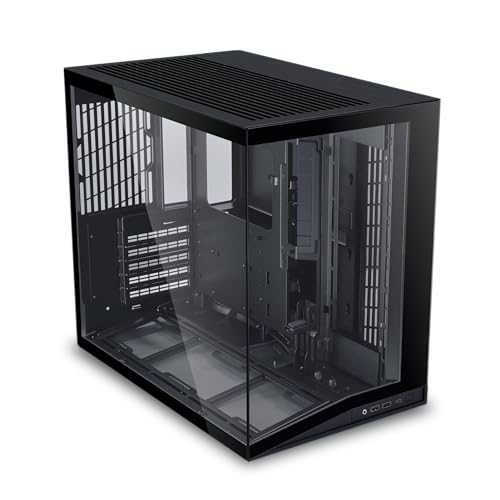
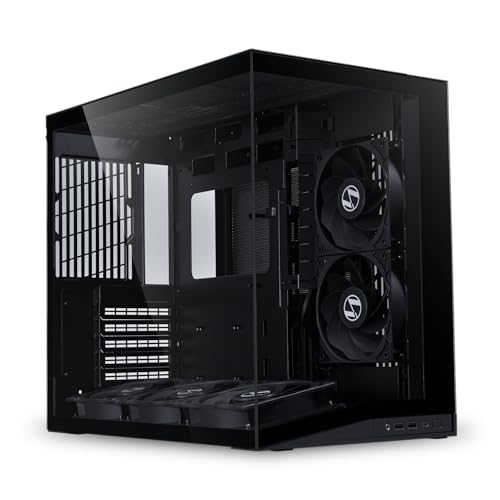
Compact ATX cases such as the Lian Li O11D Mini V2 and O11D Mini V2 Flow offer more room than small-form-factor builds, but their divided layouts still reward planning. The standard O11D Mini V2 is listed around $90, while the Flow version with five non-RGB reverse fans is commonly around $100. In either style, taking an organized approach before closing the panels makes the finished build quieter, cleaner, and easier to maintain.
As an Amazon Associate we earn from qualifying purchases at no extra cost to you.


Our Top Picks
What You Need
| Item | Why | Optional? |
|---|---|---|
| Reusable hook-and-loop cable ties | Secure cable bundles without crushing wires; 6- to 8-inch ties fit most PC bundles. | No |
| Small zip ties | Useful for permanent-looking fan-wire bundles and very tight spaces. | Yes |
| Flush cutters or scissors | Trim zip-tie tails cleanly so they do not snag hands or cables. | Yes |
| Modular power supply cables | Lets you install only the cables the system actually needs. | Yes |
| Fan hub or PWM splitter | Reduces the number of individual fan leads crossing the case. | Yes |
| Cable combs | Keeps visible 24-pin, CPU, and GPU power extensions aligned. | Yes |
| Flashlight or phone light | Helps inspect routing channels and check for cables near fan blades. | No |
Step-by-Step
1. Shut down, unplug, and photograph the current layout (10 minutes)
Shut down the PC normally, switch off the power supply, and unplug the power cord. Press the front power button for 5 to 10 seconds to discharge residual power. Remove both side panels and, if applicable, the top panel.
Before unplugging anything, take a few clear photos of the motherboard connections, fan hub, storage drives, and power supply area. These images are particularly helpful if several fans share splitters or if RGB and fan-control cables run separately. Labeling cables with small pieces of masking tape can prevent guesswork during reassembly.
2. Identify the cables you actually need (10 to 15 minutes)
Separate cables into three groups: essential power cables, data or front-panel cables, and extras. A typical modern build needs a 24-pin motherboard cable, one or two CPU/EPS cables, one or more GPU power cables, SATA power for drives or hubs, front-panel connectors, USB headers, audio, and fan leads.
If you use a modular power supply, remove unused SATA, Molex, PCIe, or peripheral cables. Never mix modular cables from different power supply models or brands, even when the connectors appear to fit. Pinouts vary, and using the wrong cable can damage drives, fans, or the motherboard.
3. Plan the airflow lane before bundling anything (10 minutes)
Look at the direction of each fan. In most compact cases, front, side, or bottom fans bring cool air in, while top and rear fans exhaust warm air. Keep the central area between intake fans, the GPU, CPU cooler, and exhaust fans as open as possible.
Do not route loose cables over the GPU backplate, across the face of radiator fans, or in front of the CPU cooler. A cable that sits 1 inch from a fan blade can still get pulled inward over time. Aim for at least 1/2 inch of clearance from fan blades and avoid placing bundles where they block a radiator or mesh intake.
4. Route the largest power cables first (15 to 20 minutes)
Start with the 24-pin motherboard cable, CPU/EPS cable, and GPU power cable. These are the thickest, least flexible cables and determine how much room remains for everything else. Route each one through the nearest rubber grommet or pass-through opening rather than pulling it diagonally across the motherboard.
For the CPU power cable, route it behind the motherboard tray and up to the top-left corner of the board. Connect it before installing a large air cooler or top radiator if access is limited. Route GPU power through the grommet closest to the graphics card. Give the cable enough slack to remove the GPU later, but avoid a large loop hanging below the card.
If your GPU uses a 12V-2×6 or 12VHPWR-style connector, do not sharply bend the cable at the plug. Keep the first 1.25 to 1.5 inches straight where possible, then make a gradual curve. Confirm the connector is fully seated before managing the rest of the cable.
5. Tame fan, RGB, and front-panel wiring (15 minutes)
Fan and RGB wiring often creates the most visible clutter because several thin leads originate in the same area. Route fan leads along the frame edge of each fan, then send them behind the tray through the closest opening. Use a fan hub when possible so multiple fans connect in one hidden location rather than stretching individual leads across the case.
Keep low-voltage front-panel, USB, audio, and fan cables separate from thick power bundles when practical. This makes each group easier to trace later. Bundle front-panel leads near the lower edge of the motherboard, where they are naturally concealed by the GPU or case shroud.
6. Build flat bundles behind the motherboard tray (15 minutes)
Instead of making one thick cable ball, create two or three flat bundles. One bundle can hold motherboard and CPU power slack; another can hold SATA power and drive data cables; a third can hold fan and RGB wiring. Follow the case’s built-in cable channels and tie-down points.
Use hook-and-loop ties every 4 to 6 inches. Tighten them only enough to hold the bundle in place. Over-tightened ties can deform thin fan wires and make future upgrades unnecessarily difficult. In a compact case, the side-panel clearance may be only about 0.5 to 0.8 inch behind the tray, so keep bundles broad and flat rather than round and bulky.
7. Check panel clearance and connector strain (10 minutes)
Before reinstalling panels, gently hold the rear panel in place without forcing it. If it does not sit flat, reopen the cable area and redistribute the thickest bundle. Do not use panel screws to compress a cable pile into place; that can damage insulation or put pressure on motherboard connections.
Check every connector for strain. The 24-pin plug should not be pulled sideways, SATA connectors should not be kinked, and GPU power connectors should not be under tension. Make sure no cable can touch a fan blade when the system is moved.
8. Test before finalizing the ties (10 minutes)
Reconnect power, start the PC with the panels still off, and confirm that all fans spin, storage drives appear, front USB ports work, and RGB components behave normally. Listen for clicking or scraping that could indicate a wire touching a fan.
Once the system passes a basic check, turn it off again and make final adjustments. Replace the panels, then check that they close without flexing. In 2026, many compact cases include useful channels, straps, and fan hubs, but a neat result still comes from routing deliberately rather than relying on the case to hide excess cable.
Mistakes to Avoid
- Using the wrong modular PSU cable: Only use cables supplied with or explicitly approved for your exact power supply model.
- Blocking intake fans: Keep thick PCIe and SATA power loops out of front, side, and bottom intake paths.
- Pulling cables too tight: Leave enough service slack to unplug a drive, remove a GPU, or replace a fan.
- Making sharp bends at power connectors: This is especially important with high-power GPU connectors.
- Using too many zip ties too early: Test the system first. Reusable ties are easier to adjust during troubleshooting.
- Ignoring the rear panel: The hidden side is where compact builds most often fail to close properly.
How Often
Inspect cable management whenever you upgrade the GPU, add storage, replace fans, or install a new power supply. For most PCs, a quick visual check every 6 to 12 months is enough. Clean dust filters and inspect fan areas at the same time. If you move the computer often, check GPU power connections and any cables near fans every 3 to 6 months, since travel can shift bundles and loosen ties.
When to Call a Pro or Replace
Ask a qualified PC technician for help if the system will not power on after rewiring, if a connector looks melted or discolored, or if you are unsure whether a modular cable belongs to the installed power supply. Replace cables with cracked insulation, bent connector pins, broken locking clips, or exposed wire.
Consider replacing the case or power supply if the build cannot close without severe cable compression, the power supply lacks the connectors required for your GPU, or the case has no practical path for airflow around a large graphics card. A compact case with removable drive cages, dedicated cable channels, and at least several tie-down points will be much easier to maintain.
FAQ
Should I use zip ties or hook-and-loop ties for PC cables?
Use hook-and-loop ties for most cable bundles because they are reusable and less likely to pinch wiring. Use small zip ties only for stable, low-risk runs such as fan wires along a fan frame. Trim zip-tie ends flush.
Is it okay to tuck extra power supply cables into the bottom of the case?
Only if the space is designed for it and the cables do not block a power supply intake or force the side panel outward. In a compact build, it is better to remove unused modular cables than to hide them in a cramped compartment.
Can messy cables make a PC run hotter?
Yes. A few thin wires rarely matter, but thick bundles placed in front of intake fans, radiators, or the GPU can restrict airflow. They can also create fan noise if they shift near blades.
How much clearance should cables have from PC fans?
Aim for at least 1/2 inch from fan blades, with more room where possible. Secure nearby wires to the fan frame, case edge, or a tie-down point so vibration cannot pull them into the fan.
Related guides
- Best Gaming PC for Fortnite: Eight Prebuilt Desktops Sorted by Refresh Rate Goal (2026)
- Best RX 9070 XT Prebuilt Gaming PCs: Seven Desktops and Three Cards Compared: 10 Compared (2026)
- CyberPowerPC vs iBUYPOWER Gaming PC: How the Two Brands Compare
- Best RX 9070 XT Prebuilt Gaming PC (2026): 5 Picks Compared









