
Our Top Picks
 MUSETEX Y6 PC Case16.73"D x 10.83"W x 15.67"H16.73 x 10.83 x 15.67 Inches14.55 poundsCheck on Amazon
 ASUS ROG Cronox ARGB Gaming PC CaseGR801|Black|4x ARGB Fans22.99 x 9.76 x 24.37 Inches35.2 PoundsCheck on Amazon

Top 3 picks at a glance
The Short Answer
When planning a custom computer build, the physical footprint of your setup is just as important as the silicon inside it. If you are asking yourself, “what case dimensions do i need for custom pc” configurations, the quick answer depends entirely on your motherboard form factor and your available desk space. For the vast majority of builders, an ATX Mid Tower is the ideal choice. These cases typically measure between 17 to 20 inches tall, 8 to 10 inches wide, and 17 to 21 inches deep.
An ATX Mid Tower strikes a perfect balance: it occupies a reasonable amount of desk real estate while offering enough interior clearance for modern, high-performance graphics cards (which can exceed 13 inches in length) and liquid cooling radiators. However, if you are working with a compact workspace, a Mini-ITX case (under 14 inches tall) might be necessary. Conversely, if you plan to install dual power supplies, multiple graphics cards, or extensive custom water loops, you will need a Full Tower chassis, which easily stands over 22 inches tall and can weigh upwards of 40 to 50 pounds when fully assembled.
As an Amazon Associate we earn from qualifying purchases at no extra cost to you.



Standard Sizes
PC cases are categorized by the size of the motherboards they can accommodate. However, exterior dimensions can vary significantly between brands due to decorative panels, external branding, and dual-chamber designs that place the power supply behind the motherboard tray rather than beneath it. As we move into 2026, hardware power demands and cooling requirements mean that modern graphics cards are larger than ever, making precise spatial planning a necessity rather than an afterthought.
Below is a breakdown of the standard PC case categories, their typical physical dimensions, and the motherboard form factors they support:
| Case Class | Height (Inches / cm) | Width (Inches / cm) | Depth (Inches / cm) | Compatible Motherboards |
|---|---|---|---|---|
| Mini-ITX (Small Form Factor) | 9″ – 14″ (23 – 35 cm) |
6″ – 9″ (15 – 23 cm) |
11″ – 15″ (28 – 38 cm) |
Mini-ITX |
| Micro-ATX (Mini Tower) | 14″ – 17″ (35 – 43 cm) |
7″ – 9″ (18 – 23 cm) |
15″ – 18″ (38 – 46 cm) |
Micro-ATX, Mini-ITX |
| ATX (Mid Tower) | 17″ – 20″ (43 – 51 cm) |
8″ – 10″ (20 – 25 cm) |
17″ – 21″ (43 – 53 cm) |
ATX, Micro-ATX, Mini-ITX |
| E-ATX (Full Tower) | 20″ – 26″ (51 – 66 cm) |
9″ – 12″ (23 – 30 cm) |
20″ – 25″ (51 – 64 cm) |
E-ATX, ATX, Micro-ATX, Mini-ITX |
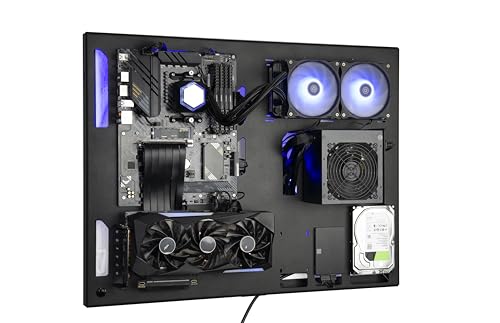
When shopping within these categories, pricing ranges from accessible entry-level options to premium designer chassis. For example, a standard ATX mid-tower like the MUSETEX Y6 PC Case (featuring 270-degree tempered glass and multiple pre-installed fans) sits in the highly affordable $75 to $95 price bracket. On the higher end, boutique modular systems or feature-rich designer towers—such as the customizable META PCS Night Reaper Lian Li O11 Dynamic EVO RGB or the screen-equipped ASUS ROG Cronox—frequently range from $450 to $600. There are also specialized solutions like the ABKCA Design Wall Computer Case, which retails around $200 to $250 and shifts the physical footprint entirely off your desk and onto your wall studs.
How to Measure Your Space
Before purchasing a case, you must ensure it physical fits both your furniture and your interior layout. Follow this step-by-step process to measure your space accurately:
- Measure Desktop Height Clearance: If your desk has an upper hutch, shelving, or is situated under a low countertop, measure the vertical distance from the desktop to the lowest hanging obstacle. Ensure you leave at least 2 to 3 inches of clearance above the top of the PC case for exhaust ventilation.
- Verify the Depth Footprint: Measure the depth of your desk from the front edge to the wall. Keep in mind that a standard mid-tower is around 18 to 20 inches deep. You must add an extra 3 inches of depth to account for the cables protruding from the rear input/output (I/O) panel and the power supply plug.
- Allow for Side and Rear Airflow: High-performance computers generate significant heat, sometimes drawing between 500W and 1000W of system power. To prevent hot air from recirculating, ensure there is a minimum of 4 to 6 inches of open space behind the rear exhaust fans and at least 2 inches on the sides.
- Test Desk Weight Capacity: A fully built computer with a heavy graphics card, a multi-fan cooling setup, a large power supply, and tempered glass panels easily weighs between 25 and 50 pounds. Ensure your desk is constructed of solid wood or sturdy steel framing; cheap particle-board or hollow-core desks may bow or sag under this concentrated load.
- Internal Component Clearance: Beyond the exterior dimensions, check the manufacturer’s specifications for internal clearance. Specifically, verify that the case supports your chosen graphics card length (frequently up to 350mm or 400mm) and your CPU air cooler height (often up to 160mm or 170mm).
By Room or Use Case
Your physical environment dictates the ideal PC chassis size just as much as your computing needs do. Here is how to select the right case dimensions for different rooms and lifestyles:
The Dedicated Home Office
In a professional home office, maximizing usable desk space for paperwork, documents, and dual-monitor setups is paramount. An ATX Mid Tower is highly recommended here. It provides a clean, professional aesthetic without dominating the room. If you want to keep your desktop completely clear, look into wall-mounted computer chassis. A wall-mounted setup keeps the delicate hardware safe from floor dust and accidental kicks while freeing up 100% of your physical desk surface.
The Dedicated Gaming Den
If you are building an uncompromising gaming station, thermal management and visual design are your top priorities. Large Mid Towers or Full Towers are the industry standard for these spaces. These cases provide the massive interior volume required to house thick liquid-cooling radiators (up to 360mm or 420mm) and premium graphics cards. Be prepared to dedicate a significant portion of a robust, 60-inch or wider gaming desk to showcase these large, illuminated machines.
The Minimalist Living Room or Media Center
For a shared living room or a Home Theater PC (HTPC) setup, bulky towers are visually intrusive. Here, a Small Form Factor (SFF) Mini-ITX case is the ideal choice. Measuring under 12 inches in height and depth, these compact enclosures can sit discreetly on a media console shelf, alongside a gaming console, or even behind a television. Ensure that any media cabinet housing an SFF case has an open back or active ventilation fans to prevent heat build-up.
Common Sizing Mistakes
Even experienced builders can run into spacing issues during assembly. Avoid these common pitfalls when selecting your case:
- Ignoring Graphics Card (GPU) Length: Modern high-end graphics cards are incredibly long and thick. Always cross-reference the GPU’s physical length (listed in millimeters) with the case’s maximum GPU clearance. Installing a front-mounted liquid cooling radiator can further reduce this internal clearance by 30mm to 50mm.
- Overlooking Power Supply Unit (PSU) Depth: High-wattage power supplies (1000W and above) are physically longer than standard 140mm ATX power supplies. In compact or mid-tower cases, a long PSU can block the adjacent hard drive cage or crowd the cable management space.
- Placing High-Airflow Cases on Carpet: Many PC cases pull cool air in through the bottom panel to vent the power supply. If you place your computer tower directly on thick carpet, the feet will sink, suffocating the power supply intake and causing components to overheat. Always place your PC on a hard desk surface, a dedicated wooden riser, or a plastic floor mat.
- Underestimating Cable Protrusion: The physical dimensions listed on product pages only represent the bare metal chassis. Do not forget that monitor cables, USB peripherals, and power cords plugged into the back of the machine require a gentle bend radius, adding several inches to the depth profile of your setup.
FAQ
1. Can I put an ATX motherboard inside a Micro-ATX case?
No. Motherboard sizes are standardized, and an ATX motherboard (12 x 9.6 inches) is physically too tall to fit inside a Micro-ATX case. However, the reverse is compatible: you can easily install a smaller Micro-ATX or Mini-ITX motherboard inside a larger ATX Mid Tower or Full Tower case, as the mounting standoffs are designed to align with smaller layouts.
2. How much clearance does a PC case need for proper airflow?
To maintain healthy operating temperatures, your computer should have at least 4 to 6 inches of clearance at the rear exhaust panel and at least 2 to 3 inches of open space around any intake vents (usually located at the front, bottom, or sides of the case). Placing a high-performance PC inside a completely enclosed cabinet or tight shelf will lead to thermal throttling and hardware degradation.
3. Are wall-mounted PC cases safe for standard drywall?
Yes, but only if they are installed correctly. Because a fully populated wall-mount PC chassis can weigh between 25 and 35 pounds, you must mount the main support brackets directly into wooden wall studs using heavy-duty lag screws. If stud alignment is not possible, you must use high-quality, toggle-bolt drywall anchors rated for at least double the total weight of the computer.
4. What case size do I need for a 360mm liquid cooling radiator?
You will typically need a spacious ATX Mid Tower or a Full Tower case to mount a 360mm radiator (which features three 120mm fans). While some specialized Micro-ATX cases can accommodate this size, most standard mini-towers are physically too short. Always check the case manual to confirm whether the 360mm radiator can be mounted on the top panel (which is ideal for thermal performance) or only on the front intake panel.
Related guides
- Best Gaming PC for Fortnite: Eight Prebuilt Desktops Sorted by Refresh Rate Goal (2026)
- Best RX 9070 XT Prebuilt Gaming PCs: Seven Desktops and Three Cards Compared: 10 Compared (2026)
- CyberPowerPC vs iBUYPOWER Gaming PC: How the Two Brands Compare
- Best RX 9070 XT Prebuilt Gaming PC (2026): 5 Picks Compared









