When designing a high-performance home office or a dedicated gaming suite, the PC tower stands as the functional centerpiece of your workspace. But while many buyers spend hours selecting the perfect aesthetic chassis or the most powerful graphics card, they often stumble on the internal engine that keeps everything running smoothly: system memory.
One of the most common mistakes when planning a custom setup is misunderstanding how to choose ram capacity for gaming build. Some builders fall into the trap of overspending on massive, industrial-grade capacities (such as 128GB) that sit completely idle, wasting hundreds of dollars that could have been allocated to a better GPU or a quieter cooling system. Others attempt to cut corners on budget builds, opting for a meager 8GB of RAM, only to find their modern games stuttering, browser tabs crashing, and their sleek desktop setup feeling sluggish. Finding the sweet spot is about balancing physical architecture, system budget, and your actual daily workflow.
As an Amazon Associate we earn from qualifying purchases at no extra cost to you.



Our Top Picks


Top 3 picks at a glance
Decide These 3 Things First
Before you purchase a single stick of memory or select a prebuilt desktop, you must define the operational boundaries of your system. Answering these three questions will instantly narrow down your choices:
- What is your primary use case? If your PC is purely a gaming console alternative, your memory needs will differ significantly from a workstation used for 4K video editing, 3D modeling, or hosting local servers while multitasking across multiple monitors.
- Which motherboard platform are you using? Motherboards are built to support either DDR4 or DDR5 memory, and these standards are not interchangeable. You must match your memory selection to the physical slots and chipset of your motherboard.
- What is your total system budget? Memory scales in price alongside capacity and speed. You need to determine whether you are building a entry-level machine under $700, a mid-range system around $1,200, or an enthusiast-grade powerhouse hovering near $2,000.
1. Size: Matching Capacity to Your Gaming and Workload Demands
The total capacity of your RAM, measured in gigabytes (GB), determines how much temporary data your computer can access instantly. If your system runs out of physical RAM, it is forced to use your storage drive as secondary memory, resulting in severe performance drops and system lag.
For modern systems, 16GB is the absolute baseline. In entry-level configurations, such as a budget desktop powered by an AMD Ryzen 5 5600GT costing around $660, 16GB of memory allows you to play standard competitive titles like Valorant or League of Legends while keeping background applications like Discord open.
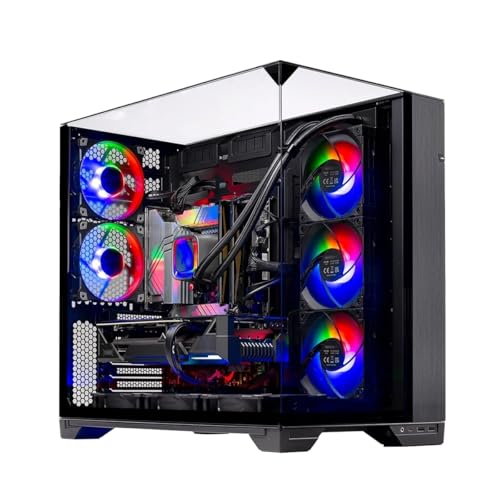
However, 32GB has quickly become the gold standard for modern gaming and home office setups. As we look ahead to 2026, modern game engines require larger pools of rapid-access memory to stream massive open-world textures smoothly. High-end builds, like those featuring an NVIDIA RTX 5070 and costing around $1,999, utilize 32GB of DDR5 memory to ensure that resource-heavy games run flawlessly alongside web browsers, streaming software, and system utilities.
Opting for 64GB or more is generally reserved for professional creators. If your daily routine involves heavy rendering in Adobe Premiere, CAD design, or running virtual machines, investing in a high-capacity 64GB kit is highly beneficial. For gaming alone, however, 64GB provides virtually no performance uplift over 32GB.
2. Material: Understanding DDR4 vs. DDR5 Standards
The “material” generation of your RAM dictates its raw speed, voltage requirements, and physical pin layout. DDR4 and DDR5 are physically different; DDR4 modules have 288 pins with a notch near the center, while DDR5 modules also have 288 pins but feature a different notch alignment to prevent accidental insertion into incompatible motherboards.
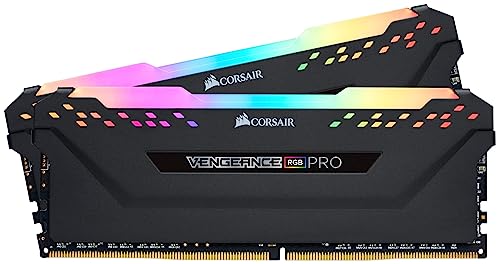
DDR4 Memory: Operating at standard voltages of 1.2V to 1.35V, DDR4 is a mature, highly reliable technology. Standard frequencies range from 3200MHz to 3600MHz. It is highly cost-effective, making it ideal for budget builds. A premium 32GB DDR4 kit with integrated RGB lighting and an anodized aluminum heat spreader can be found for approximately $250, offering excellent thermal dissipation and structural rigidity for older or mid-range platforms.
DDR5 Memory: This is the current standard for modern processors. DDR5 starts at speeds of 4800MHz and easily reaches 5600MHz to 6000MHz+ in high-performance configurations. DDR5 operates at lower base voltages (1.1V), but features on-board Power Management Integrated Circuits (PMIC) directly on the module. This shifts voltage regulation from the motherboard to the RAM stick itself, improving efficiency but requiring high-quality thermal pads and aluminum heat armor to keep the chips cool under heavy loads.
3. Construction: Single-Channel vs. Dual-Channel Configurations
How your RAM is physically packaged and installed on your motherboard dramatically impacts memory bandwidth. When choosing your capacity, you should almost always buy a multi-module kit rather than a single stick.
A single-channel configuration (using just one stick of RAM, such as 1x16GB) limits your CPU to a single 64-bit data path. This creates a severe performance bottleneck, reducing your average framerates in CPU-bound games by up to 15% to 20%.
A dual-channel configuration (using two identical sticks, such as 2x8GB or 2x16GB) opens up a 128-bit data path. This doubles the theoretical bandwidth available to your processor. When purchasing memory, always look for kits sold in pairs. To run in dual-channel mode, these sticks must be installed in specific, alternating slots on your motherboard (typically slots 2 and 4, counting away from the CPU socket).
4. Comfort and Performance: Speed, Latency, and Physical Clearance
In the context of system memory, “comfort” translates to system stability, while “performance” is determined by speed and latency. Additionally, the physical dimensions of the memory modules must fit comfortably within your computer case.
Speed and Latency: RAM performance is defined by its frequency (measured in Megatransfers per second, or MT/s, often labeled as MHz) and its CAS Latency (CL). For DDR4, the sweet spot is 3200MHz CL16 or 3600MHz CL18. For DDR5, the optimal balance of price and speed is 6000MHz CL30 or 5600MHz CL40. Lower latency numbers mean the memory responds faster to CPU commands.
Physical Clearance: High-performance RAM modules often feature tall, decorative aluminum heat spreaders and RGB light bars. These modules can range from a low-profile 31mm in height to a towering 51mm. If you are using a large, dual-fan air cooler on your CPU, tall RAM sticks may physically block the cooler’s installation. Always measure the clearance underneath your CPU cooler before purchasing memory with tall, decorative profiles.
5. Price Tiers: Allocating Your Budget Effectively
Memory pricing is highly volatile, but it generally correlates with standard performance tiers. Understanding these brackets helps you avoid overpaying for unnecessary features.
- Budget Tier ($40 – $70): This tier consists primarily of 16GB kits (2x8GB) of DDR4 at 3200MHz, or entry-level 16GB DDR5 kits. These feature basic black or gray aluminum heat spreaders without fancy lighting. Perfect for builds under $800.
- Mid-Range Tier ($80 – $150): This is the sweet spot for most builders. It includes high-performance 32GB kits (2x16GB) of DDR4 at 3600MHz or standard DDR5 kits at 5600MHz to 6000MHz. These kits offer robust aluminum construction, reliable thermal management, and optional customizable RGB lighting. This tier is standard in systems priced around $1,500 to $2,000.
- Premium/Enthusiast Tier ($160 – $300+): In this category, you find highly binned 32GB or 64GB DDR5 kits running at ultra-high speeds (7200MHz+ with tight CL30 latencies), or premium legacy DDR4 kits featuring custom light pipes and thick, polished metal heat armor. These are designed for overclockers and high-end showpiece builds.
6. Warranty and Long-Term Reliability
Unlike graphics cards or motherboards, which typically carry two- to three-year warranties, high-quality RAM from reputable manufacturers almost always comes with a limited lifetime warranty. This industry-standard protection ensures that if a memory chip develops errors or fails under normal operating conditions, the manufacturer will replace the kit free of charge.
When selecting RAM, stick to established brands that utilize memory chips (DRAM) sourced directly from major semiconductor manufacturers: Samsung, SK Hynix, or Micron. High-quality modules undergo rigorous factory testing to ensure stability at their rated speeds and voltages (typically up to 1.35V or 1.4V for overclocked profiles). Investing in a reputable brand minimizes the risk of system crashes, blue screens, or corrupted files down the road.
7. Assembly and System Integration
Integrating RAM into your system build is one of the easiest installation steps, but it requires precision to avoid damaging the delicate components on your motherboard.
- Prepare the Slots: Locate the memory slots to the right of your CPU. Open the plastic retaining clips on either end of the designated slots (refer to your motherboard manual to identify the correct slots for a dual-channel setup, usually labeled A2 and B2).
- Align the Notch: Line up the physical notch on the bottom edge of the RAM stick with the plastic key inside the motherboard slot. The stick will only fit in one direction.
- Apply Even Pressure: Push straight down on both ends of the RAM module simultaneously. You will hear a distinct, mechanical “click” as the retaining clips snap shut, locking the module in place. This requires roughly 10 to 15 pounds of downward force.
- Enable XMP or EXPO: Once your system is assembled and boots up, enter the BIOS screen. By default, your RAM will run at basic, slow speeds. You must enable the Extreme Memory Profile (XMP for Intel) or Extended Profiles for Overclocking (EXPO for AMD) in the BIOS settings to allow your memory to run at its fully rated speed (e.g., 3200MHz or 5600MHz).
Spec Checklist
Use this quick-reference matrix to align your RAM choice with your overall system tier:
| Specification | Budget Tier | Mid-Range Tier | Premium/Enthusiast |
|---|---|---|---|
| Target System Price | $600 – $900 | $1,000 – $1,700 | $1,800 – $3,000+ |
| RAM Capacity | 16GB (2 x 8GB) | 32GB (2 x 16GB) | 32GB to 64GB (2 x 32GB) |
| Memory Generation | DDR4 | DDR5 (or high-end DDR4) | DDR5 |
| Target Speed | 3200MHz | 5600MHz – 6000MHz | 6000MHz – 7200MHz+ |
| CAS Latency (CL) | CL16 | CL30 – CL36 | CL30 or lower |
| Voltage Range | 1.2V – 1.35V | 1.1V – 1.35V | 1.35V – 1.45V |
Red Flags
When shopping for memory or evaluating prebuilt gaming systems, watch out for these critical warning signs:
- Single-Channel Prebuilts: Some system integrators cut costs by installing a single stick of 16GB RAM instead of two 8GB sticks. This significantly limits CPU performance. If you buy a prebuilt with only one stick, plan to buy an identical second stick immediately to enable dual-channel operation.
- “Green PCB” Bare Modules: Avoid RAM sticks that lack an integrated aluminum heat spreader. Bare circuit boards with exposed memory chips run hotter, look unfinished in a modern case, and are much more vulnerable to physical damage during installation.
- Mismatched RAM Kits: Never mix and match different brands, speeds, or capacities of RAM. Even if the sticks look similar, minor differences in the underlying memory chips can cause severe system instability, frequent blue screens, or prevent your PC from booting entirely. Always buy your RAM in a single, factory-matched kit.
- Extremely High Frequencies on Budget Boards: Do not buy high-speed DDR5 memory (such as 7200MHz) if you are using an entry-level motherboard. Lower-tier motherboards lack the physical PCB routing and power delivery needed to stabilize these extreme speeds, forcing your expensive RAM to run at slow baseline settings.
FAQ
Is 16GB of RAM enough for gaming now?
Yes, 16GB is still enough for the vast majority of modern games at 1080p resolution with moderate background tasks. However, it offers very little headroom. If you prefer to keep web browsers with multiple tabs, streaming software, or voice chat clients open while playing modern, resource-heavy games, upgrading to 32GB will provide a much smoother, stutter-free experience.
Can I install DDR5 RAM on a DDR4 motherboard?
No. DDR4 and DDR5 memory modules are physically and electrically incompatible. They feature different pin configurations, different notch placements, and require different operating voltages. You must use the exact memory standard supported by your motherboard’s chipset and physical slots.
What happens if I don’t enable XMP or EXPO in my BIOS?
If you do not enable these profiles, your RAM will run at its default, safe baseline speed set by the industry standard body (JEDEC). For example, a high-performance DDR4 3600MHz kit might run at just 2133MHz, or a DDR5 6000MHz kit might run at 4800MHz. Enabling XMP or EXPO is a safe, one-click setting that allows your RAM to run at the optimal speed you paid for.
Should I buy 4 sticks of RAM or 2 sticks?
For almost all modern gaming builds, using 2 sticks (e.g., 2x16GB) is highly preferred over 4 sticks (e.g., 4x8GB). Modern memory controllers on consumer CPUs are designed to run most stably with only two slots filled. Populating all four slots increases the load on the CPU’s memory controller, which can limit maximum stable speeds and make it harder to achieve high overclocking profiles.