
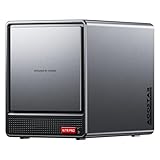
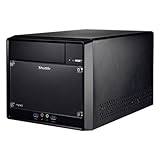
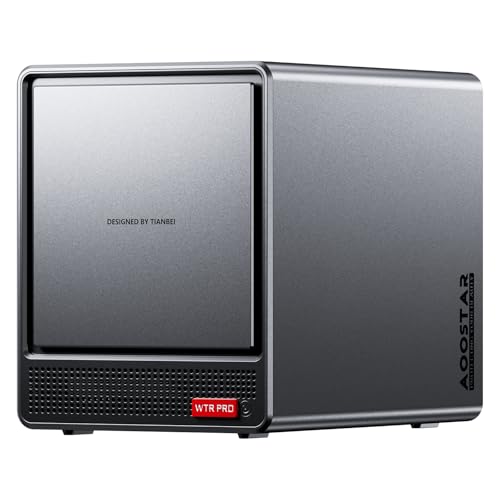
A barebones PC is an incredibly rewarding project for anyone building a dedicated home office, a compact media center, or a mini home lab. Unlike pre-built systems, a barebones unit arrives as a partial assembly—typically just a chassis, motherboard, and power supply. Popular choices like the compact Shuttle XPC Cube SH510R4 (retailing around $219 with a 300W Bronze PSU) or the multi-bay AOOSTAR WTR PRO AMD R7 5825U (priced around $399, designed for home servers) give you the freedom to choose your own RAM, storage, and operating system.
However, because these systems are completely blank out of the box, the software setup rests entirely on your shoulders. Knowing how to install windows on new barebones pc correctly is the difference between a lightning-fast workstation and a frustrating paperweight. If done poorly, you risk facing boot loops, unallocated drive errors, or missing driver conflicts that can render your newly assembled hardware unresponsive. Taking a methodical approach ensures your custom system runs smoothly from the very first boot.
As an Amazon Associate we earn from qualifying purchases at no extra cost to you.
Our Top Picks

What You Need
Before you begin the installation process, gather all the necessary components and tools. Preparing these items beforehand prevents interruptions mid-installation.
| Item | Why | Optional? |
|---|---|---|
| Barebones PC | The physical chassis, motherboard, and power supply unit (PSU). | No |
| RAM & SSD | Temporary memory and permanent storage (e.g., M.2 NVMe SSD) where Windows will reside. | No |
| 8GB+ USB Flash Drive | To hold the bootable Windows Installation Media. | No |
| Secondary Computer | Required to download the Windows installation files and write them to the USB drive. | No |
| Windows License Key | To activate your copy of Windows 10 or Windows 11. | Yes (you can activate it after installation) |
| Precision Screwdriver | A small Phillips head screwdriver (typically 2mm to 4mm) to secure the storage drive and RAM. | No (unless your chassis is completely toolless) |
Step-by-Step
Follow these numbered steps to successfully install Windows on your barebones machine. Ensure your workspace is clean, dry, and free of static electricity.
Step 1: Install the Hardware Components (Time: 15 minutes)
Before touching any software, you must install your physical memory and storage. Unplug your barebones system from the wall. Remove the outer casing—for example, the Shuttle XPC Cube (measuring roughly 12.6 x 8.5 x 7.5 inches and weighing about 7.5 pounds) requires removing three rear thumbscrews. Carefully insert your compatible RAM sticks into the DIMM slots until the side clips click into place. Next, locate the M.2 PCIe slot on the motherboard, insert your NVMe SSD at a 30-degree angle, press it flat, and secure it with the small motherboard screw. Reassemble the chassis.
Step 2: Build the Bootable USB Installation Media (Time: 15 minutes)
Move to your secondary, working computer. Insert your USB flash drive into an open port. Open a web browser, navigate to Microsoft’s official software download page, and download the Windows Media Creation Tool. Run the downloaded application, accept the license terms, and select “Create installation media for another PC.” Choose your desired language and edition, select “USB flash drive” as the destination, and choose your inserted drive. The tool will format the drive and download the installation files. Once finished, safely eject the USB drive.
Step 3: Configure the BIOS/UEFI Settings (Time: 10 minutes)
Plug the bootable USB drive into one of the USB 3.0 ports on your barebones PC (preferably a rear port directly on the motherboard). Connect a monitor, keyboard, and mouse, then plug in the power cable. Turn on the PC and immediately tap the BIOS key—usually Delete or F2—repeatedly until the motherboard setup screen appears. Verify that the BIOS recognizes your installed CPU, RAM, and SSD. Navigate to the “Boot” or “System Configuration” tab, set your USB flash drive as “Boot Option #1,” save your changes, and exit.
Step 4: Execute the Windows Installer (Time: 20 minutes)
Your system will reboot and automatically read the USB drive, launching the Windows Setup screen. Select your language, time format, and keyboard layout, then click “Install Now.” Enter your product key, or click “I don’t have a product key” to input it later. When prompted, select “Custom: Install Windows only (advanced).” You will see a list of drives; select your new, unallocated SSD and click “Next.” Windows will partition the drive, copy its system files, and install features. The system will restart automatically during this process—do not interrupt it or pull out the USB drive until you reach the basic setup screen.
Step 5: Complete the Initial Setup and Install Drivers (Time: 15 minutes)
Once the system restarts into the Windows Out-of-Box Experience (OOBE), follow the on-screen prompts to select your region, keyboard layout, and network connection. Create a user account and adjust your privacy settings. Once you reach the desktop, you must install the specific motherboard drivers. Because barebones systems use unique chipsets (such as those in the AOOSTAR WTR PRO home server), default Windows drivers might not enable Wi-Fi, ethernet, or audio right away. Use your secondary computer to download the latest chipset, LAN, and audio drivers from the manufacturer’s official support page, transfer them via your USB drive, and install them. Finally, go to Settings > Update & Security > Windows Update to run all security patches.
Mistakes to Avoid
- Using an Old, Slow USB Drive: Avoid cheap, low-grade USB 2.0 drives. They are highly prone to overheating and data corruption during long installation processes, which can halt your Windows setup midway with cryptic error codes.
- Leaving Secondary Storage Connected: If your barebones unit has multiple drive bays (like the 4-bay AOOSTAR WTR PRO), only install the primary OS drive during the initial Windows installation. If multiple drives are connected, Windows may accidentally place the boot partition on a secondary drive, causing boot failures if that drive is ever removed.
- Neglecting TPM and Secure Boot Settings: If you are installing Windows 11, you must enable Intel Platform Trust Technology (PTT) or AMD fTPM, alongside Secure Boot, within your BIOS settings. Skipping this step will result in a “This PC can’t run Windows 11” error during setup.
- Relying Entirely on Windows Update for Drivers: While Windows Update is convenient, it often installs generic drivers. Always download the official chipset and network drivers directly from the barebones manufacturer to ensure stable power delivery and network speeds.
How Often
Once Windows is successfully installed on your barebones PC, you do not need to repeat this process under normal circumstances. However, executing a clean reinstall of your operating system every 2 to 3 years is an excellent way to maintain peak performance, clear out registry bloat, and eliminate corrupt system files. As we look ahead to 2026, keeping your operating system fresh and updated ensures your hardware remains compatible with modern security protocols and resource-heavy productivity software.
When to Call a Pro or Replace
Most tech enthusiasts can install Windows on a barebones PC without professional intervention. However, you should consult a professional technician if your system fails to POST (Power On Self Test). If the internal fans spin but your monitor receives no signal, or if the motherboard emits a sequence of warning beeps, you likely have a hardware compatibility issue, faulty RAM, or a defective power supply.
Additionally, if your barebones PC motherboard is more than 6 to 8 years old and lacks support for modern TPM standards or UEFI booting, it cannot officially run modern operating systems. In this scenario, it is more cost-effective to replace the barebones unit entirely rather than attempting to bypass safety parameters.
FAQ
Can I install Windows without purchasing a license key immediately?
Yes. During the installation process, you can select “I don’t have a product key” when prompted. Windows will install completely and remain fully functional. However, a small watermark will appear on the bottom right of your screen, and you will be restricted from modifying personalization options like desktop wallpapers until you input a valid key.
What should I do if the Windows installer does not detect my SSD?
First, turn off the PC, open the chassis, and verify that the SSD is seated firmly in its slot. If the physical connection is secure, enter the BIOS and make sure the SATA/NVMe controller is set to “AHCI” or “NVMe” mode rather than “RAID.” If you are using an older barebones chipset, you may need to download the Intel Rapid Storage Technology (IRST) driver onto a separate USB drive and load it during the “Select Drive” phase of the Windows installer.
Is a 300W power supply sufficient for a barebones PC?
Yes, for standard computing, home labs, and office tasks. A 300W Bronze-certified power supply, like the one built into the Shuttle XPC Cube, easily accommodates a 65W to 125W processor, two sticks of RAM, a couple of SSDs, and a low-profile, energy-efficient graphics card. However, if you plan to install a high-end dedicated gaming graphics card, you will need a larger chassis with a 500W to 750W power supply.
Do I need to update the BIOS before installing Windows?
While it is not strictly mandatory, it is highly recommended. Updating your barebones PC’s BIOS to the latest version before installing the OS ensures maximum compatibility with newer processor architectures, prevents system crashes during installation, and resolves potential memory management bugs.
Related guides
- Best Gaming PC for Fortnite: Eight Prebuilt Desktops Sorted by Refresh Rate Goal (2026)
- Best RX 9070 XT Prebuilt Gaming PCs: Seven Desktops and Three Cards Compared: 10 Compared (2026)
- CyberPowerPC vs iBUYPOWER Gaming PC: How the Two Brands Compare
- Best RX 9070 XT Prebuilt Gaming PC (2026): 5 Picks Compared









