
As an Amazon Associate we earn from qualifying purchases at no extra cost to you.
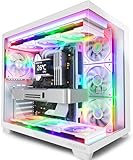

White PC cases look stunning when new, but they demand more care than their black counterparts. Dust shows instantly, fingerprints stand out, and one wrong cleaning product can permanently yellow the plastic or damage the finish. The good news: with the right supplies and technique, keeping a white case looking factory-fresh takes about 20 minutes per session. This guide walks you through the safest, most effective method.
The stakes are real. Harsh chemicals like bleach or acetone can strip coatings, microfiber pads can scratch tempered glass, and excess moisture near fan hubs or power supplies can short components. Worst of all, improper cleaning accelerates the yellowing you’re trying to prevent, leaving your case looking aged and dull within months.
What You Need
| Item | Why | Optional? |
|---|---|---|
| Microfiber cloths (3–4) | Lint-free cleaning without scratching paint, plastic, or glass | No |
| Isopropyl alcohol (70% or 99%) | Removes fingerprints, adhesive residue, and grime; evaporates quickly | No |
| Distilled water | Dilutes alcohol and rinses without leaving mineral spots | No |
| Cotton swabs | Clean tight corners, fan grilles, and I/O ports | No |
| Soft-bristle brush (clean makeup or paintbrush works) | Dislodges dust from mesh, vents, and crevices | No |
| Compressed air can or electric air duster | Blows dust from fans, filters, and hard-to-reach areas | No |
| Spray bottle | Applies cleaning solution evenly without oversaturating | Recommended |
| Rubber gloves | Keeps skin oils off surfaces and protects your hands from alcohol | Yes |
| UV-blocking case spray or plastic protectant | Adds a sacrificial layer that slows UV-related yellowing | Yes |
| Screwdriver (Phillips #2) | Removes side panels, filters, and fans for deep cleaning | Yes |
Step-by-Step
Step 1: Power Down and Disassemble (5 minutes)
Shut down your PC, flip the power supply switch off, and unplug all cables. Press the power button for 10 seconds to drain residual charge. Move the case to a well-lit workspace away from carpet. Remove both tempered glass panels and pull out dust filters if your case has removable ones. If you’re comfortable, unplug and remove front fans for a more thorough clean — snap a photo of the wiring first so reassembly is easy.
Step 2: Dry Dust First (5 minutes)
Never wipe a dusty surface with a wet cloth; that grinds particles into the finish and creates micro-scratches that trap yellowing over time. Use compressed air or an electric duster to blow dust out of fans, heatsinks, and vents. Hold fans steady with a finger or cotton swab so they don’t spin violently — overspinning can damage bearings. Use a soft-bristle brush to sweep mesh and grille areas, working from top to bottom.
Step 3: Clean Plastic and Painted Panels (5 minutes)
Mix a solution of 50% isopropyl alcohol and 50% distilled water in your spray bottle. Lightly mist a microfiber cloth — never spray the case directly, since liquid running into seams can seep toward electronics. Wipe plastic and painted surfaces in straight, gentle strokes, following the panel direction when visible. For stubborn fingerprints or adhesive residue, dampen a cloth with 99% isopropyl alcohol and press it against the spot for 10 seconds before wiping. Avoid any product containing bleach, ammonia, hydrogen peroxide, or acetone — these attack plastic polymers and coatings, which is precisely what causes yellowing.
Step 4: Clean the Tempered Glass (3 minutes)
Use a separate, clean microfiber cloth with a light mist of the alcohol-water solution. Wipe in circular motions, then buff dry with a third dry cloth to eliminate streaks. Never use paper towels or standard window cleaners with ammonia on or near the panels’ painted edges; keep the liquid on the glass itself and away from frame adhesive.
Step 5: Detail the Small Areas (5 minutes)
Dip cotton swabs in the alcohol solution and wring them nearly dry. Run them along fan blades, screw heads, I/O ports, front-panel seams, and the edges of dust filters. On cases like the MUSETEX Y6, which features seven pre-installed infinity mirror ARGB fans and a 270° full-view tempered glass layout, dust collects noticeably along the fan frames and the glass edges, so swabbing those areas makes a dramatic visual difference. On panoramic designs like the CORSAIR 3500X RS, with its wraparound glass front, pay extra attention to the curved glass-to-frame seams where grime accumulates.
Step 6: Dry and Reassemble (3–5 minutes)
Let all surfaces air-dry for at least 5 minutes — alcohol evaporates fast, but check seams and fan hubs for lingering moisture. Buff everything with a dry microfiber cloth. Reinstall filters, fans, and panels. Power on and confirm all fans spin normally before closing up your workspace.
Step 7 (Optional): Apply UV Protection (2 minutes)
If your case sits near a window, apply a thin coat of a plastic-safe UV protectant to ABS-plastic exterior panels using a clean microfiber cloth. Buff off excess. UV exposure is the primary driver of yellowing in white plastic, so this extra step meaningfully slows the process. Repeat every 2–3 months.
Mistakes to Avoid
– Using bleach, hydrogen peroxide, acetone, or ammonia-based cleaners — these chemically degrade ABS and coated plastics and cause the exact yellowing you’re preventing.
– Spraying liquid directly onto the case instead of onto a cloth.
– Wiping dusty surfaces dry with pressure, which grinds particles into the finish.
– Using paper towels or rough cloths that scratch tempered glass and painted panels.
– Removing panels while the PC is powered or plugged in.
– Letting liquid pool around fan hubs, RGB controllers, or the power supply shroud.
– Scrubbing at yellowed spots aggressively — existing yellowing from UV or heat damage usually can’t be wiped away, and scrubbing only damages the surface further.
– Placing the case in direct sunlight or near a heat source after cleaning; heat plus plastic accelerates discoloration.
How Often
– Light exterior wipe-down (glass and outer panels): every 1–2 weeks
– Full cleaning with the steps above: every 1–2 months
– Filter and fan dusting: every month, or every 2 weeks if you have pets or carpet
– UV protectant reapplication: every 2–3 months
Environment matters more than a fixed schedule. Homes with pets, smokers, or high humidity should cut these intervals roughly in half.
When to Call a Pro or Replace
Call a professional PC technician if dust has built up inside the power supply, if you need radiators or liquid cooling loops flushed, or if you notice corrosion on any internal components — DIY cleaning around a PSU can be genuinely hazardous.
Consider replacement if the yellowing has penetrated deep into the plastic. Surface-level grime cleans off; UV-baked yellowing does not. If scrubbing with the correct products leaves the case still looking aged, the discoloration is in the material itself. Replacement is often the more economical choice, since capable white cases have become remarkably affordable — the MUSETEX Y6 runs around $89 with seven ARGB fans included, and the CORSAIR 3500X RS sits near around $99, so swapping to a fresh chassis typically costs less than a full pro cleaning plus restoration attempt. Expect the market to stay competitive through 2026, with well-equipped white mid-towers clustering in the $80–$130 range.
FAQ
Can I use magic eraser sponges on a white PC case?
No. Melamine foam is essentially a very fine abrasive. It will remove a thin layer of the plastic or paint along with the stain, leaving a dull patch that yellows faster. Stick to microfiber and alcohol solution.
Why is my white case yellowing even though I clean it?
Cleaning removes surface dirt but can’t reverse chemical changes in the plastic itself. The main causes are UV exposure from windows, heat from nearby components or radiators, and off-gassing from certain plastics over time. Prevention — keeping the case out of direct sun and using UV protectant — works far better than any cleaning.
Is 70% or 99% isopropyl alcohol better?
Use 70% for general surface cleaning; the added water slows evaporation enough to dissolve grime effectively. Reserve 99% for stubborn adhesive residue and areas near electronics where you want the fastest possible evaporation.
Can I put dust filters in the dishwasher?
Only if the manufacturer explicitly says the filters are washable, and even then use the top rack with no heat dry. Magnetic and fine mesh filters can warp or lose adhesion with heat. Hand-washing with mild dish soap and cool water, then air-drying flat, is safer.
Related guides
- Best Gaming PC for Fortnite: Eight Prebuilt Desktops Sorted by Refresh Rate Goal (2026)
- Best RX 9070 XT Prebuilt Gaming PCs: Seven Desktops and Three Cards Compared: 10 Compared (2026)
- CyberPowerPC vs iBUYPOWER Gaming PC: How the Two Brands Compare
- Best RX 9070 XT Prebuilt Gaming PC (2026): 5 Picks Compared









