Getting RGB right in a white PC is harder than in a black one. White cases, especially those with tempered glass and white fans, reflect and diffuse every color you throw at them, which makes poorly tuned lighting look washed out, overly pink, or uneven between components. The priority is not maximum brightness, it is color accuracy and consistency across all of your hardware. A clean white build looks best when your software, motherboard, RAM, GPU, and fans are all speaking the same language and calibrated to the same white point and brightness level. That means locking in a single control ecosystem, correcting the inherent cool-blue tint of most addressable RGB LEDs, and using diffusion-friendly effects instead of harsh rainbow cycles that clash with the case color.
In 2026 most white builds use a mix of ARGB 5V 3-pin devices, so syncing through your motherboard header is critical for a unified look. This guide gives you exact values, menu paths, and file locations you can apply today to get a premium, frosted-glass glow without hot spots or color mismatch.
As an Amazon Associate we earn from qualifying purchases at no extra cost to you.

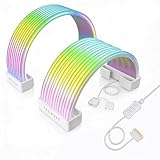


Our Top Picks
 Jungle Leopard Prism6 MAX X3 120mm ARGB PC6Max_Forward_3Pack4.72 x 4.72 x 0.98 Inches0.3 PoundsCheck on Amazon
 Under Cabinet LED Lighting RGB Color Changing &Slim12.75 x 0.8 x 0.3 Inches2.4 poundsCheck on Amazon
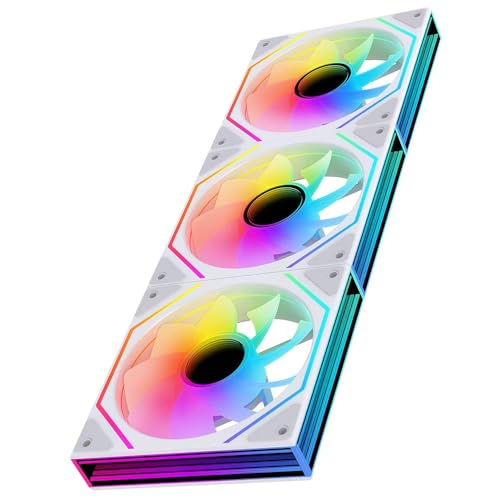 Prism6 MAX X3 120mm ARGB PC Case Fan6Max_Reverse_3Pack4.72 x 4.72 x 0.98 Inches0.3 poundsCheck on Amazon


Top 3 picks at a glance
Quick Recommended Settings
| Setting | Recommended value | Why |
|---|---|---|
| Primary Control Software | Motherboard sync only (Armoury Crate / MSI Center / Gigabyte Control Center) set as master | Prevents conflicts and color drift between peripherals and case fans |
| Base Color Temperature | 5800K – 6200K pure white | Corrects blue tint of LEDs so white walls in case look neutral, not icy blue |
| Static White Mode | Hex #FFFFFF with R 255, G 242, B 230 adjustment | Warm-corrected white compensates for W-LED bias and looks clean on white plastic |
| Brightness | 65% – 75% | High enough to glow through diffusion, low enough to avoid blown-out halos |
| Saturation | 85% – 95% for colors, 0% for white | Keeps accent colors vivid without making white look pastel |
| Effect | Static, Breathing, or Color Cycle at slow speed | Subtle effects complement white; fast rainbow creates visual noise |
| Effect Speed | 30% – 40% slider (approx. 8-12 second cycle) | Slow movement feels premium and lets diffusion do its work |
| ARGB Header Mode | Addressable Gen 2 enabled, calibrated per header | Ensures even voltage and color mapping across daisy-chained fans |
| Fan LED Count | Set exact LED count per device (e. | Prevents truncated effects and rainbow misalignment |
Setting-by-Setting
1. Unified Control Source: Motherboard Sync as Master
Exact value: Set Main Control to Motherboard Sync ON and close competing software RGB control.
What causes it: Running ASUS Armoury Crate, Corsair iCUE, NZXT CAM, and Lian Li L-Connect 3 at the same time creates competing SDK calls to the 5V ARGB header, causing flicker, stuck colors, and sections that refuse to turn white.
How to check: Open Task Manager with Ctrl + Shift + Esc, go to Startup tab, and look for multiple RGB services like LightingService.exe, iCUE.exe, and L-Connect. If two or more are set to run at startup, you have a conflict.
What to do: Choose one master. For most white builds, use your motherboard software. Path: ASUS Armoury Crate > Device > Addressable Headers > Sync at Shutdown > Enabled. MSI Center > Features > Mystic Light > Link All Devices toggle ON. Gigabyte Control Center > RGB Fusion > Settings > Calibration > Sync All. Then in the secondary software, disable motherboard integration: Corsair iCUE > Settings > Software and Games > Disable SDK. Lian Li L-Connect 3 > Settings > Sync with Motherboard RGB > ON (so it becomes a slave, not a master).
How to undo: Re-enable SDK or motherboard sync in the secondary software and set Startup Type back to Automatic in Task Manager.
Trade-off: You lose some device-specific effects in iCUE or CAM, but you gain perfect color matching. This is the single biggest fix for mismatched whites.
2. White Point Correction: Temperature and RGB Values
Exact value: Static White at R 255, G 242, B 230 or Temperature 6000K, Saturation 0%
What causes it: Bare ARGB LEDs are not true white. They create white by firing red, green, and blue at full power, which skews cool and bluish, especially against a matte white case interior that amplifies blue tones.
How to check: Set your system to pure Hex #FFFFFF (R 255, G 255, B 255) and take a phone photo with white balance locked to Auto. If the case looks light blue or lavender on screen, your white point is too cool.
What to do: In your master software, go to Manual Color Picker and enter R 255, G 242, B 230. Path: Armoury Crate > Aura Sync > Aura Effects > Static > Color Picker > Enter RGB values manually. For MSI Mystic Light > Color Wheel > Click the white center > Adjust sliders to R 255 G 242 B 230. For SignalRGB users, path: Devices > LED Strip > Color Correction > White Balance > Reduce Blue by 12-15 points. This adds warmth to cancel the blue bias.
How to undo: Reset to default by clicking the preset White swatch or entering R 255, G 255, B 255.
Trade-off: Your white will be slightly warmer than absolute pure white on a colorimeter, but it will photograph and look neutral to the human eye inside a white chassis.
3. Brightness and Diffusion: The 65-75% Rule
Exact value: Global Brightness 70%, per-header brightness matched within 5%
What causes it: At 100% brightness, white LEDs create hot spots on fan hubs and light strips, washing out nearby components and creating harsh glare through glass. White cases act like a lightbox and over-expose easily.
How to check: Set to static white and look at fan hubs from 3 feet away. If you can see individual LED dots instead of an even glow, brightness is too high. Check slider: Armoury Crate > Device > Addressable Strip > Brightness Slider 0-100.
What to do: Set global brightness to 70%. Path: Gigabyte Control Center > RGB Fusion > Brightness slider > 70. If you have Lian Li UNI Fans, open L-Connect 3 > Fan Settings > Brightness > 65% – 70%. For Corsair, iCUE > Lighting > Brightness Limit > 70%. Then calibrate each header so fans and strips match: use your phone camera on manual exposure to compare.
How to undo: Drag slider back to 100% or click Reset to Default in the lighting panel.
Trade-off: You lose some daylight visibility, but you gain even diffusion and truer pastels. This also reduces LED heat and extends lifespan.
4. Saturation for Accent Colors
Exact value: Accent colors: Saturation 90%, Brightness 70%. Pastels: Saturation 40-50%
What causes it: In a white case, fully saturated colors at 100% bleed onto white surfaces and tint the whole interior. Undersaturated colors look faded and dirty against bright white.
How to check: Apply a solid color like cyan Hex #00FFFF or pink Hex #FF6EC7. If white cables and the motherboard shroud take on the accent color, saturation is too high. Check saturation slider under Effect Settings.
What to do: Path: SignalRGB > Effect > Solid Color > Saturation slider > 88-92. For static accent: Armoury Crate > Aura Sync > Static > Saturation > 90. For a soft pastel theme that suits white builds, use Saturation 45% with Brightness 75% and choose colors like Ice Blue R 170 G 216 B 253 or Sakura Pink R 255 G 183 B 197.
How to undo: Move saturation slider back to 100% for maximum vividness.
Trade-off: Slightly less neon pop, but accent colors stay contained and do not color-wash the white interior.
5. Effect Selection and Speed
Exact value: Use Static, Breathing (2 sec fade), or Color Cycle at 35% speed. Disable Rainbow Wave at 100% speed.
What causes it: Fast rainbow wave and strobing effects clash with the clean aesthetic of a white build and highlight mismatched LED counts between RAM, GPU, and fans.
How to check: Run the default Rainbow effect. If the wave appears broken or jumps between RAM sticks and fans, the effect speed or LED mapping is wrong.
What to do: Path: MSI Mystic Light > Light Effect > Breathing > Speed slider > 35%. ASUS Armoury Crate > Aura Sync > Effects > Color Cycle > Speed > Slow (around 30% on the 0-100 scale, approx. 10 second transition). Key combo for some motherboards to test without software: Press and hold the onboard LED button for 3 seconds to cycle speed, or use remote key Fn + F12 to slow effect. Set LED count correctly in OpenRGB if used: OpenRGB > Device > ARGB Header > Set LED Count to actual number (e.g., 24 for 3x UNI Fans) and file location for persistence is %appdata%\OpenRGB\OpenRGB.json.
How to undo: Re-select Rainbow or Wave and set speed back to 80-100%.
Trade-off: Less flashy, but the build looks cohesive and professional. Slow transitions also reduce distraction while gaming.
6. ARGB Header Calibration and LED Count
Exact value: Enable Calibration, set LED count per port, and set Direction to match physical wiring
What causes it: Incorrect LED count truncates the end of effects and makes strips display the wrong color. Wrong direction makes the effect run backward on one fan string.
How to check: Apply a Chase or Comet effect. If the tail of the comet disappears before the last fan, your LED count is too low. If it runs clockwise on one fan group and counter-clockwise on another, direction is mismatched.
What to do: Path: Gigabyte Control Center > RGB Fusion > Settings > LED Count > Enter exact value from manual (e.g., Lian Li SL120 = 16 LEDs per fan, Strimer Plus 24-pin = 120 LEDs). Armoury Crate > Device > Addressable Header > Calibration > Start Calibration > Follow on-screen test pattern. File location for ASUS calibration data: C:\ProgramData\ASUS\AURA\AuraService\config.json (do not edit manually, use GUI). Restart Aura service after change: Win + R > services.msc > ASUS Aura Service > Restart.
How to undo: Click Reset Calibration or set LED count back to Auto Detect.
Trade-off: Takes 5 minutes to configure correctly, but fixes 90 percent of wave and sync errors permanently.
By Hardware Tier
Low Tier: Single ARGB Hub, Air Cooled, No Premium Controller
This is typically a white case like the NZXT H5 Flow or Montech Air 100 with three to six fans daisy-chained to one motherboard 5V 3-pin header or a basic button-controlled hub.
Recommended settings: Use motherboard software exclusively and set everything to Static White R 255 G 242 B 230 at 70% brightness. Disable all software effects. Use the physical LED button on the case (often hold for 3 seconds to sync to motherboard) to put the hub into Motherboard Sync mode so the button no longer overrides software. Value range: Keep saturation at 0% for white, do not attempt pastel colors at this tier as cheap diffusers will show green and pink tint.
Menu path: BIOS > Advanced > Onboard Devices Configuration > RGB LED Control > Enabled, then control from OS. If using OpenRGB as a lightweight free controller, set it to start minimized: Settings > Minimize on Close > ON.
Mid Tier: Dedicated Controller (Corsair Commander, Lian Li, NZXT) with Mixed Brands
You have white RAM like Corsair Vengeance RGB or G.Skill Trident Z Royal, plus 6-9 UNI or QX fans and maybe an AIO with LCD.
Recommended settings: Master is still the motherboard, but let the AIO keep its own control for screen only. Set unified accent theme: Ice White base with one accent color. Example: Static White base (R 255 G 242 B 230, 70% brightness) and Teal accent on RAM only at R 0 G 200 B 180, Saturation 85%, Brightness 70%. Effect for fans: Breathing at 35% speed. This creates contrast without overwhelming the white interior.
Menu path: L-Connect 3 > Sync Mode > MB Sync > ON for fans, but keep AIO Screen Settings separate under AIO > Display. In iCUE, set Murals to Disabled to prevent takeover. File location for iCUE profiles to back up: C:\Users\[YourName]\AppData\Roaming\Corsair\CUE5\profiles\*.cueprofile. Save a backup before syncing.
High Tier: Full Ecosystem, Strimer Cables, GPU Bracket, Multiple ARGB Zones
High-end white builds with Lian Li Strimer Plus V2, 10+ fans, GPU RGB, and vertical mounts have many independent zones that must be tuned individually.
Recommended settings: Create a layered profile. Layer 1: Static White corrected at R 255 G 242 B 230, 65% brightness for all fan frames and strips. Layer 2: Slow Color Cycle at 30% speed, Saturation 45% for GPU and Strimer only, to add movement without affecting the clean fan glow. Calibrate each zone’s white point: Strimer tends to run cooler, so reduce its blue by an extra 10 points (try R 255 G 245 B 225 for Strimer zone only). Enable Gen 2 Addressable mode for smoother gradients.
Menu path: Armoury Crate > Aura Sync > Advanced Effects > Create Layer > Select Device Group > Apply per-device color correction. Gigabyte > RGB Fusion > Per Header Calibration > White Balance > Adjust Blue channel -10. Key combo to instantly preview without saving: Press Apply vs. Save – use Apply to test, Save to write to device firmware.
Common Mistakes
Mistake 1: Leaving Two RGB Apps Fighting for Control
What causes it: Two services writing to the same SMBus address cause flicker and resets to red default.
How to check: Open Services with Win + R and type services.msc, look for LightingService and iCUE Service both Running, then open Task Manager > Startup and see two RGB apps Enabled.
What to do: In iCUE > Settings > General > uncheck Enable SDK and Plugins. In Armoury Crate > Settings > General > uncheck Start on Startup if iCUE is your chosen master, reboot, then re-test static white.
How to undo: Re-check Enable SDK and set service Startup Type back to Automatic.
Mistake 2: Using Pure 100% White at 100% Brightness
What causes it: Overexposure washes out the build and creates yellow or blue hot spots on white plastic.
How to check: Set Hex #FFFFFF and Brightness 100%, then view the build in a dark room. If fan centers are noticeably brighter than edges, it is too high.
What to do: Lower Global Brightness to 70% in your master app and apply the warm correction R 255 G 242 B 230. Path: Aura Sync > Static > Brightness slider > 70, then manually edit RGB values.
How to undo: Restore to R 255 G 255 B 255 and Brightness 100%.
Mistake 3: Rainbow Wave on Every Component
What causes it: Default rainbow cycles emphasize mismatched LED densities and make a white case look like a toy.
How to check: If your RAM has 8 LEDs but your fan strip has 24, the rainbow will appear stretched or broken when viewed through the glass.
What to do: Switch to Breathing or Static with one accent. Path: Mystic Light > Effect > Breathing > Speed 35% > Color #FFB7C5 for a sakura accent, or set to Static White for a clean look.
How to undo: Re-select Rainbow or Wave and increase Speed to 90%.
Mistake 4: Wrong LED Count or Header Direction
What causes it: Auto-detect often miscounts daisy-chained devices, truncating the effect tail.
How to check: Run a single-color chase. If the chase jumps or cuts off early on the last device in the chain, count is wrong. Check manual for LED count per fan.
What to do: In your controller software, manually set count: L-Connect 3 > Settings > Device Info > LED Number > 48 for three SL120 fans daisy-chained. Use the Reverse Direction toggle if one string runs opposite.
How to undo: Set LED Number back to Auto.
Mistake 5: Forgetting to Enable Motherboard Sync on the Physical Hub
What causes it: Many white cases include a front-panel hub with a button that defaults to hardware mode, which overrides software commands even when software looks correct.
How to check: Change color in software to red. If the fans stay white or rainbow, the hub is in hardware mode.
What to do: Hold the case LED button for 5 seconds until fans flash white, or press the sync button on the hub PCB inside the case (usually near the rear panel). Some hubs require moving a SATA-powered switch from HUB to MB.
How to undo: Short-press the case LED button to return to hardware control.
FAQ
What is the best overall RGB color for a white PC?
A warm-corrected static white at R 255 G 242 B 230, 6000K, 70% brightness, 0% saturation is the most universally flattering. It keeps the interior looking premium and matches correctly across white cables, motherboard shrouds, and tempered glass. If you want color, add a single low-saturation pastel accent like Ice Blue or Sakura Pink on RAM or the GPU only, while leaving fans white. This avoids color wash on the white surfaces.
Why does my white look blue or pink in a white case?
White ARGB LEDs lean blue by default, and white plastic diffuses that blue strongly. The pink tint appears when green is slightly low. Fix it by reducing the blue channel by 12-15 points from pure white, as described above, and ensuring brightness is not at 100 percent. Also check that no second software is applying its own white correction on top of the motherboard’s.
Should I use SignalRGB or OpenRGB for a white build?
Use SignalRGB if you want advanced per-device white balance and game integrations with a unified interface. Its white balance correction under Devices is excellent for white builds. Use OpenRGB if you want a lightweight, open-source tool that does not run background services constantly. OpenRGB is better for low-tier builds where you just need to set once and save to device memory at C:\ProgramData\OpenRGB\. In both cases, disable other RGB software SDKs first to avoid conflicts.
How do I save my RGB settings so they persist after reboot or shutdown?
In most motherboard software you must click Save to Device or Apply to Firmware, not just Apply. Path: Armoury Crate > Device > Addressable Header > Shutdown Effect > Enabled > Save. MSI Center > Mystic Light > Save Profile icon (floppy disk) > Save to Board Memory. For hardware hubs, after setting motherboard sync, hold the hub sync button until it flashes to write the mode to the hub’s flash. Back up your profile file before major updates: Armoury Crate profiles are in C:\ProgramData\ASUS\AURA\, MSI profiles in C:\Users\[YourName]\Documents\MSI Center\Mystic Light\.