Streaming from a single PC means your encoder is competing directly with your game for CPU and GPU resources. Getting the best streaming PC encoder settings is not about maxing quality sliders, it is about protecting gameplay smoothness while delivering a stable image to Twitch, YouTube, or Facebook. Prioritize three things in order: frame-time stability first, bitrate efficiency second, and fine detail third. If your encoder causes in-game stutter or dropped frames, no viewer-side quality improvement matters. The guide below gives you exact values and menu paths you can apply in OBS Studio in 2026, with clear trade-offs so you can tune for your hardware without guesswork.
Our Top Picks
 Zowietek 4K Video Streaming Encoder/DecoderStandard2.68 x 0.87 x 4.84 inches0.4 poundsCheck on Amazon
 URayCoder HD HEVC H.265 MPEG4 H.264 4K HDMIH.264 LAN5.12 x 4.13 x 1.1 Inches1.1 poundsCheck on Amazon
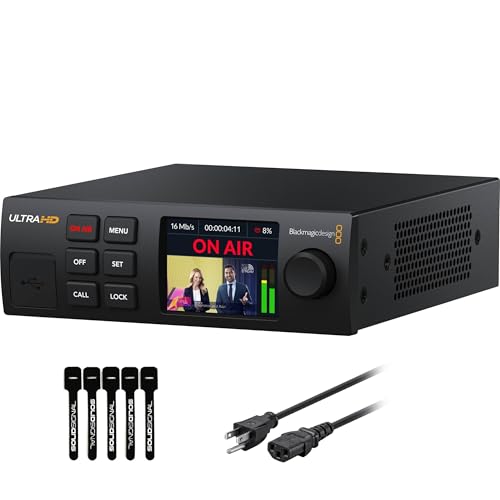


Top 3 picks at a glance

Quick Recommended Settings
| Setting | Recommended value | Why |
|---|---|---|
| Encoder | Hardware: NVENC H.264 (NVIDIA) or AMF H.264 (AMD) if available; otherwise x264 | Hardware offloads encoding from CPU and preserves game performance on most single-PC setups |
| Rate Control | CBR | Required by most platforms and prevents bitrate spikes that cause buffering |
| Bitrate | 4500-6000 Kbps for 1080p60, 3000-4500 Kbps for 720p60, 2500-3500 Kbps for 936p60 | Balances clarity with platform limits and viewer download speeds |
| Keyframe Interval | 2 seconds | Meets Twitch and YouTube requirements for transcoding and seeking |
| Preset | NVENC: P5 Slow (Quality) or P6 Slower; x264: veryfast to medium | Higher quality presets improve efficiency but cost GPU/CPU headroom |
| Profile | high | Best compression efficiency for modern devices |
| Tune / Multipass | Tune: None; Multipass: Two Passes (Quarter Resolution) for NVENC | Improves motion handling without adding latency of full two-pass |
| B-Frames | 2 | Adds quality at same bitrate with minimal latency impact |
| Resolution / FPS | Canvas: 1920×1080, Output (Scaled): 1920×1080 or 1664×936 or 1280×720 at 60 fps | 936p is an efficient compromise when 1080p60 exceeds your bitrate |
| Color Format / Range | NV12, 709, Partial | Standard for streaming; prevents washed-out or crushed color |
Setting-by-Setting
Encoder Type: Where to Set It and Which to Choose
Exact path: In OBS Studio go to Settings > Output > Streaming section > Encoder dropdown. You will see options like Software (x264), Hardware (NVENC) H.264, Hardware (AMF) H.264, and QuickSync H.264. NVENC is available on NVIDIA GTX 1650 Super and newer, including RTX 20, 30, and 40 series. AMF appears for AMD RX 5000 and newer. QuickSync appears if your Intel CPU has integrated graphics enabled in BIOS.
As an Amazon Associate we earn from qualifying purchases at no extra cost to you.



Trade-off: x264 gives you more granular control over CPU presets and can look slightly better at low bitrates if you have a spare 6 to 8 core CPU, but it directly taxes the same cores your game uses. Hardware encoders use a dedicated chip on the GPU, so gameplay stays smoother. For most single-PC streamers, choose NVENC H.264 or AMF H.264. Only choose x264 if you have a high core-count CPU that stays below 75% total utilization while gaming and streaming, visible in Task Manager > Performance > CPU or with Ctrl+Shift+Esc.
Rate Control: CBR
Exact path: Settings > Output > Streaming > Rate Control. Select CBR. Set Bitrate field next to it. Do not use CQP, CRF, or VBR for live streaming. Platforms expect a constant stream or they will flag bitrate fluctuations as instability.
Trade-off: CBR wastes some bits on static scenes where VBR would save data, but it guarantees network stability and keeps your stream within platform ingests. If you record locally at the same time, use a separate Recording tab with Rate Control set to CQP or CRF for higher local quality without affecting the live CBR stream.
Bitrate: Platform-Specific Values
Exact path: Settings > Output > Streaming > Bitrate. Enter value in Kbps. Twitch limit for non-partners is 6000 Kbps; YouTube supports up to 9000 Kbps but 6000 is a practical ceiling for viewers. Always set Audio Bitrate under Settings > Output > Audio to 160 for most streams.
Trade-off: Higher bitrate improves clarity during fast motion, foliage, and particle effects, but requires more upload bandwidth. Check your real upload with a speed test and leave 35% headroom. For example, if you have 10 Mbps upload, do not exceed 6000 Kbps total (video plus 160 Kbps audio). Viewers on mobile or limited connections may buffer if you push above 6000 Kbps without transcoding.
Keyframe Interval: 2 Seconds
Exact path: Settings > Output > Streaming > Keyframe Interval. Set to 2. OBS may show it as seconds. If it shows 0 for auto, change it manually.
Trade-off: Lower values like 1 second increase seekability but slightly reduce compression efficiency. Higher values like 4 seconds improve efficiency a little but break Twitch requirements and delay viewer rejoin after a drop. 2 seconds is the universal standard.
Preset: Quality vs Performance
Exact path: Settings > Output > Streaming > Preset. For NVENC, presets are labeled P1 Fastest to P7 Slowest. For AMF, presets are Quality, Balanced, Speed. For x264, presets are ultrafast to slow.
Trade-off: Slower or higher-quality presets use more encoder power to squeeze more quality per bit, which looks better but can add encoding latency and increase GPU utilization. Recommended starting points: NVENC P5 Slow for gaming PCs with RTX 3060 or better, P4 Medium if you play high-refresh competitive shooters and notice encoder lag. For x264, start at veryfast, then try faster or medium if Task Manager shows CPU headroom and OBS Stats dock (View > Docks > Stats) shows 0% frames missed due to rendering lag and 0% skipped frames due to encoding lag.
Profile: High
Exact path: Settings > Output > Streaming > Profile. Choose high.
Trade-off: High profile supports more compression tools than main or baseline, giving better quality at the same bitrate. Some very old mobile decoders needed baseline, but all current platforms and devices support high. No reason to use lower.
B-Frames and Reference Settings
Exact path: Settings > Output > Streaming > B-Frames. Set to 2. If using NVENC advanced options, set B-Frame Reference Mode to Middle. For AMF, set B-Picture Pattern to 2.
Trade-off: B-frames improve quality by referencing future and past frames, especially on static backgrounds. Setting to 0 reduces latency by a few milliseconds but costs quality. Setting to 4 can improve quality slightly at high bitrates but may cause decoding issues on some browsers. 2 is safe and efficient across platforms.
Multipass Mode and Look-Ahead
Exact path: Settings > Output > Streaming > Multipass Mode and check boxes for Look-ahead and Psycho Visual Tuning. Recommended: Multipass Mode: Two Passes (Quarter Resolution), Look-ahead: Off for competitive games, On for slower-paced games, Psycho Visual Tuning: On.
Trade-off: Quarter-resolution two-pass improves rate control and motion estimation with minimal GPU cost. Full-resolution two-pass looks marginally better but uses more encoder headroom. Look-ahead improves scene change detection but adds a small queue latency, so disable it if you need the lowest glass-to-glass delay for esports.
Resolution and Downscale Filter
Exact path: Settings > Video > Base (Canvas) Resolution, Output (Scaled) Resolution, Downscale Filter, and FPS. Also Settings > Output > Streaming > Rescale Output (leave unchecked if you control scaling in Video tab). Common choices: Base 1920×1080, Output 1920×1080 at 60 FPS. If you need to lower bitrate demand, set Output to 1664×936 or 1280×720. Set Downscale Filter to Lanczos (36 samples) for best sharpness when downscaling.
Trade-off: Native 1080p60 is sharpest but demands more bitrate. 936p60 retains most clarity while reducing pixel count by about 25%, which makes 5000 Kbps look cleaner than 1080p60 at the same bitrate. 720p60 is most forgiving on low upload or low-end encoders but looks soft on large monitors. FPS of 60 is standard for gaming; 30 saves bitrate but hurts motion smoothness in shooters.
Advanced Color and Process Priority
Exact paths: Settings > Advanced > Color Format: NV12, Color Space: 709, Color Range: Partial. Settings > Advanced > Process Priority: Above Normal. File location for manual backup: %appdata%\obs-studio\basic\profiles\YourProfileName\basic.ini and service.json. Press Ctrl+Shift+S to open Stats to monitor performance.
Trade-off: NV12 with 709 and Partial is the broadcast standard for streaming. Setting Full range may look crushed on viewers’ players. Above Normal priority keeps OBS from starving when the game spikes CPU, but setting it to High can make system input lag worse. Leave it at Above Normal.
By Hardware Tier
Low-End PC: 4 to 6 Core CPU, GTX 1650 Super / RTX 2050 / RX 6500 XT, 16GB RAM
Use hardware encoding exclusively. Go to Settings > Output > Output Mode: Simple or Advanced. Recommended path Advanced: Encoder AMF H.264 or NVENC H.264, Rate Control CBR, Bitrate 3500-4500 Kbps, Keyframe Interval 2, Preset Speed or P3 Fast, Profile high, B-Frames 2, Output Resolution 1280×720 or 1536×864 at 60 fps or 30 fps if encoder lag appears. In Settings > Video set FPS to 30 if Stats show skipped frames due to encoding lag above 0.1%. Check your log file at %appdata%\obs-studio\logs\ to confirm encoding lag lines remain at 0. Enable Dynamic Bitrate under Settings > Advanced > Network > Enable Dynamic Bitrate to avoid disconnects on unstable connections.
Mid-Range PC: 6 to 8 Core CPU, RTX 3060 / RTX 4060 / RX 7600 XT or better, 16 to 32GB RAM
This tier handles single-PC 936p60 or 1080p60 comfortably. Set Encoder to NVENC H.264 or AMF H.264, Rate Control CBR, Bitrate 5000-6000 Kbps, Keyframe Interval 2, Preset P5 Slow or Quality, Multipass Two Passes (Quarter Resolution), Psycho Visual Tuning On, Look-ahead Off for shooters or On for RPG and strategy, B-Frames 2, Profile high. In Settings > Video, Base 1920×1080, Output 1664×936 or 1920×1080, Lanczos filter, 60 fps. Monitor encoder load in OBS Stats dock. If rendering lag appears, cap in-game FPS to 3-5 fps below monitor refresh or enable NVIDIA Control Panel > Manage 3D settings > Max Frame Rate.
High-End PC: 8+ Core CPU, RTX 4070 / RTX 4080 / RX 7900 XT or better, 32GB RAM
You can run maximum hardware quality or switch to x264 medium if you prefer CPU encoding. Hardware path: NVENC H.264, CBR 6000 Kbps, Keyframe Interval 2, Preset P6 Slower, Multipass Two Passes (Quarter Resolution) or Full Resolution if utilization stays under 80%, Psycho Visual Tuning On, B-Frames 2, Profile high, Look-ahead On, Output 1920×1080 60 fps. CPU path alternative: Encoder x264, CBR 6000 Kbps, Keyframe Interval 2, CPU Usage Preset medium or slow, Profile high, Tune none, x264 Options field leave blank unless you add bframes=2 b-adapt=2. Test stability with a 10 minute capture of your most demanding game while viewing View > Stats. If CPU total exceeds 85% in Task Manager, revert to NVENC to avoid input latency.
Common Mistakes
1. Bitrate too high for upload, causing dropped frames (network). What causes it: Setting 8000 Kbps when upload is insufficient or Wi-Fi interference causes packet loss. How to check: In OBS, View > Docks > Stats > Dropped Frames (Network) percentage. Also check Help > Log Files > Show Log Files and search for dropped frames. What to do: Lower bitrate to 4500 Kbps, go to Settings > Advanced > Network and check Enable Dynamic Bitrate and Bind to IP to your ethernet adapter. Switch from Wi-Fi to ethernet if possible. How to undo: Restore bitrate to previous value and uncheck Dynamic Bitrate if it causes quality pulsing you dislike.
2. Canvas and Output resolution mismatch causing blur. What causes it: Setting Base to 2560×1440 but streaming Output to 1920×1080 without a proper downscale filter, or checking Rescale Output in Output tab and also scaling in Video tab causing double scaling. How to check: Look at Settings > Video vs Settings > Output > Streaming > Rescale Output. If both are scaling, one is redundant. What to do: Uncheck Rescale Output, set scaling only in Settings > Video > Output Resolution, and set Downscale Filter to Lanczos. Restart preview with right-click Preview > Scale Preview unchecked. How to undo: Re-enable Rescale Output and set Video Output to same as Canvas if you need separate recording resolution.
3. Encoder overloaded due to maxed preset. What causes it: Using NVENC P7 Slowest or x264 medium/slow on a CPU that is also running the game at 90%+ utilization. How to check: Stats dock shows Skipped frames due to encoding lag above 0.5% or Encoding overloaded message. Task Manager shows GPU Video Encode at 95%+ or CPU at 95%+. What to do: Step preset down one level, for NVENC from P7 to P5, for x264 from medium to veryfast. Cap in-game frame rate with in-game limiter or RivaTuner to free headroom. How to undo: Return preset to previous value after reducing game load or closing background apps like Chrome.
4. Wrong keyframe interval breaking transcoding. What causes it: Leaving Keyframe Interval at 0 (auto) or 4+, which some platforms do not transcode reliably. How to check: Check Settings > Output > Keyframe Interval. Also review Twitch Inspector or YouTube Live Dashboard health for keyframe errors. What to do: Set Keyframe Interval to 2 seconds and restart stream. How to undo: Set back to 0 if you are only recording locally and want auto control.
5. Full color range causing washed color. What causes it: Setting Color Range to Full while platform expects Partial, or capturing HDR without tone mapping. How to check: Compare local preview to stream playback on another device; blacks look gray or highlights clip. Check Settings > Advanced > Color Range. What to do: Set Color Format NV12, Color Space 709, Color Range Partial. If using Game Capture HDR, right-click source > Properties > uncheck Capture HDR if available. How to undo: Set Color Range back to Full if you are recording locally in Full for editing and handle conversion in post.
FAQ
Should I use NVENC, AMF, or x264 for single-PC streaming?
Use NVENC H.264 or AMF H.264 if your GPU offers it, because the dedicated encoder chip keeps gaming performance higher than x264. Check Settings > Output > Encoder to see available options. Choose x264 only if you have tested and see no CPU bottleneck, which you verify in Stats dock with 0% missed frames. If you have an Intel Arc or Intel integrated GPU with QuickSync H.264, that is also viable for 720p60 to 936p60 and is selected the same way.
What bitrate should I use for 1080p60 without losing quality?
Platform guidance is 4500 to 6000 Kbps for 1080p60 with CBR and Keyframe Interval 2. If you notice blockiness during fast motion in OBS logs or playback, lower Output Resolution to 1664×936 in Settings > Video instead of raising bitrate above 6000 Kbps, since many viewers cannot smoothly receive higher rates. Keep Audio Bitrate at 160 Kbps under Settings > Output > Audio. Test for 10 minutes and watch Stats > Dropped Frames (Network) to ensure your upload sustains the chosen rate.
Why does OBS say encoding overloaded even though the game runs fine?
The game and encoder compete for the same resource. The game may hold 60 fps while the encoder misses deadlines, which OBS reports as skipped frames due to encoding lag or rendering lag. Open View > Docks > Stats and Task Manager > Performance. If GPU 3D is at 98% in Task Manager, limit in-game FPS or lower game settings. If CPU is at 90% with x264, switch to NVENC H.264 or move x264 preset from medium to veryfast. File locations for logs that confirm which lag occurred are in %appdata%\obs-studio\logs\.
Do I need different settings for Twitch versus YouTube?
Core settings stay the same: CBR, Keyframe Interval 2, Profile high, B-Frames 2. Difference is ceiling and flexibility. Twitch expects 6000 Kbps maximum for most accounts, so target 4500-6000 Kbps and 936p60 if needed for clarity. YouTube tolerates higher bitrates and VP9 transcoding, so you can use 6000-9000 Kbps if your upload allows and you set Keyframe Interval 2. Path to change platform: Settings > Stream > Service, then adjust Bitrate under Settings > Output > Streaming accordingly. Always do a private test stream and check the platform’s health dashboard before going live.