Small form factor PCs live and die by thermals and power delivery. Unlike a mid-tower with massive airflow, a small PC packs hot components into a compact case where heat builds fast, fans ramp loudly, and voltage spikes can trigger thermal throttling. Undervolting is the most effective way to reclaim headroom: you lower the voltage supplied to your CPU and GPU while maintaining the same clock speeds, which reduces heat, noise, and power draw without sacrificing performance when done correctly. What to prioritize is stability first, thermals second, and acoustic performance third.
For a small PC, the goal is not to chase the lowest possible voltage. It is to find the point where your system stays stable under sustained load, keeps CPU and GPU temperatures under their throttling thresholds inside a restricted chassis, and allows fans to run at a quieter, flatter curve. You want to reduce voltage in small, testable steps, validate each change with a real workload, and keep a clear path to revert if instability appears. As of 2026, both AMD and Intel platforms and modern NVIDIA and AMD GPUs offer granular voltage control that makes this process safer and more predictable than ever if you follow the correct menu paths and testing sequence.
As an Amazon Associate we earn from qualifying purchases at no extra cost to you.




Our Top Picks
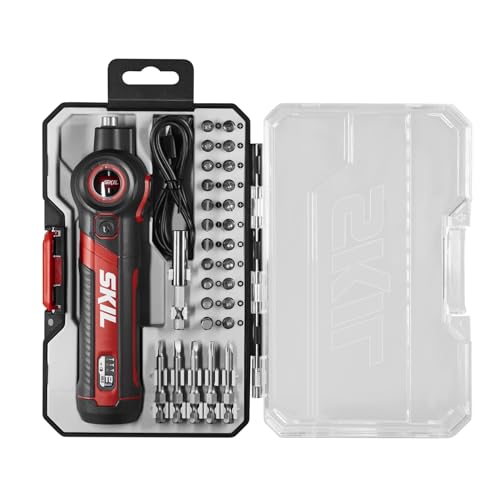 SKIL Twist 2.0 Rechargeable 4V Screwdriver with Pivoting1 Pack5.31 x 2.2 x 8.11 Inches1.7 PoundsCheck on Amazon


Top 3 picks at a glance
Quick Recommended Settings
| Setting | Recommended value | Why |
|---|---|---|
| CPU Undervolt Method | AMD Curve Optimizer: -15 to -25 per core / Intel: -50mV to -80mV offset | Lowers voltage at every frequency point without capping peak boost, ideal for thermally limited cases |
| CPU Power Limits (PPT / PL1/PL2) | Set PPT to 65W-88W for 65W CPUs, PL1 65W-125W for Intel small builds | Prevents sustained power spikes that overwhelm small coolers and PSUs |
| GPU Voltage Curve | 900mV – 950mV at 2400-2610 MHz (NVIDIA) / 1050mV – 1100mV max for AMD | Flattens the frequency/voltage curve to cut heat and keep boost clocks from bouncing |
| GPU Power Limit | 85% – 92% | Caps total board power to reduce exhaust heat inside the chassis |
| Fan Curve (CPU and Case) | 30% at 40C, 55% at 65C, 85% at 80C, 100% at 90C | Keeps noise low during light loads but ramps early enough to avoid heat soak |
| Load Line Calibration (LLC) | Medium / Level 3-4 of 7-8, or Auto | Prevents voltage droop without overshooting voltage under load |
| Memory / SoC Voltage | Leave at stock unless using Curve Optimizer; SoC 1.05V – 1.10V for AMD AM5 | Avoids instability from undervolting the memory controller |
| Stability Test Loop | 10 min Cinebench R23 + 15 min OCCT CPU + 30 min gaming load | Validates both synthetic and real-world stability before daily use |
Setting-by-Setting
CPU Curve Optimizer / Voltage Offset – Recommended: AMD -20 All-Core Start, Intel -60mV
What causes it: Factory voltage tables are conservative and apply more voltage than needed for stability on most silicon, which creates excess heat in small cases with low cooler clearance.
How to check: On AMD, enter BIOS by tapping Delete during boot, then go to Advanced > AMD Overclocking > Precision Boost Overdrive > Curve Optimizer. On Intel, go to BIOS Advanced > Overclocking > Voltage Configuration > CPU Core Voltage Offset, or use Intel XTU at C:\Program Files\Intel\Intel XTU\XtuService.exe. Check current voltage with HWiNFO64 sensors (CPU Core Voltage SVI2 TFN for AMD, Vcore for Intel) while running Cinebench R23.
What to do: For AMD AM4/AM5, set Curve Optimizer to All Cores, Negative, 20. For Intel 12th/13th/14th Gen, set CPU Core Voltage Offset to -60mV and set Cache/Ring Offset to -40mV. Apply and reboot. If stable, increase magnitude by -5 per step for AMD or -10mV for Intel. Test after each step.
Trade-off: More negative values lower temperatures and fan noise but increase risk of idle crashes or WHEA errors. Per-core tuning is more stable than all-core but takes longer.
How to undo: Return to the same BIOS menu and set Curve Optimizer to Disabled or set Voltage Offset back to 0mV. In XTU, click Default on the left profile pane and Apply.
CPU Power Limits (PPT, TDC, EDC / PL1, PL2) – Recommended: PPT 76W-88W for 65W-class, PL1 65W-125W
What causes it: Stock power limits allow short bursts well above the cooler’s sustained capacity, causing rapid heat soak in small chassis with limited exhaust.
How to check: In HWiNFO64, monitor CPU Package Power and PPT/PL1 limits during a 10-minute Cinebench run. If package power is pinned at 120W+ and temperatures hit 95C quickly, limits are too high for your cooler.
What to do: In BIOS go to Advanced > AMD CBS > NBIO > SMU > Precision Boost Overdrive Limits > Manual and set PPT to 88000 (88W), TDC to 75A, EDC to 110A. For Intel, go to Overclocking > CPU Power Management > Long Duration Power Limit (PL1) and Short Duration Power Limit (PL2) and set PL1 to your cooler rating (65W for low-profile air, 125W for 240mm AIO in SFF) and PL2 to PL1 + 25W. Set Tau to 56 seconds.
Trade-off: Lower limits cap multi-core scores slightly but keep clocks consistent over long gaming sessions and prevent fan oscillation.
How to undo: In the same BIOS power limit page, switch back to Auto or Motherboard limits. Save and exit with F10.
GPU Voltage Curve – Recommended: Lock 930mV to 2520-2595 MHz for NVIDIA RTX 40 Series
What causes it: The default GPU boost algorithm pushes voltage to 1.05V-1.10V to chase the highest possible clock, which dumps unnecessary heat into a small case and causes boost clock fluctuation.
How to check: Install MSI Afterburner from Program Files (x86)\MSI Afterburner\MSIAfterburner.exe. Press Ctrl + F to open the Voltage/Frequency curve editor. Run a game with overlay (Alt + R for GeForce Experience overlay or use HWiNFO OSD) and note the voltage where the GPU stabilizes at full load.
What to do: In the curve editor, click the point at 930mV, drag it up to your target frequency (for example 2550 MHz), then press Shift + drag from that point to the right to flatten the curve beyond it. Click Applycheckmark in Afterburner and save to Profile 1. Click the Windows icon in Afterburner to enable Apply at startup at C:\Program Files (x86)\MSI Afterburner\Profiles\MSIAfterburner.cfg. For AMD Radeon, use Adrenalin Software > Performance > Tuning > Custom > GPU Tuning enabled > Advanced Control > set Max Voltage to 1075mV and set Frequency offset to 0.
Trade-off: A flat, low-voltage curve reduces hotspot temperatures and PSU load, but an overly low voltage causes driver crashes or black screens during scene transitions.
How to undo: In Afterburner, press Ctrl + F, click Reset, then Apply. For Adrenalin, click Reset in the Tuning tab or set Tuning Preset back to Default.
GPU Power Limit – Recommended: 88% – 92%
What causes it: Board power limit directly controls total heat output. In Sandwich-layout or console-style SFF cases, the GPU exhaust recirculates and raises CPU and chipset temperatures.
How to check: In Afterburner main slider, note Power Limit %. In HWiNFO64, watch GPU Board Power and Hot Spot Temperature while running a 10-minute loop of a demanding title or 3DMark Stress Test.
What to do: In MSI Afterburner, set Power Limit to 88%, leave Temp Limit linked at 83C, click Apply. If you undervolted via the curve, this acts as a safety ceiling and will rarely be hit, but it prevents transient spikes in small PSUs like SF600/SF750.
Trade-off: Lower power limit is the easiest way to cut noise and thermals, but setting it below 85% on higher-end GPUs can cap performance in ray-traced titles before the voltage curve does.
How to undo: Move Power Limit slider back to 100% and click Apply. Uncheck Apply at startup if you want it off after reboot.
Fan Curve and Thermal Response – Recommended: Flat 30% to 40C, Linear to 85% at 80C
What causes it: Default fan curves in small PCs are often too passive, letting heat soak into the chassis before ramping, then overcorrecting loudly.
How to check: In BIOS go to Hardware Monitor > Fan Control or use FanControl software at C:\Program Files\FanControl\FanControl.exe. Observe fan RPM hysteresis settings and CPU/GPU edge temps at idle and after 5 minutes of gaming.
What to do: Set CPU Fan and System Fan 1/2 to Custom Curve: 30% PWM at 40C, 45% at 55C, 65% at 70C, 85% at 80C, 100% at 90C. Set hysteresis to 5C and response delay to 3 seconds to stop rapid cycling. For GPU, set a similar curve in Afterburner > Settings > Fan > Enable user defined software automatic fan control, with the same points.
Trade-off: A more aggressive early ramp keeps case air moving and lowers average temps but is slightly louder at mid-load. A delayed ramp is quieter but risks thermal runaway in mesh-free cases.
How to undo: In BIOS Fan Control, set all headers back to Smart Fan Auto / Default. In Afterburner, disable user defined fan control.
Load Line Calibration (LLC) – Recommended: Medium or Auto
What causes it: Vdroop during load can make a stable undervolt appear unstable if LLC is too weak, while too strong an LLC injects voltage overshoot.
How to check: In BIOS go to Overclocking > Digi+ VRM or Voltage Regulation > Load Line Calibration. Check the level scale (often Level 1 is max, Level 7 is low, or Mode 1-8 depending on vendor).
What to do: Set LLC to Medium, typically Level 3 or Level 4 on an 8-level board, or LLC Mode 3 on MSI. Leave it at Auto if you are only using Curve Optimizer and not manual offsets, as Auto tracks best with PBO.
Trade-off: Higher LLC stabilizes voltage under load but increases peak voltage and heat. Lower LLC saves a bit more heat but needs a less aggressive undervolt.
How to undo: Set LLC back to Auto and reboot.
By Hardware Tier
Low Tier: Entry SFF (Ryzen 5 5600 / i5-12400F + RTX 4060 / RX 7600, 65W cooler like Noctua NH-L9a)
Focus on silence and power efficiency since these parts are already efficient. For CPU, use AMD Curve Optimizer Negative 15 all-core or Intel offset -50mV. Set PPT/PL1 to 65W strict to match the cooler. For GPU, set Power Limit to 85% and lock 930mV to 2400 MHz in Afterburner (Ctrl+F). Keep case fans at a gentle curve (30% to 60C) because total heat is low. Stability check: Run Cinebench R23 multi-core 10 minutes and play one hour of your most-played competitive title. Low-tier silicon often has less headroom, so do not push beyond -25 on Curve Optimizer.
Mid Tier: Balanced Compact Gaming (Ryzen 7 7700 / i5-13600K + RTX 4070 Super / RX 7800 XT, 240mm AIO or 67mm air like Thermalright AXP120)
This tier benefits the most from undervolting because performance is high but case volume remains constrained. For CPU, start at Curve Optimizer Negative 20 or Intel -70mV core / -40mV cache. Set PPT to 88W for Ryzen 65W parts or PL1 to 125W / PL2 to 150W for Intel K chips. For GPU, target 930mV-950mV at 2520-2610 MHz, Power Limit 88%-90%. Use a more active fan curve (55% at 65C) to prevent heat soak in NR200, Meshlicious, or Dan A4 style cases. Validate with OCCT CPU test in Extreme mode for 15 minutes plus a 30-minute gaming session with HWiNFO logging enabled to file at C:\Users\YourName\Documents\HWiNFO64 Logs\.
High Tier: Dense Flagship (Ryzen 7 7800X3D / i7-14700K + RTX 4080 / 4090 in FormD T1, NCase M1, Lian Li A4-H2O)
High-wattage GPUs and X3D CPUs are extremely sensitive to voltage and heat. For 7800X3D, do not use large all-core negatives. Use Curve Optimizer per-core Negative 10 to Negative 18 tested one core at a time via BIOS > Curve Optimizer > Per Core. For Intel high-tier, keep offset conservative at -50mV to -60mV because stability under transient loads matters more than shaving extra millivolts. For RTX 4080/4090, lock 940mV-960mV to 2640-2730 MHz and set Power Limit to 90%-92%; never flatten the curve above 975mV in SFF. Set an aggressive exhaust fan curve and consider deshrouding or slim-fan mods only if GPU hot spot exceeds 88C. Test thoroughly: 15 minutes OCCT, 3 loops of Cinebench, and a 45-minute ray-traced game. Keep BIOS profile saved to USB via BIOS > Tool > Save Profile to File so you can restore quickly.
Common Mistakes
Applying a large undervolt all at once and crashing on idle. What causes it: Setting Curve Optimizer to -30 all-core or -100mV offset immediately exceeds the silicon’s limits at low frequencies. How to check: Look in Windows Event Viewer > Windows Logs > System for WHEA Logger 18/19 errors after a light-load crash or cold boot. What to do: Re-enter BIOS > Curve Optimizer and step back to -15 or reduce Intel offset by 20mV increments, then test idle for 30 minutes before heavy loads. How to undo: Load BIOS defaults with F5 or clear CMOS via the case jumper/button if you cannot POST.
Forgetting to test both CPU and GPU together. What causes it: Validating CPU and GPU in isolation hides combined power and thermal load that causes PSU trip or heat soak in small cases. How to check: Monitor total system power at the wall or via HWiNFO CPU Package Power + GPU Board Power summed during simultaneous load. What to do: After isolated tests, run a combined test: Cinebench multi-core in background plus a windowed game or 3DMark Time Spy Stress Test for 20 minutes. How to undo: If combined load crashes but isolated does not, raise GPU voltage by 15mV at the same frequency or raise CPU Curve Optimizer by +5 (less negative).
Using two tuning tools that conflict. What causes it: Running Ryzen Master and BIOS Curve Optimizer, or Afterburner and Adrenalin Tuning at the same time overwrites settings on boot. How to check: Open Task Manager > Startup and BIOS settings; if Adrenalin Tuning is set to Custom while Afterburner is set to Apply at startup, they will fight. What to do: Pick one tool per component. Use BIOS for CPU and Afterburner for NVIDIA GPU, or Adrenalin for AMD GPU, and disable the other. In Adrenalin, set Tuning to Default if you use Afterburner. How to undo: Uninstall the extra tool or disable Apply at startup and reboot.
Undervolting SoC or memory controller voltage. What causes it: Lowering SoC, VDDIO, or DRAM voltage to save power destabilizes the fabric and memory, leading to random reboots unrelated to core voltage. How to check: In HWiNFO64, check SoC Voltage and memory errors in OCCT Memory test. What to do: Leave SoC at 1.05V-1.10V on AM5 and DRAM at its EXPO/XMP voltage (1.25V-1.35V). Only undervolt cores and GPU. How to undo: In BIOS > Advanced > Voltage Settings, reset SoC Voltage and DRAM Voltage to Auto and re-enable EXPO/XMP profile.
Saving no fallback profile. What causes it: Overwriting your stable BIOS profile without a backup leaves you without a quick revert after a failed experiment. How to check: In BIOS > Tool > Overclocking Profiles, see if Slot 1 is empty. What to do: Before changing anything, save a known-good profile to Slot 1 named Stable_Stock and export to USB as OCProfile.CMO. After each successful undervolt level, save to next slot. How to undo: In BIOS, Load Profile from Slot 1 or from USB, then F10 to save.
FAQ
Will undervolting void my warranty or reduce performance?
No, undervolting within manufacturer tools does not void warranty on mainstream platforms and is reversible. What causes concern is confusion with overvolting. How to check: Refer to your motherboard manual warranty section and verify you are lowering voltage, not raising it above stock. What to do: Use BIOS Curve Optimizer or Intel XTU offset and Afterburner curve without raising limits above stock. Performance stays the same at the same clocks; if scores drop, you set power limits too low. How to undo: Reset BIOS to optimized defaults and click Reset in Afterburner to return to stock behavior.
Why does my small PC crash only at desktop or light browsing after undervolting?
This is a classic low-load instability. What causes it: The CPU uses very low voltages at idle, and an aggressive negative Curve Optimizer pushes it below the stable minimum. How to check: Note if crashes happen at idle or when opening a browser, and check Event Viewer for WHEA errors on specific cores (APIC ID). What to do: In BIOS > Curve Optimizer > Per Core, raise the offending cores by +5 to +10 (for example from -25 to -15) and keep other cores lower. If using Intel, reduce the global offset from -80mV to -50mV. How to undo: Set the affected cores back to -10 or set Curve Optimizer to All Cores -15 for maximum stability.
How is GPU undervolting different from lowering the power limit?
Power limit caps total watts, while voltage curve controls voltage at each frequency. What causes confusion is that both lower heat. How to check: Test each separately in Afterburner. Set only Power Limit to 88% and note clocks and hot spot, then reset and test only the voltage curve lock at 930mV. What to do: For consistent FPS in small cases, use the voltage curve lock as primary and set Power Limit 88%-92% as a ceiling to handle spikes. This keeps clocks flat instead of bouncing off the power limit. How to undo: Press Reset in Afterburner to clear both and click Apply.
What is the safest step-by-step order to undervolt a new small PC build?
Order matters to isolate instability. What causes issues is changing CPU and GPU at once. How to check: Keep a log file at C:\Users\YourName\Desktop\Undervolt_Log.txt with each change and test result. What to do: Step 1: Update BIOS and chipset drivers, set EXPO/XMP, test stock stability. Step 2: Undervolt CPU first via BIOS Curve Optimizer in -5 steps, testing with Cinebench and OCCT after each. Step 3: Once CPU is stable, undervolt GPU via Afterburner Ctrl+F curve in 15mV steps, testing with a 30-minute game. Step 4: Adjust fan curves and power limits last. Save each stable stage as a BIOS profile and an Afterburner profile. How to undo: If a later step fails, revert only that component to last stable profile instead of resetting everything.