Building a quiet small form factor PC is mostly a airflow problem, and the single biggest lever you have is the fan curve. Stock fan curves in most BIOSes are tuned for big towers with generous clearance, so in an SFF case they spin fans harder and louder than necessary, creating turbulence noise in cramped layouts. The goal of a good quiet setup is not maximum cooling — it is the lowest fan speed that keeps your components under their safe temperature limits during the workloads you actually run. Get the curve right and a well-built SFF box can sit under 30 dBA at idle and stay tolerable under load; get it wrong and even premium fans will whine, click, and ramp audibly every time a background task spikes the CPU.
This guide walks through the exact settings to change, where to find them, and the trade-offs at each step. Before touching anything, establish your baseline: download HWiNFO64 (free) to log CPU package temperature, GPU temperature, and each fan’s RPM, and run a short stress test like Cinebench or a demanding game while watching temps. You need to know how much thermal headroom you actually have before you start flattening curves. SFF cases — Node 202, NR200, FormD T1, Dan A4, Fractal Terra, and similar — have very little air volume, so temperatures respond quickly when you change fan behavior. Change one setting at a time and re-test.
As an Amazon Associate we earn from qualifying purchases at no extra cost to you.




Our Top Picks
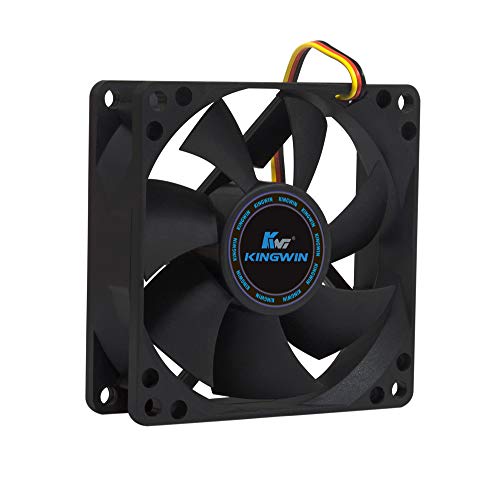
 be quiet! Pure Wings 3 120mm PWM High-Speed120mm PWM high-speed4.7 x 4.7 x 1 Inches0.4 poundsCheck on Amazon




Top 3 picks at a glance
Quick Recommended Settings
| Setting | Recommended value | Why |
|---|---|---|
| CPU fan step response / ramp rate | Slow or smoothed (2–4 second response) | Prevents audible rev-ups from momentary CPU spikes |
| CPU fan minimum duty | 20–30% (roughly 500–800 RPM on most 120 mm fans) | Lowest speed most fans run without bearing or motor noise |
| CPU fan target temperature | 75 °C package temp under sustained load | Well below thermal throttling on modern chips |
| CPU fan maximum duty | 80–90% cap | Above ~90% most fans add noise faster than airflow |
| Temperature source | CPU package (not a single core) | Single-core spikes trigger false ramp-ups |
| GPU fan mode | Custom curve, flat below 60 °C | Stops zero-RPM oscillation and idle whine |
| Case/exhaust fan | Tied to GPU or hottest component, offset +10% | Exhausts GPU heat that pools in SFF layouts |
| Hysteresis | 3–5 °C | Prevents fans from hunting up and down around a threshold |
Setting-by-Setting
CPU Fan Minimum Duty: 20–30%
The minimum duty cycle is where idle noise lives. Most quality 120 mm fans (Noctua NF-A12x25, Phanteks T30, be quiet! Silent Wings) become audibly quiet somewhere between 500 and 800 RPM, and motor/bearing noise often appears below the fan’s rated minimum. Set the floor at 20% and listen; if the fan stalls or ticks, raise it in 5% increments until it runs smoothly. In the BIOS this usually appears as “Fan Min. Duty Cycle” or “Fan Stop/Start RPM” under the Q-Fan, Smart Fan, or Fan Control section.
Trade-off: a lower floor means warmer idle temperatures and a warmer chassis, but dramatically less ambient noise. If your CPU idles at 50–55 °C instead of 40 °C, that is fine — idle temperature is not a reliability concern.
CPU Target Temperature: 75 °C
The target is the temperature at which the fan reaches its mid-range duty. Setting it around 70–75 °C package temperature gives you headroom below the 95–100 °C throttle points typical of modern CPUs while letting the fan stay slow during light loads. In ASUS BIOSes this is the “Temperature Upper Limit” or the top of the fan graph; on MSI it is the “Target Temperature” in Smart Fan mode; on Gigabyte it is the “Temperature Interval” and slope settings in Smart Fan 6.
Trade-off: raising the target to 85 °C buys you near-silence in games but leaves little margin during sustained all-core loads. Lowering it to 65 °C keeps the chip frosty but the fan will never rest. For a Ryzen 7-series or Intel K-series chip in a low-clearance SFF cooler, 75 °C is the practical sweet spot.
Fan Stop vs. Always-On
Many boards offer a “Fan Stop” feature (ASUS calls it “Fan Stop,” MSI “Zero Frozr” behavior is GPU-side) that halts fans completely below a temperature threshold, usually 50–60 °C. In a large case with passive airflow this works well; in SFF it usually does not, because residual heat soaks into the chassis and causes a jarring start-stop cycle. If you enable fan stop, set the restart threshold at least 10 °C below the stop threshold, or disable it and use a flat low-speed floor instead.
Trade-off: true zero-RPM idle is the quietest possible state but risks thermal cycling. A 20% floor is nearly inaudible and keeps air moving, which is more consistent in a 7–15 liter chassis.
Step-Up/Step-Down Response Time: 2–4 Seconds
This is the most overlooked setting. Response time controls how quickly the fan changes speed after the temperature source changes. Modern CPUs spike 20 °C in milliseconds when a background task hits one core; a fast response makes fans audibly surge every few seconds. Set a slow response — ASUS “Fan Step Up Time” of 3–4 seconds, Gigabyte “Fan Slope” at a shallow gradient, or a smoothed curve in Fan Control (the free desktop utility) — and spikes get absorbed instead of broadcast.
Trade-off: slow response means fans lag behind real heat during a sudden heavy load, so brief temperature overshoots of 5–10 °C are normal. Sustained loads still converge to the correct speed.
Temperature Source: CPU Package, Not Single Core
Boards often default to “CPU” temperature, which on some platforms is a single hottest-core reading. A single core can hit 85 °C during a browser spike while the package average sits at 45 °C, triggering pointless fan ramps. In the BIOS fan menu, choose “CPU Package” or “PECI/Sensor: CPU” if available. In Fan Control, bind the curve to the “CPU Package” sensor exposed by LibreHardwareMonitor.
Trade-off: none — this is a strict improvement. If your board only offers a motherboard socket sensor, expect it to lag several seconds behind actual die temperature; compensate with a slightly lower target.
Maximum Duty Cap: 80–90%
Fan airflow scales roughly linearly with speed, but noise power scales with roughly the fifth power of RPM. Above about 85–90% duty, most fans add a lot of noise for marginal airflow gains, and in a restrictive SFF intake the returns diminish even faster. Cap the curve’s top at 85% and let sustained worst-case loads land there.
Trade-off: under a worst-case stress test, temperatures may run 3–5 °C higher than with a 100% cap. If you hit throttling, raise the cap or address airflow rather than just letting the fan scream.
GPU Fan Curve: Flat Below 60 °C
Use your GPU vendor’s tool — NVIDIA App, AMD Adrenalin (Performance → Tuning → Custom Fan Curve), or MSI Afterburner with the curve editor (Ctrl+F) — to flatten the GPU fan curve below 60 °C. Set 0% or the card’s quiet floor under 45 °C, roughly 30% from 50–60 °C, then a gentle slope above. Add hysteresis of 3–5 °C if the tool supports it (Afterburner does not natively; Fan Control can manage GPU fans on some cards).
Trade-off: a flat idle section means the card sits at 55–60 °C in games’ menus and light loads instead of 40 °C. That is harmless for the hardware and eliminates the annoying rev-decay cycle.
By Hardware Tier
Low-Power Tier (65 W TDP CPUs, single-fan or blower GPUs)
Chips like a Ryzen 5 8400F-class part or an Intel 65 W non-K under a low-profile cooler (Noctua NH-L12S, Thermalright AXP90) generate modest heat. Set the CPU floor at 20%, target 70 °C, cap at 80%. Because the cooler is the limiting factor, a shallow, steady curve outperforms an aggressive one — the fan simply cannot rescue a saturated low-profile heatsink, so keep it slow and constant instead. GPU: flat curve under 55 °C since blower cards already run warm; keep 35% minimum under load rather than letting zero-RPM engage mid-game.
Mid-Range Tier (105–125 W CPUs, 60–80 W GPUs)
This is the classic SFF build — a 7700 or 14600K-class CPU with a 4060/7600-class card in an NR200 or Terra. Floor 25%, target 75 °C, cap 85%, 3-second response, package sensor. Undervolting pairs beautifully here: a Curve Optimizer offset of −15 to −25 (AMD, in BIOS under PBO → Curve Optimizer) or Intel’s “Adaptive Boost”/undervolt via XTU can drop sustained temperatures several degrees, letting the fan curve sit even lower. Case fans: exhaust at 40–45% constant, tied to a GPU sensor if your board supports GPU temperature sources.
High-End Tier (14900K/9950X-class, 100–200 W+ GPUs)
High-end parts in SFF are thermally saturated by design. Accept that a 14900K under an NH-D12L or a 240 mm AIO will not be silent at full load; the goal is quiet during gaming and controlled loudness during worst case. Floor 30%, target 80 °C, cap 95%, 2-second response (slow response causes bigger overshoots when the thermal mass is already hot). For AIO users, tie the pump to a constant 80% and control only the radiator fans — never let the pump follow a temperature curve. GPU: custom curve with a 65 °C target and a 100% cap reserved for genuine spikes; in a 12-liter case the GPU is usually the loudest component, so prioritize its curve.
Common Mistakes
Fans hunting up and down constantly. What causes it: no hysteresis, or a steep section of the curve right at your idle temperature — fans cross a threshold, cool the sensor below it, drop speed, heat up again, and repeat. How to check: watch RPM in HWiNFO64 under light load; oscillation of hundreds of RPM every few seconds confirms it. What to do: add 3–5 °C of hysteresis (BIOS “Hysteresis” or “Temperature Tolerance,” or the smoothing options in Fan Control), and flatten the curve section around your normal idle temperature. How to undo: set hysteresis back to 0 or restore the default curve profile in the BIOS fan menu.
Controlling case fans from CPU temperature. What causes it: the default “Sync with CPU” option. GPU heat is usually the dominant heat source in an SFF chassis, so CPU-linked case fans idle lazily while the GPU cooks the box. How to check: run a GPU-only load and watch chassis temperatures and case fan RPM. What to do: in the BIOS, change the case fan header’s source to the motherboard sensor nearest the GPU, or use Fan Control to bind case fans to the GPU temperature sensor with a +5–10% offset over the GPU’s own curve. How to undo: re-select the CPU source for that header.
Floor set too low, causing stalling or clicking. What causes it: a minimum duty below the fan’s reliable start threshold, common with high-static-pressure fans at low voltage. How to check: set the floor, cold-boot the machine, and listen for tick-tick-tick or a fan that fails to spin without a nudge. What to do: raise the minimum in 5% steps until the fan starts reliably on a cold boot from full power-off. How to undo: restore the previous minimum value, or enable the BIOS “Fan Start-up Boost” feature which briefly pulses the fan to full speed at spin-up.
Tuning before checking airflow. What causes it: restrictive intakes (dust filters, mesh with fine perforation, dead-end compartments) mean fans fight static pressure, so curves get tuned to compensate for a mechanical problem. How to check: pull the side panel and run your stress test with the panel off; if temperatures drop significantly and noise drops, airflow is the bottleneck. What to do: clean filters, reposition fans so intake feeds the GPU directly, and confirm fan orientation before finalizing curves. How to undo: reinstall panels and revert to your logged baseline settings.
FAQ
What temperature should my CPU sit at in a quiet SFF build?
For a quiet build, 70–80 °C package temperature under gaming load is normal and healthy for modern CPUs; they are designed to run near their limits. Idle temperature matters far less than people assume — 50–55 °C at idle is fine if the fans are inaudible. Reliability concerns begin at sustained throttling, not at elevated-but-stable temperatures.
Should I use the BIOS fan controls or software like Fan Control?
BIOS control runs before the OS loads and survives reinstalls, but most boards offer only 4–6 curve points and limited sensor choices. The free desktop utility Fan Control (get it from its official GitHub repository) exposes every sensor including GPUs and drives, supports hysteresis and response smoothing, and can mix sources. A good approach: set a safe, sane curve in the BIOS as a fallback, then run Fan Control for fine-tuning.
Why do my fans ramp up for a second even when the PC is idle?
This is almost always a single-core temperature spike from background tasks — Windows Update, browser tabs, RGB software, antivirus scans. Fix it by switching the fan’s temperature source to CPU package instead of a single core, slowing the step-up response to 3–4 seconds, and adding hysteresis. Flattening the curve between idle and mid temperatures also helps absorb spikes without any speed change.
Do I need to re-tune my fan curve after undervolting or changing coolers?
Yes. An undervolt can drop sustained temperatures by 5–15 °C, which means your curve’s load section is now running the fan harder than needed — lower the target temperature or flatten the slope to reclaim that silence. Conversely, a cooler upgrade with different thermal mass changes how quickly temperatures respond, so re-test with your stress workload and adjust response time and hysteresis accordingly. Re-check your settings seasonally too; a warm room shifts every reading up several degrees.