A newly built PC that powers on but shows “No Signal,” a black screen, or an out-of-range message on the monitor is one of the most common first-boot problems. Fans may spin, RGB lighting may turn on, and the motherboard may even display a debug LED, yet the monitor never receives a usable video signal. The issue can come from something simple, such as the monitor being set to the wrong input, or something that requires reseating core components.
Most no-signal problems after a build are not emergencies and do not mean a part is permanently damaged. Work methodically, make one change at a time, and fully shut down the system before moving hardware. In 2026, modern motherboards commonly provide CPU, DRAM, VGA, and BOOT debug indicators; those lights are among the fastest ways to narrow down where startup is failing.
Likely Causes
| Cause | How to confirm | Fix difficulty |
|---|---|---|
| Wrong monitor input, cable, or port | Monitor says “No Signal”; another input or cable works | Easy |
| Display cable connected to motherboard instead of graphics card | System has a dedicated GPU and cable is in the rear motherboard I/O panel | Easy |
| Loose GPU or missing GPU power cable | VGA debug LED stays lit, or GPU fans/lights do not respond normally | Moderate |
| Memory not seated correctly or installed in the wrong slots | DRAM debug LED remains on; system repeatedly starts and restarts | Moderate |
| BIOS settings, memory training, or unsupported BIOS version | System turns on but cannot complete POST; CPU or DRAM light remains active | Moderate |
| CPU power, CPU seating, motherboard short, or faulty hardware | CPU debug LED stays on, no POST behavior, or minimal hardware test fails | Advanced |
Fix 1: Check the Monitor Input, Cable, and Power
What causes it
The monitor may be set to HDMI when the PC is connected through DisplayPort, or the selected cable may be faulty. Some monitors do not automatically switch inputs reliably, especially when a new PC is first powered on. A loose DisplayPort connector can also look connected while failing to make full contact.
How to check
Turn on the monitor first and open its on-screen display using the physical joystick or Menu button. Find the Input, Source, or Input Select menu. Confirm it matches the cable in use: HDMI 1, HDMI 2, DisplayPort, or USB-C. Check that the monitor’s power LED is on and that its brightness is not set extremely low.
What to do
Turn off the PC. Disconnect and firmly reconnect both ends of the video cable. If using DisplayPort, press the connector in until it clicks. Try a different cable and a different port on the monitor. If the graphics card has multiple outputs, test another output. Avoid adapters during initial troubleshooting; use a direct HDMI-to-HDMI or DisplayPort-to-DisplayPort connection if possible. Test the monitor and cable with another device, such as a laptop, console, or older PC.
How to undo it
No permanent changes are made. Once video works, reconnect your preferred cable and select the matching monitor input again.
Fix 2: Connect the Display Cable to the Correct Video Output
What causes it
When a dedicated graphics card is installed, builders sometimes plug the monitor into the motherboard’s HDMI or DisplayPort socket. Those motherboard ports only work if the CPU includes integrated graphics and the firmware allows it. Many desktop CPUs do not provide onboard graphics at all.
How to check
Look at the back of the case. Motherboard video ports are grouped with USB, Ethernet, and audio jacks near the top of the rear panel. Graphics card ports are lower down, aligned horizontally with the PCIe expansion slots. If your cable is connected near the USB ports, it is connected to the motherboard.
What to do
Shut down the PC and move the display cable to a port on the dedicated GPU. Turn the monitor on, select the correct input, then start the PC. If you intentionally want to use motherboard video, verify that your CPU has integrated graphics. For example, many Intel processors with an “F” suffix lack integrated graphics, and many AMD Ryzen desktop processors without a “G” suffix may also lack it.
How to undo it
To return to motherboard video later, shut down the PC and move the cable back. In UEFI firmware, enable integrated graphics if needed. Typical paths include Advanced > Chipset Configuration > Integrated Graphics or Settings > Advanced > Integrated Graphics Configuration.
Fix 3: Reseat the Graphics Card and Check PCIe Power
What causes it
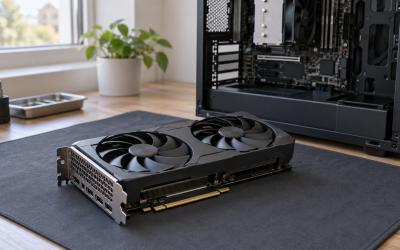
A graphics card can appear installed while its PCIe connector is not fully seated. This is especially common in heavy cards, cases with tight expansion-slot alignment, and systems using a vertical GPU riser. Many GPUs also require one or more 6-pin, 8-pin, or 16-pin PCIe power connections. Without them, the system may stop at the VGA stage.
How to check
Look at the motherboard debug LEDs after powering on. A steady VGA light usually points to the GPU, its power, or video initialization. With the PC unplugged, inspect whether the PCIe slot retention clip is engaged and whether the GPU bracket is screwed securely to the case. Check every power socket on the GPU.
What to do
Turn off the power supply using its rear switch, unplug it, and press the case power button for 10 seconds. Remove the GPU retaining screws, press the PCIe slot latch, and carefully remove the card. Reinstall it in the top full-length PCIe x16 slot, usually the slot closest to the CPU. Push straight down until the latch clicks. Connect every required GPU power plug.
Use PCIe or VGA cables supplied with that exact power supply. Do not use CPU/EPS cables in GPU sockets, even if the connectors seem similar. For a 16-pin GPU connector, push it in completely and avoid sharply bending the cable within about 1.4 inches (35 mm) of the plug.
How to undo it
Reverse the installation process: unplug the power supply, remove GPU power connectors, release the PCIe latch, and lift the card out. If you changed from a riser cable to direct motherboard installation, reinstall the riser only after the PC successfully boots.
Fix 4: Reseat and Test the RAM
What causes it
RAM requires more insertion force than many first-time builders expect. A module that is slightly raised on one end can prevent the PC from completing POST. Incorrect slot placement can also cause problems, particularly when using two sticks in slots that are not the board’s recommended pair.
How to check
Check the motherboard’s DRAM debug LED. If it remains illuminated, memory is the leading suspect. Consult the motherboard manual for recommended DIMM slots. For two modules, the correct slots are often A2 and B2, the second and fourth slots away from the CPU, but confirm this for your board.
What to do
Disconnect power and remove all RAM modules. Install one module in slot A2. Align the notch with the slot key, then press evenly on both ends until the retaining clips lock. Start the PC and wait several minutes; first-time DDR5 memory training can take longer than expected. If there is still no display, test the same module in another recommended slot, then test the other module by itself.
Once the system reaches UEFI, install the second module in the recommended paired slot. Leave EXPO, XMP, and other memory overclock profiles disabled until the PC has successfully booted several times.
How to undo it
To remove a RAM module, power down, unplug the system, open the DIMM retention clips, and lift the module by its edges. After stability is confirmed, you can enable the rated memory profile in UEFI, usually under Ai Tweaker, OC, Extreme Tweaker, or Advanced Memory Settings.
Fix 5: Clear CMOS and Allow the System to Train Memory
What causes it
Incorrect firmware settings, a failed memory profile, or settings left from previous testing can prevent video initialization. A newly assembled system may also restart multiple times while it trains DDR5 memory. Interrupting that process too quickly can make troubleshooting harder.
How to check
If the PC powers on but cycles through CPU and DRAM lights, or if the display stopped working after changing BIOS settings, reset the firmware. Check the motherboard manual for a Clear CMOS button, CLR_CMOS pins, or JBAT1 header.
What to do
Turn off the system, switch off the PSU, and unplug it. Press the case power button for 10 seconds. Use the rear Clear CMOS button if available. Otherwise, briefly bridge the two Clear CMOS pins with a screwdriver for about 5 to 10 seconds. Do not bridge random headers. If neither option is available, remove the round CR2032 battery for five minutes, then reinstall it with the positive side facing up.
Start the PC and wait up to 10 minutes on the first boot, especially with DDR5. When video returns, enter UEFI by repeatedly pressing Delete or F2. Load default settings using Save & Exit > Load Optimized Defaults, then save and reboot.
How to undo it
Clearing CMOS resets custom settings, fan curves, boot order, EXPO/XMP, RAID configuration, and manual tuning. Re-enter UEFI and restore only settings you need. If Windows was installed in UEFI mode, keep boot mode set to UEFI rather than Legacy or CSM.
Fix 6: Verify CPU Power and Inspect the CPU Installation
What causes it
The motherboard’s 24-pin power connector alone is not enough. The CPU also needs the 8-pin EPS connector near the top-left corner of the motherboard. A missing or loose EPS cable can produce a CPU debug light, fan activity, and no display. Bent CPU socket pins, overtightened coolers, or improperly seated CPUs can cause the same symptom.
How to check
With power removed, inspect the top edge of the motherboard for a connector labeled CPU_PWR, ATX_12V, EPS12V, or similar. Confirm the 4+4-pin CPU/EPS cable is installed. Do not confuse it with a PCIe/VGA cable. If the CPU light remains on after confirming power, inspect the CPU and socket.
What to do
Reseat the 24-pin motherboard connector and CPU EPS connector until their latches click. If necessary, remove the CPU cooler, clean old thermal paste with 90% or higher isopropyl alcohol, and lift the CPU retention mechanism. Check for debris, bent pins, or damaged socket contacts under bright light. Reinstall the CPU in the marked orientation, apply a small pea-sized amount of thermal paste, and mount the cooler evenly without excessive pressure.
How to undo it
If you remove the CPU, reinstall it using the orientation marker and fresh paste. Reconnect the cooler fan to the CPU_FAN header. If you adjusted cooler mounting pressure, loosen and retighten screws gradually in a cross pattern.
Fix 7: Perform a Minimal Outside-the-Case POST Test
What causes it
A misplaced motherboard standoff, pinched cable, defective front-panel accessory, or case-related short can stop a new build from posting. Testing only the essentials isolates those variables.
How to check
If every earlier fix fails, remove nonessential components from the equation. The minimum configuration is motherboard, CPU and cooler, one RAM stick, power supply, graphics card if the CPU has no integrated graphics, and monitor.
What to do
Place the motherboard on its original cardboard box, not on the anti-static bag. Connect the 24-pin ATX cable, CPU EPS cable, CPU cooler, one RAM stick in A2, and GPU if required. Connect the monitor to the GPU. To start the board, briefly touch the two power-switch pins with a screwdriver; refer to the front-panel header diagram in the manual. Do not connect storage drives, USB devices, RGB hubs, front-panel USB, or extra PCIe cards initially.
If the board posts outside the case, reinstall it and verify that every standoff matches a motherboard mounting hole. Remove any extra standoff that touches the underside of the board.
How to undo it
Shut down, unplug power, and reinstall components one at a time. Test after adding each item. This identifies whether a drive, USB header, riser, front-panel cable, or case installation causes the no-signal condition.
If Nothing Works
Record the exact motherboard debug LED that remains lit, any Q-Code number shown on the board, and whether the system restarts or stays powered on. Check the motherboard CPU support list and confirm the installed BIOS version supports your exact CPU. If the board supports BIOS Flashback, update the BIOS using a FAT32-formatted USB drive and the manufacturer’s required BIOS filename; this feature can often work without a display.
At this stage, test with known-good parts if available: another monitor, cable, power supply, RAM stick, or graphics card. If a known-good GPU still produces no display while the VGA light remains on, the motherboard may be faulty. If the CPU light remains on after verified CPU power and careful socket inspection, seek warranty support for the CPU or motherboard rather than repeatedly forcing connectors or powering the system on.
FAQ
Why do my fans spin but my monitor says no signal?
Fans spinning only confirms that some power is reaching the system. It does not confirm that the PC completed POST. Check the motherboard’s CPU, DRAM, VGA, and BOOT debug lights to find which startup stage is failing.
How long should I wait on the first boot?
Wait at least 5 minutes, and up to 10 minutes for a DDR5 system after clearing CMOS or changing memory. The motherboard may reboot itself during memory training. Do not repeatedly force shutdowns unless it remains stuck beyond that period.
Can I use the motherboard HDMI port with a graphics card installed?
Only if the CPU has integrated graphics and the motherboard firmware supports enabling it. For initial troubleshooting with a dedicated graphics card, connect the monitor directly to the GPU first.
Which debug light matters most for no display?
A VGA light points most directly to graphics card detection or video output. A DRAM light means test memory seating and slots. A CPU light suggests CPU power, CPU installation, socket contact, or BIOS compatibility. A BOOT light often means the PC has passed hardware initialization and is looking for an operating system.