Your new PC powers on — fans spin, RGB lights up, case LEDs glow — but the monitor stays black. Sometimes the screen wakes for a second and drops back to sleep; sometimes it never even shows the motherboard logo. This is one of the most common first-boot problems builders run into, and it is genuinely stressful because you cannot tell whether a $500 component is dead or a single cable is loose.
The good news: in the majority of cases, the PC is actually running fine and the problem is a monitor input, a cable, a display output on the wrong port, or a RAM stick that is not seated properly. Follow the fixes below in order — they are arranged easiest first, and most people resolve the issue within the first three. Work through them with the PC off and the power supply switched off at the rear toggle whenever you are touching internal components.
Likely Causes
| Cause | How to confirm | Fix difficulty |
|---|---|---|
| Monitor on wrong input or cable loose | Monitor OSD shows “No Signal” or cycles inputs; cable wiggles at the port | Very easy |
| Monitor plugged into motherboard video instead of GPU | You have a dedicated graphics card but the cable runs to a port in the motherboard’s I/O shield | Very easy |
| RAM not fully seated or single-stick in wrong slot | Debug LEDs show DRAM lit, or motherboard speaker beeps in a repeating pattern | Easy |
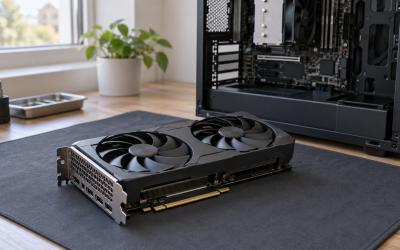
| GPU not fully seated or PCIe power cables disconnected | GPU fans do not spin up; 6/8-pin connectors on the card’s edge are empty | Easy |
| Monitor refresh rate or resolution set beyond what the GPU outputs at boot | Display worked during BIOS, goes black once Windows loads | Moderate |
| CMOS/BIOS issue — incompatible BIOS for your CPU or corrupted settings | CPU debug LED lit; board shipped before your CPU’s launch date | Moderate to hard |
Fix 1: Check the Monitor Input and Cable
What causes it
Monitors remember the last input they used. A new PC may output on DisplayPort while the monitor is set to HDMI, or the cable may be seated loosely at one end after being routed through cable management.
How to check
Press the input/source button on the monitor and cycle through HDMI 1, HDMI 2, DisplayPort, and USB-C, waiting 5–10 seconds on each. Wiggle the cable gently at both ends while watching for a flicker. Try a second cable if you have one — DisplayPort cables in particular are a frequent failure point.
What to do
Select the input that matches the port your cable actually uses. Reseat both ends of the cable until they click. If the port has thumbscrews (DisplayPort and DVI do), tighten them. Prefer a known-good DisplayPort or HDMI cable rated for your resolution — for 4K at 144 Hz you need a DisplayPort 1.4 or HDMI 2.1 cable.
How to undo it
No changes to keep or revert — just reconnect the cable however you prefer.
Fix 2: Plug Into the Graphics Card, Not the Motherboard
What causes it
It is the single most common new-build mistake: the monitor cable goes into a video port on the motherboard’s I/O shield while the actual GPU sits unused below it. Many motherboards ship with integrated graphics disabled when a discrete card is detected.
How to check
Look at where your cable enters the case. If it plugs into a port inside the I/O shield (the cluster of USB ports at the top rear) and you have a dedicated graphics card mounted lower in the case, this is your problem.
What to do
Power off, move the cable to the port on the graphics card itself — the metal bracket with the fan-facing shroud, usually near the middle or bottom of the case. Power back on and wait up to 60 seconds for the first POST, which can be slow on a fresh build.
How to undo it
Nothing to undo. If you ever want to use the motherboard ports instead (e.g., for troubleshooting with iGPU), enable Integrated Graphics in your BIOS under Advanced > System Agent (AMD) or Advanced > Processor Configuration (Intel).
Fix 3: Reseat Your RAM
What causes it
RAM slots require real force to click fully. A stick that is 1 mm short of seated produces exactly this symptom: system powers on, no display, often with the DRAM debug LED lit or a repeating beep code if a motherboard speaker is installed.
How to check
Look at your motherboard’s debug LEDs (small labeled lights near the 24-pin connector: CPU, DRAM, VGA, BOOT). If DRAM is lit, RAM is the prime suspect. Also check slot orientation — the offset notch must align with the slot’s key.
What to do
Power off and flip the PSU switch. Press down on the release tabs at each end of the stick, remove it, then reinsert it firmly until both tabs snap up audibly. If you have one stick, place it in the slot your manual designates first (commonly the second slot from the CPU, labeled A2 or DDR4_2/DDR5_2). With two sticks, use slots A2 and B2. Reconnect power and boot.
How to undo it
No setting change involved. If you moved sticks between slots and want your original arrangement back, consult the manual for which slots your configuration requires.
Fix 4: Reseat the GPU and Its Power Cables
What causes it
Modern graphics cards are heavy, and during installation it is easy to leave the card a few millimeters out of the PCIe slot or forget one of the 8-pin power connectors. Cards with 12V-2×6 (12VHPWR) connectors can also have the adapter not fully clicked in.
How to check
Check the VGA debug LED on the motherboard. With the PC off, press the card’s rear bracket — it should not move. Count the power connectors on the card’s top edge and confirm each has a cable plugged in fully, with the connector latch clicked.
What to do
Power off. Unscrew the bracket screws, press the PCIe slot’s release tab (bottom end of the slot), remove the card, and reinsert it straight down until the tab clicks. Reconnect every power cable, pushing until the latch engages. Never daisy-chain a single PCIe cable’s pigtails on a card that draws over 300 W — use two separate cables from the PSU. Boot and test.
How to undo it
No software change. Physical reinstallation is the same process in reverse.
Fix 5: Clear the CMOS
What causes it
A corrupted or misconfigured UEFI can set memory speeds or voltages the system cannot POST with, or an outdated factory BIOS may not support your CPU on very new platforms.
How to check
This is worth trying after RAM and GPU reseating. Symptoms that point here: fans ramp to full speed repeatedly in a boot loop, or the CPU/DRAM LED alternates. Check your motherboard model’s support page to see whether your CPU requires a minimum BIOS version newer than what shipped on the board.
What to do
Power off and unplug the PSU. Two methods: (1) press the CMOS reset button if your board has one on the rear I/O or near the battery — hold it 5–10 seconds; (2) otherwise remove the coin-cell CR2032 battery on the motherboard, hold the power button for 15 seconds to drain residual charge, wait 5 minutes, and reinsert the battery with the + side facing out. Reconnect and boot. The first boot will be slow while the board retrains memory.
How to undo it
Clearing CMOS resets BIOS settings to defaults, including any XMP/EXPO memory profiles. To restore performance, re-enter the BIOS with Del, go to the AI Tweaker (ASUS), DRAM settings (MSI), or OC tab (Gigabyte/ASRock), and re-enable XMP or EXPO Profile 1.
Fix 6: Test With a Single RAM Stick and Minimal Hardware
What causes it
One defective stick, a bad slot, or a short caused by a standoff misalignment can prevent POST entirely. Isolating hardware identifies the culprit.
How to check
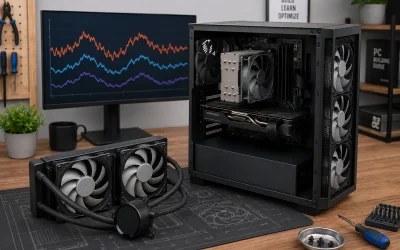
Only after the fixes above fail. You will strip the build down to CPU, cooler, one RAM stick, and GPU.
What to do
Power off and unplug. Disconnect all storage drives, case USB cables (keep the front-panel power switch header), and extra RAM. Leave one stick in slot A2 and boot. No display? Swap that stick for the other one. Then try the first slot (A1) to rule out a dead slot. If a single configuration finally POSTs, add components back one at a time until the failure returns — that part is your problem. Also verify the motherboard standoffs match your case’s mounting holes and that no stray screw is loose inside the case.
How to undo it
Reconnect your drives (SATA data to the motherboard, SATA power from the PSU, or M.2 sticks into their slots at a 30-degree angle before screwing them flat) and reinstall the remaining RAM in A2/B2.
Fix 7: Update the BIOS via USB Flashback
What causes it
On recent platforms, boards boxed months before your CPU’s release may lack the firmware needed to recognize it — the system powers on but never POSTs, with the CPU debug LED lit.
How to check
Find your motherboard’s exact model (printed on the board between the PCIe slots). Check the CPU compatibility list on the support page and note the minimum BIOS version required for your processor. If the factory version is older, this is likely your issue.
What to do
On another PC, download the latest BIOS file from the manufacturer’s support page, rename it per the board’s instructions (for example, ASUS boards use the BIOSFlashback rename tool included in the download, producing a file like .CAP), and copy it to the root of a FAT32 USB stick. With the system powered off but the PSU switched on, plug the stick into the port labeled BIOS Flashback, press the Flashback button, and wait up to 8 minutes for the LED to stop blinking. Do not interrupt power during this. Then boot normally.
How to undo it
You generally do not want to undo a BIOS update, but you can flash an older version using the same procedure if a specific release causes instability.
Fix 8: Rule Out the Monitor Itself
What causes it
The monitor’s own scaler can lock up, or its auto-source detection can fail — making a perfectly healthy PC appear dead.
How to check
Connect the monitor to a laptop, console, or another PC using the same cable. If it also shows no signal there, the monitor or cable is the fault, not your PC. Also check the monitor’s own OSD buttons — if its menu appears on screen, the panel works and the signal chain is the issue.
What to do
Unplug the monitor’s power brick from the wall for 60 seconds, then reconnect. In the monitor’s OSD menu, set Source to Auto or manually select the correct input. Disable any “Deep Sleep” option (usually under System or OSD Setup). Try a different cable type — switch from DisplayPort to HDMI as a test.
How to undo it
Re-enable Deep Sleep and Auto Source in the same OSD menus if you prefer the monitor to power down with the PC.
If Nothing Works
If the machine still produces no display after all eight fixes, suspect a defective component. Contact the retailer or manufacturer for RMA on the most likely candidates in this order: the graphics card, the motherboard, and the RAM (most RAM carries a lifetime warranty from Corsair, G.Skill, and Kingston). Ask the retailer to POST-test the CPU and board if you bought them together — many Micro Center or Memory Express locations will bench-test components. If you bought a prebuilt system, stop opening the case further and use the warranty: internal modifications can complicate claims. One last check before calling: confirm the PSU’s rear switch is on, the 24-pin and 8-pin CPU (EPS) cables are fully clicked in, and the power button header is on the correct pins labeled PWR in the manual.
FAQ
Why do the fans spin but the screen stays black?
Fans spinning only confirms the PSU delivers power — it says nothing about whether the board completed POST. A system that fails POST before initializing video looks exactly like this, which is why RAM seating and debug LEDs are the first things to check.
How long should I wait on the first boot?
Give it up to 5 minutes. Fresh builds spend the first boot training memory, and boards with large memory capacities can sit on a black screen for a couple of minutes with cycling debug LEDs before the display appears.
Should I reinstall Windows to fix this?
No. If Windows is the problem, you would see the BIOS logo first and lose the display only afterward. A completely black screen from power-on means the failure happens before the operating system loads, so reinstalling Windows will change nothing.
Can a bad power supply cause no display?
Yes, but it is less common than the causes above. A marginal PSU can run fans yet fail to deliver stable power to the GPU. If every component tests fine elsewhere, test with a known-good PSU of adequate wattage — at least 650 W for a modern mid-range GPU build.