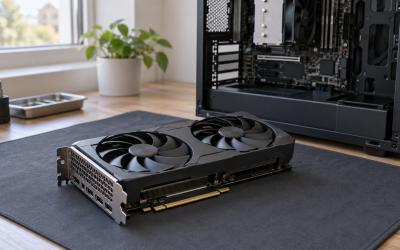
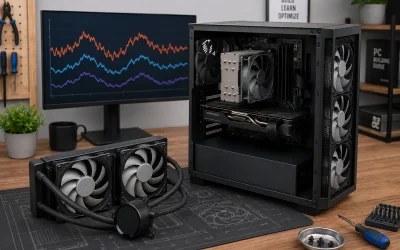
A new custom PC that fails to boot can look several different ways: pressing the power button does nothing, fans spin but there is no display, the system turns on and immediately shuts off, or it stops on a motherboard debug LED labeled CPU, DRAM, VGA, or BOOT. A first build can also appear “dead” when it is actually waiting for memory training, using the wrong display output, or missing one small power connection.
Most no-boot problems are not emergencies and do not mean a component is permanently damaged. Shut the system down before moving cables or parts, switch the power supply off, and press the case power button for several seconds to discharge residual power. Work through the checks in order rather than replacing parts at random. This 2026 troubleshooting process starts with simple external checks and ends with a minimal-hardware test that isolates the failing part.
Likely Causes
| Cause | How to confirm | Fix difficulty |
|---|---|---|
| Power supply switch, outlet, or front-panel connector issue | No fans, LEDs, or motherboard standby lighting; power button has no effect | Easy |
| Monitor connected to the wrong video output | PC remains powered on but monitor reports “No Signal” | Easy |
| Loose 24-pin, CPU EPS, GPU, or PCIe power cable | System starts briefly, debug LEDs remain lit, or GPU has no lighting/fan activity | Easy to moderate |
| Memory is not fully seated or is installed in the wrong slots | DRAM debug LED stays on, repeated restarting, or no display after powering on | Moderate |
| BIOS settings, unsupported CPU, or memory-training problem | CPU/DRAM light persists after basic reseating; board documentation lists a newer BIOS requirement | Moderate |
| Motherboard short, bent socket contact, or faulty component | Failure remains with only CPU, cooler, one RAM stick, and graphics output installed | Advanced |
Fix 1: Check the Power Source and Front-Panel Power Switch
What causes it
The power supply may be switched off, the AC cable may not be fully inserted, the surge protector may be off, or the case’s power-switch lead may be connected to the wrong front-panel header pins. A new system can therefore show absolutely no reaction when the case button is pressed.
How to check
Check the rear of the PSU for the I position; O means off. Confirm the wall outlet or power strip works by testing it with another device. Look for motherboard standby LEDs after turning the PSU on. Then consult the motherboard manual’s front-panel header diagram, usually labeled F_PANEL, JFP1, or PANEL1.
What to do
Reseat the PSU power cord at both ends and plug directly into a known-good wall outlet for testing. Verify the case connector labeled POWER SW is attached to the two power-switch pins; polarity does not matter for this connector. To bypass a questionable case switch, briefly touch the two power-switch pins with the tip of a screwdriver while the PSU is on. Touch only those two pins for about one second. If the PC starts, reconnect or replace the case power-switch cable.
How to undo it
Turn the PSU off before moving the front-panel connector. If you used the screwdriver test, simply remove it from the pins. Reinstall the POWER SW plug on the correct pair of header pins.
Fix 2: Verify the Display Connection and First-Boot Wait Time
What causes it
A working PC can be mistaken for a failed boot when the monitor is connected to the motherboard video ports instead of the graphics card. This is especially common when the installed CPU does not include integrated graphics. Modern DDR5 platforms may also take several minutes to complete their first memory-training cycle.
How to check
If fans and motherboard lighting remain on, inspect the monitor first. If a dedicated graphics card is installed, connect HDMI or DisplayPort directly to a port on the graphics card’s rear bracket, not to the motherboard I/O panel. Confirm the monitor is set to the matching input using its on-screen Input or Source menu.
What to do
Power the PC off, move the cable to the graphics card, and reconnect it firmly. Try another output on the GPU and another cable if available. For the first DDR5 startup, leave the system powered on for up to 10 minutes without repeatedly forcing it off. A sequence of restarts during this period can be normal while the motherboard trains memory.
How to undo it
You can move the display cable back to a motherboard video output only if your CPU supports integrated graphics and you intend to use it. No BIOS setting needs to be changed merely for testing different monitor ports.
Fix 3: Reseat the Main Power, CPU Power, and GPU Power Cables
What causes it
The 24-pin motherboard connector, 8-pin CPU EPS connector, or GPU power connector can feel inserted while still being slightly loose. Another common mistake is connecting a PCIe cable to the motherboard’s CPU power socket. The plugs may look similar, but their pin layouts differ.
How to check
Turn the PSU off and unplug it. Inspect the large 24-pin connector along the motherboard’s right edge and the CPU power socket near the top-left corner. The CPU socket is commonly labeled CPU_PWR, EPS12V, or ATX_12V. Use only cables labeled CPU or EPS there. Check that all GPU power sockets are populated with PCIe or 12V-2×6 cables as required by the graphics card.
What to do
Release each latch, remove the connector, align its keyed shape, and press it in until the retaining clip clicks over the socket tab. Do the same for GPU power. If your PSU includes multiple separate PCIe cables, use separate cables for multiple 8-pin GPU sockets when the PSU manual recommends it. For a 16-pin 12V-2×6 GPU connector, push it in fully so there is no visible gap between plug and socket, and avoid sharply bending the cable close to the connector.
How to undo it
Switch off and unplug the PSU, press the latch, and pull connectors straight out by the plug body. Never pull on the wires. Reconnect only the correctly labeled modular PSU cables; do not mix modular cables from different PSU models or brands.
Fix 4: Reseat and Test Memory One Stick at a Time
What causes it
Memory modules require more force than many first-time builders expect. A DIMM that is not fully locked can cause a DRAM debug light, a black screen, or a loop of power cycles. Installing two modules in the wrong slots can also prevent reliable startup.
How to check
Look for a motherboard debug LED marked DRAM or a two-digit code in the manual’s diagnostic-code table. With power removed, inspect both ends of every DIMM. The retaining clips should be fully engaged. For two modules, most boards specify slots A2 and B2, generally the second and fourth slots away from the CPU, but verify the board manual.
What to do
Remove all memory. Install one stick in slot A2, lining up the notch with the slot key. Press evenly on both ends until the latches lock. Boot and wait through memory training. If it fails, test the same stick in the slot recommended for one module, then test the other stick using the same slot. Once the system reaches BIOS, install the second stick in B2. Do not enable XMP, EXPO, or manual memory overclocking until the PC boots consistently at default settings.
How to undo it
Power down, unplug the PSU, open the DIMM latches, and lift the modules out by their edges. Reinstall the intended kit in the slots specified by the motherboard manual.
Fix 5: Clear CMOS and Load Default BIOS Settings
What causes it
A failed memory profile, leftover board settings, or an interrupted configuration change can stop POST. Clearing CMOS resets firmware settings to safe defaults and removes settings such as EXPO, XMP, manual voltage changes, custom fan curves, and boot overrides.
How to check
This is appropriate if the system powered on previously but stopped booting after a BIOS change, RAM adjustment, CPU tuning attempt, or hardware swap. Locate the motherboard’s Clear CMOS button, two-pin CLR_CMOS header, or coin-cell battery. The exact location is listed in the board manual.
What to do
Turn off the PSU, unplug it, and hold the case power button for 10 seconds. Use the dedicated Clear CMOS button if present. For a two-pin header, briefly bridge the pins with a screwdriver for 5 to 10 seconds. If neither option is available, remove the CR2032 battery for five minutes, then reinstall it with the positive side facing up. Start the system and enter BIOS by repeatedly pressing Delete or F2. Select Load Optimized Defaults, Load UEFI Defaults, or similarly named option, then choose Save & Exit.
How to undo it
Re-enter BIOS and restore only settings you actually need, such as boot order. Re-enable XMP or EXPO later only after confirming stable startup; use the memory kit’s advertised profile rather than manually guessing frequency or voltage values.
Fix 6: Check CPU Support and Update the BIOS Safely
What causes it
A motherboard may physically accept a CPU but require a newer BIOS version before it can boot with that processor. This is most likely when a board has been in retail inventory for a long time or when pairing a newer CPU generation with an earlier chipset.
How to check
Read the motherboard model printed on the PCB and compare the BIOS version sticker, if present, with the CPU support list in the manufacturer documentation. A CPU debug LED that remains lit after verifying EPS power, CPU installation, and RAM can point to compatibility or socket-contact trouble.
What to do
If the motherboard supports BIOS Flashback, Q-Flash Plus, Flash BIOS Button, or a similarly named feature, use that method exactly as the manual specifies. Typically, format a small USB drive as FAT32, place the required BIOS file in the drive’s root directory, and use the manufacturer-required filename. Insert it into the specifically labeled flashback USB port, then press the flashback button. Keep PSU power connected and do not interrupt power while the indicator LED is flashing. If the board lacks flashback, use a supported older CPU or arrange for a shop to update the BIOS.
How to undo it
BIOS updates generally cannot be rolled back safely unless the manufacturer explicitly supports downgrade flashing. After a successful update, enter BIOS, load defaults, save, and then configure only necessary options.
Fix 7: Perform a Minimal-Boot Test Outside the Case
What causes it
A misplaced motherboard standoff, loose screw, damaged USB header, overtightened cooler, faulty add-in card, or defective component can prevent booting. Reducing the system to essential parts helps identify whether the case or an attached device is involved.
How to check
Disconnect storage drives, RGB hubs, front USB/audio connectors, extra PCIe cards, and all USB devices except a basic keyboard if needed. If the failure persists, inspect for extra standoffs beneath the motherboard, dropped screws, bent CPU socket contacts, and cooler mounting hardware touching components it should not touch.
What to do
Test with the motherboard placed on its cardboard box, not on an anti-static bag. Install only the CPU and cooler, one known-good RAM stick, PSU 24-pin and CPU EPS power, and a graphics card only if the CPU has no integrated graphics. Connect a monitor, then start the board by briefly bridging the power-switch pins. If it boots outside the case, reinstall it carefully using only standoffs that align with motherboard mounting holes. Add one device at a time, testing after each addition.
How to undo it
Turn off and unplug the PSU before rebuilding. Move the board back into the case, verify every standoff aligns with a mounting hole, and reconnect components one at a time. Do not operate the PC long-term outside the case without a secure cooler and stable, nonconductive work surface.
If Nothing Works
Record exactly what happens: whether fans spin, which debug LED stays lit, any beep pattern, whether the system shuts down, and whether it ever reaches BIOS. Take clear photos of motherboard power connections, RAM slots, CPU socket area, and the GPU power plug. This information makes warranty support far more effective.
If a minimal configuration still will not POST, the most practical next step is cross-testing with known-good parts: RAM first, then PSU, GPU, and motherboard/CPU as available. Avoid repeatedly powering on a system with a suspected short, a visibly damaged connector, overheating CPU, or burning smell. Use the retailer’s return window or the component manufacturer’s RMA process for the part supported by your research evidence.
FAQ
How long should a new PC take to boot for the first time?
Most systems show BIOS quickly, but a new DDR5 build can spend several minutes training memory on its first boot or after a CMOS reset. Leave it on for up to 10 minutes before deciding it is stuck, provided there is no burning smell, extreme heat, or repeated instant shutdown.
Why do the fans spin but there is no display?
Common causes are a monitor connected to the motherboard instead of the GPU, a loose GPU power cable, improperly seated RAM, or a motherboard debug fault. Check the graphics card output first, then test one RAM stick in the recommended single-DIMM slot.
Can I start a motherboard without the case power button?
Yes. With the PSU connected and switched on, briefly bridge the two power-switch pins on the front-panel header with a screwdriver. This is a diagnostic step; avoid touching neighboring pins and do not leave the screwdriver in place.
Should I enable XMP or EXPO before installing Windows?
No. First confirm the PC can repeatedly reach BIOS and boot normally using default memory settings. After the system is stable, enable XMP or EXPO in BIOS, save changes, and verify it still starts reliably before continuing with operating system installation.