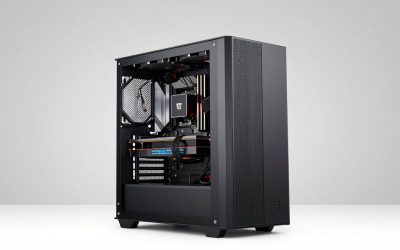
Plenty of great builds start out plain — a solid CPU cooler, standard fans, no lighting — and later the itch strikes to add some glow. The good news is that retrofitting RGB into an existing PC is one of the easiest upgrades there is, provided you understand the two lighting standards and how they connect. Done right, you get a cohesive look; done carelessly, you get mismatched colors and a fan that will not light at all.
Know your two standards first
There are two incompatible RGB systems. Plain RGB uses a 12 V 4-pin header and lights every LED the same color at once. Addressable RGB (ARGB) uses a 5 V 3-pin header and controls each LED individually for rainbow and wave effects. They are not interchangeable — plugging a 5 V ARGB device into a 12 V header will destroy it. Check your motherboard for which headers it has before buying anything.
No headers? Use a controller
Budget and older boards sometimes lack ARGB headers entirely. In that case, buy an ARGB controller hub that draws SATA power and includes a remote or button, or a hub that syncs via a USB connection. This lets you add addressable lighting to any build regardless of the motherboard.
Popular ways to add RGB
| Component | Effort | Typical cost | Impact |
|---|---|---|---|
| ARGB LED strip | Easy | $8–20 | Ambient glow |
| Swap to ARGB fans | Moderate | $40–90 (set) | Biggest visual change |
| RGB RAM | Easy | Varies | Accent lighting |
| ARGB controller hub | Easy | $20–40 | Enables control |
A simple retrofit plan
The highest-impact single move is replacing your existing case fans with ARGB fans, since they light both the airflow path and the interior. Add a magnetic ARGB strip along the top or edge of the case for ambient glow. Route all lighting to one ARGB header or hub so a single software suite controls everything and colors stay in sync.
Keep it cohesive
Resist the urge to mix five lighting brands. Sticking to one ecosystem (one board’s software, or one hub) means effects sync cleanly instead of running out of step. Pick a palette — a single accent color often looks more premium than a full rainbow — and match it across fans, strips, and RAM.
Software ecosystems and syncing
The final piece is control software. Each motherboard brand has its own lighting suite, and it can usually drive strips and fans plugged into the board’s ARGB headers. Trouble starts when you mix components from several brands, each wanting its own app, because they fight over control and effects fall out of sync. The cleanest approach is to route everything through one system: either all board headers under one suite, or a single third-party hub with its own controller. Pick one ecosystem up front, and adding a strip or a fan later stays a five-minute job instead of a software tug-of-war.
FAQ
Can I add ARGB if my motherboard has no ARGB header?
Yes. Use a SATA-powered ARGB controller hub with a remote or USB sync. It supplies power and control independently of the motherboard, so any build can get addressable lighting.
Will adding RGB affect performance or temperatures?
No meaningful effect. Lighting draws a tiny amount of power and does not change cooling. If you swap in ARGB fans, just make sure they match or beat your old fans’ airflow and static-pressure ratings.
Bottom line
Adding RGB to a plain build is straightforward once you respect the 12 V RGB versus 5 V ARGB divide — never mix them. Swapping to ARGB fans delivers the biggest visual jump, a strip adds ambient glow, and a controller hub lets any motherboard join in. Consolidate everything onto one ecosystem, choose a tasteful palette, and your once-plain PC gets a cohesive, synchronized look for very little money.