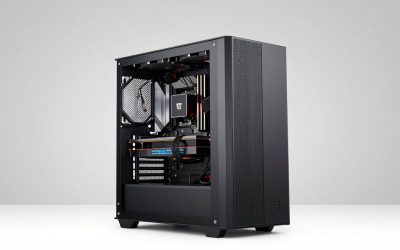
Your new build will not post, and near the edge of the motherboard a small light is glowing steadily. That is a debug LED, and it is pointing straight at the problem. Modern boards use either a set of four labeled lights or a two-digit code display to tell you which stage of startup failed. Reading them turns guesswork into a targeted fix.
The two systems boards use
Budget and mainstream boards usually have four EZ Debug LEDs labeled CPU, DRAM, VGA, and BOOT. Higher-end boards add a two-digit Q-Code display that shows a hexadecimal number for the exact POST step. Both do the same job: identify where the boot sequence stalled.
The four-light system
During a normal boot the LEDs light and clear in order as each stage passes. If one stays lit, that stage failed. The order itself is a clue, since boot always checks the CPU first, then memory, then graphics, then the boot device.
| LED lit | Stage that failed | What to check |
|---|---|---|
| CPU | Processor init | CPU seating, bent pins, EPS 8-pin power |
| DRAM | Memory detection | Reseat RAM, try one stick, correct slots |
| VGA | Graphics init | Reseat GPU and its power cable |
| BOOT | Boot device | Check drive, boot order, OS install |
Using the lights to fix a no-post
Follow the lit stage
A steady DRAM light, the most common on new builds, means the board cannot train the memory. Reseat both sticks firmly until they click, confirm they are in the manual specified slots like A2 and B2, and try a single stick if it persists. A VGA light means reseat the graphics card and its power connectors.
When it cycles quickly, that is normal
Do not panic if the lights flash through the sequence during a healthy boot; that is each stage passing. Only a light that stays on, or a Q-Code that stops advancing, indicates a fault. If the display settles on a code, look it up in the board manual for the precise meaning.
From lit LED to solved build
Debug LEDs are only useful if you act on them systematically. Treating the lit stage as a starting point for a short, ordered checklist resolves the large majority of no-post situations without swapping parts.
The DRAM light is the most common
On new builds, a steady DRAM light appears more than any other, and it almost never means dead memory. Reseat both sticks until they click firmly, confirm they are in the manual specified slots, test with a single stick, and clear CMOS if a high memory profile is preventing the board from training the RAM.
Work outward from the earliest stage
Because boot checks CPU, then memory, then graphics, then boot device in order, a stuck light early in that chain must be solved first. Fixing a CPU light may then reveal a DRAM light, which is progress. Address the lit stage, retest, and follow the sequence rather than jumping around.
Use Q-Codes for precision
If your board has a two-digit code display, it narrows the problem beyond the four broad categories. When the code stops advancing and settles on a value, look it up in the motherboard manual for the exact POST step. That specificity can distinguish, for example, a memory detection failure from a memory training failure, guiding a more precise fix.
FAQ
My DRAM light is on but the RAM is new. Is it faulty?
Rarely the RAM itself. A DRAM light usually means seating or slot placement, so reseat firmly, use the correct slots, and try one stick at a time. A very high memory speed profile can also fail to train, so clearing CMOS to run at default often clears the light.
What if the BOOT light stays on but everything else passed?
That means the hardware initialized but the board found no valid boot device. Confirm your SSD is detected in BIOS, that the boot order points to it, and that Windows is actually installed. A fresh build with no OS yet will naturally stop at BOOT until you install one.
Bottom line
Debug LEDs are a free map to a dead build. The lit label, CPU, DRAM, VGA, or BOOT, names the failed stage, and Q-Codes give even finer detail. Reseat the flagged part, keep the manual nearby, and let the board diagnose itself instead of swapping components blindly.