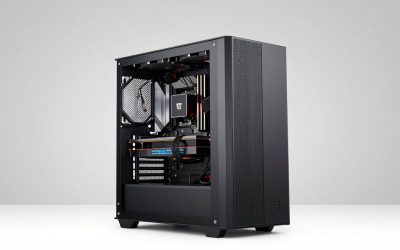
First-time builders often grab the case, drop the motherboard in, and then fight to reach connectors that a smarter sequence would have left wide open. The order you install parts is not cosmetic. Doing the CPU, cooler backplate, and RAM outside the case can turn a two-hour ordeal into a 90-minute build with clean cable runs and no scratched fingers.
The build order that actually works
Work from the components that need the most open space to the ones that tolerate tight quarters. Almost every experienced builder follows a version of this flow.
Bench work first (motherboard outside the case)
Set the motherboard on its box. Install the CPU, then the M.2 SSD, then the RAM, then the CPU cooler bracket and cooler.
Then the case, then everything heavy
Install case standoffs and the I/O shield, drop in the board, install the power supply, then the GPU last so it does not block access to lower connectors.
| Step | Component | Why this position | Approx time |
|---|---|---|---|
| 1 | CPU into socket | Needs zero obstruction; done on bench | 3 min |
| 2 | M.2 SSD | Screw hole hidden once GPU is in | 3 min |
| 3 | RAM | Requires firm push with board supported | 2 min |
| 4 | CPU cooler | Backplate access easiest on bench | 10-20 min |
| 5 | PSU | Route 24-pin and EPS before board is crowded | 10 min |
| 6 | Motherboard into case | Now a single carried unit | 10 min |
| 7 | Storage and front-panel wiring | Clear sightlines to headers | 15 min |
| 8 | GPU | Last so it never blocks anything | 5 min |
Where beginners lose an hour
The two classic mistakes are installing the cooler after the board is in the case (fighting the backplate through a cutout) and installing the GPU before wiring the front-panel headers, which then hide under the card. A mid-tower with a large air cooler is especially unforgiving here.
Small-form-factor changes the rules slightly
In a Mini-ITX case under about 15 liters, you often must install the SSD, RAM, and sometimes the 24-pin cable before the cooler because clearance is measured in millimeters. Read the case manual first; SFF is the one place where sequence is dictated by the chassis, not preference.
Tools and prep that speed the sequence
The right prep makes the order flow instead of stalling. Before touching a single part, lay out a clear workspace, gather a #2 Phillips screwdriver, keep a small bowl for screws, and open your motherboard and case manuals to the diagrams. Roughly 80 percent of first-build frustration is not difficulty, it is hunting for a screw or rereading which header goes where mid-step.
Group the small screws before you start
Cases ship a bag with several screw types: coarse-thread standoffs and case screws, fine-thread drive and PSU screws, and tiny M.2 screws. Sorting them into piles takes two minutes and prevents the classic mistake of forcing a coarse screw into a fine-thread mount. The single M.2 screw is the easiest to lose, so set it aside first.
Dry-fit the big parts
Before final mounting, hold the CPU cooler and GPU in place to confirm clearance. A tall air cooler can block the top RAM slot or foul the side panel by a few millimeters, and a long GPU can clash with front fans. Catching that during the bench stage, not after everything is screwed down, saves a full teardown.
Cable plan before storage and GPU
Route the bulky 24-pin, EPS, and PCIe power cables through the case before installing drives and the graphics card. Pulling those thick cables through the rear channels is far easier with the tray empty. Leave connectors loose at the board end, plug them in as each part goes in, then tidy the slack at the end.
FAQ
Should I test the build before final assembly?
Yes. A quick bench post with CPU, one RAM stick, and GPU confirms the core parts work before you spend 30 minutes on cable management. Reaching a BIOS screen at that stage saves painful teardowns.
Do I install Windows before or after cable management?
After. Finish the physical build, confirm a stable boot, then install the OS. You do not want to be mid-install and realize a SATA cable needs reseating behind the tray.
Bottom line
That single habit prevents 90 percent of the awkward reaches, protects your components, and consistently shaves 30-45 minutes off a first build.