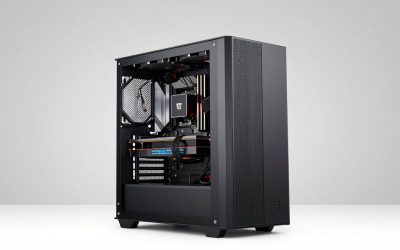
If you plan to use a liquid cooler now or in the future, radiator support should shape your case choice from the start. Nothing is more frustrating than buying a 360mm cooler only to find your case tops out at 240mm. This guide explains how to read radiator specs and pick a case that fits your cooling plans.
Radiator Sizes and What They Mean
All-in-one liquid coolers are sold by radiator length, which corresponds to the number of fans it holds: 120mm (one fan), 240mm (two), 280mm (two larger fans), and 360mm (three). Larger radiators dissipate more heat and can run quieter, but they need more room and specific mounting locations inside the case.
Bigger Is Not Always Necessary
A 240mm or 280mm radiator handles most mainstream and even many high-end CPUs comfortably. A 360mm is best reserved for flagship or overclocked chips, or for people who want the lowest possible fan noise. Match the radiator to your processor’s heat output rather than buying the biggest one by default.
| Case size | Typical max radiator | Notes |
|---|---|---|
| Mini-ITX | 120-240mm | Very tight, check exact model |
| Micro-ATX | 240-280mm | Often front-mounted only |
| Mid tower | 360mm | Front and/or top mounts |
| Full tower | 360-420mm+ | Multiple radiator positions |
Reading a Case’s Radiator Spec
Case listings state supported radiator sizes per location: front, top, and sometimes rear. Do not assume a case that supports a 360mm radiator supports it in every position. A top mount may be limited by motherboard or RAM clearance, while a front mount might conflict with drive cages. Read the location-specific numbers.
Clearance Conflicts to Check
Top-mounted radiators can collide with tall RAM sticks or motherboard heatsinks, so check the clearance between the top of the board and the radiator. Front-mounted radiators can reduce space for long graphics cards. Manufacturers usually publish both radiator and GPU clearance figures; cross-check them for your specific parts.
Plan for the Future, Not Just Today
Even if you start with an air cooler, choosing a case that supports at least a 280mm or 360mm radiator keeps the door open for a liquid upgrade later. It costs little to pick a case with generous radiator support, and it saves a full rebuild if your cooling needs grow.
Airflow Still Matters
A radiator is only as good as the air moving through it. A case with a mesh front panel feeds the radiator cooler air than a solid glass front. If quiet, effective liquid cooling is the goal, prioritize a case with good intake airflow alongside its radiator support.
Fan Thickness and Push-Pull Setups
Radiator support figures sometimes assume standard-thickness fans. If you plan thicker fans or a push-pull configuration, with fans on both sides of the radiator, you need extra clearance. Check the combined thickness of radiator plus fans against the case’s stated limit, especially for top mounts where board components sit close.
Thicker Radiators Need More Room
Radiators themselves vary in thickness, and a thicker radiator cools better but demands more space. In a mid tower this is usually fine at the front, but a top mount can run into RAM or heatsink clearance. Confirm both the radiator length and its thickness fit your chosen mounting location before buying.
FAQ
Can I mount a radiator in the front and still fit a long GPU?
Often yes, but it depends on the case. A front radiator plus its fans takes up depth that can shorten the maximum GPU length. Check the case’s GPU clearance both with and without a front radiator installed before buying a long card.
Does a 360mm radiator always cool better than a 280mm?
It has more surface area, so it can move more heat or run quieter at the same temperature. But for many CPUs a 280mm is already sufficient, so the practical difference is small unless your chip runs hot or you chase silence.
Bottom Line
Choose a case around the radiator you might realistically use, checking the supported size at each mounting position rather than the headline figure. Match radiator size to your CPU’s heat output, watch for RAM and GPU clearance conflicts, and favor a mesh front for airflow. Plan a little ahead and your case will handle both today’s cooler and tomorrow’s upgrade.