The hardest part of a first PC build is not the screwing together, it is the planning. Get the plan right and assembly is a calm afternoon; get it wrong and you discover an incompatible part halfway through. This step-by-step framework walks a complete beginner from a blank page to a confident, compatible parts list.
Step 1: Define the Machine’s Job and Budget
Write one sentence: what this PC must do and roughly what you can spend. “1440p 144Hz gaming for about $1,200” is a real spec. “A good gaming PC” is not. The job sets your target resolution and frame rate; the budget sets the ceiling. Everything downstream flows from these two numbers.
Step 2: Pick the GPU and CPU Together
Choose these as a pair, not in isolation. The GPU targets your resolution and frame rate; the CPU keeps that GPU fed without becoming the bottleneck. For 1080p high refresh, a mid CPU with a strong GPU works well. For 1440p, aim for a balanced pairing where neither part is dramatically stronger than the other.
Step 3: Build Outward From the Core
With CPU and GPU chosen, everything else follows rules. Match the motherboard to the CPU socket and chipset. Pick RAM the board supports at a sensible speed. Size the power supply with headroom. The table shows sensible starting points for a first 1440p build.
| Part | Beginner target | Why |
|---|---|---|
| RAM | 32GB DDR (2x16GB) | Comfortable for games + browser |
| Storage | 1TB NVMe Gen4 | Fast loads, room to grow |
| Power supply | 650-750W 80+ Gold | Headroom for upgrades |
| Cooler | Quality air or 240mm AIO | Quiet, sufficient thermals |
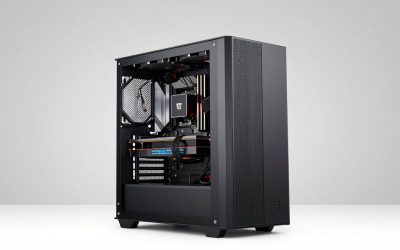
| Case | Mid-tower, good airflow | Easy first build, cool parts |
Step 4: Verify Compatibility Before You Buy
Run a compatibility pass on the whole list. Confirm the CPU socket matches the board, the RAM is on the board’s support list, the GPU length fits the case, the cooler clears the case and RAM, and the PSU has the right connectors. A compatibility checker tool catches most mistakes in minutes and is worth the five it takes.
Step 5: Sequence Your Purchases
You do not have to buy everything at once. Prioritize the parts least likely to drop in price (case, power supply, cooler) and watch for sales on the volatile ones (GPU, SSD, RAM). Just avoid leaving the build half-bought so long that a chosen part disappears from the market.
Give Yourself a Calm First Assembly
Planning does not end at the parts list; it includes planning the build day itself. Set aside an unhurried block of three to four hours for a first build, work on a large non-carpeted surface, and read the motherboard and case manuals before you start rather than during a stuck moment. Many first-timers do a test fit outside the case, mounting the CPU, cooler and one RAM stick on the bare board and confirming it powers on, before committing everything to the chassis.
Keep a small kit ready: a single Phillips screwdriver handles almost everything, a bag for stray screws prevents losses, and the tiny motherboard speaker or a diagnostic LED helps decode a no-boot. A first build that goes smoothly is usually one that was planned as an event, not squeezed into a rushed evening with parts still in shipping boxes.
FAQ
How long should planning take?
For a first build, expect two to five hours of research spread over a few days. Rushing is where compatibility mistakes happen. A day of patient planning is far cheaper than a returned motherboard and a week of shipping delays.
What is the most common first-build planning mistake?
Undersizing the power supply to save money, closely followed by buying a case too small for the chosen cooler or GPU. Both are avoidable with a five-minute compatibility check, and both are miserable to discover mid-assembly.
Bottom Line
Plan in order: job and budget, then the GPU-CPU pair, then build outward, then verify compatibility, then buy in a smart sequence. Follow that path and your first build becomes a relaxed project rather than a gamble. The screwdriver work is the easy part; the plan is what makes it easy.