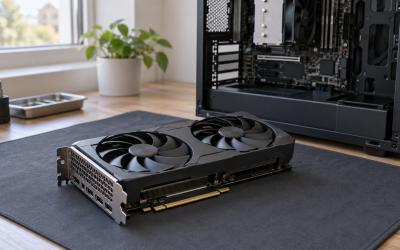
Case fans are supposed to be audible under a heavy gaming load, but a PC that sounds like a small vacuum cleaner while browsing, idling, or playing a modest game usually has a configuration, airflow, or hardware problem. The noise may come from fan speed, turbulence, vibration, a cable touching a blade, or a fan curve that reacts too aggressively to brief temperature spikes.
Before buying anything, identify which fan is noisy and when it gets loud. A front intake fan, rear exhaust fan, CPU cooler fan, GPU fans, power supply fan, and liquid-cooler radiator fans can all create similar sounds. In 2026, most motherboards provide enough BIOS controls to diagnose and correct ordinary case-fan noise without replacing hardware.
Most Common Causes
| Cause | Symptom | Likelihood |
|---|---|---|
| Fan curve set too aggressively | Fans repeatedly surge up and down during light use | Very high |
| Incorrect PWM/DC control mode | Fan runs near full speed regardless of temperature | High |
| Dust-restricted filters, heatsinks, or vents | Noise increases over time; temperatures and fan speeds rise | High |
| Airflow turbulence or blocked intake | Whooshing, humming, or rushing noise rather than clicking | High |
| Loose screw, panel, cable, or fan grille | Rattle, buzz, ticking, or vibration at certain RPMs | Medium |
| Worn fan bearing | Grinding, scraping, chirping, or persistent rumble | Medium |
| Too many fans connected to one header or hub issue | Several fans behave erratically or stay at one speed | Medium |
| High CPU, GPU, or motherboard temperature | Fans are loud because the system is genuinely hot | Medium |
Diagnose Step by Step
1. Identify the sound and its location
Shut down the PC, remove the side panel, then restart it with the panel off. Keep fingers, tools, clothing, and cables away from spinning fans. Listen near each fan without touching the blades. A smooth airflow sound usually points to high RPM or poor airflow. A sharp tick often means a wire or grille contact. A low-frequency buzz suggests vibration. Grinding or scraping usually indicates a failing bearing.
Use a rolled sheet of paper as a listening tube if necessary: hold one end near your ear and point the other toward a fan from a safe distance. Do not use compressed air while the system is running.
2. Check temperatures before lowering speeds
Open Windows Task Manager with Ctrl + Shift + Esc, select the Performance tab, and check whether CPU usage is unexpectedly high. Then open Settings > System > Power & battery and confirm the selected power mode is not forcing maximum performance unnecessarily.
For more useful temperature information, check your motherboard BIOS or UEFI hardware-monitor page. Restart the PC and press Delete or F2 repeatedly during startup. Look for a section named Monitor, Hardware Monitor, PC Health Status, or Fan Control. If CPU temperature is already elevated while sitting in BIOS, the issue is not a Windows background task.
3. Verify fan headers and control mode
With the PC powered off and unplugged, inspect each case-fan connector. A 4-pin fan should normally use PWM control; a 3-pin fan should normally use DC or voltage control. A 3-pin fan connected to a header forced into PWM mode may run too fast or fail to respond properly.
In BIOS, locate each header, often labeled CHA_FAN, SYS_FAN, or FAN1. Confirm the displayed RPM changes when you select a lower duty setting. If several fans are attached to a hub, the motherboard may only read RPM from one designated port.
4. Test whether the fan curve is the problem
In the BIOS fan-control screen, note the current curve or take a photo. Set one noisy case-fan header temporarily to a fixed 40% duty cycle. Wait one to two minutes. If the noise drops immediately and temperatures remain reasonable, the fan itself may be fine; its curve is likely too aggressive. Restore the previous setting before continuing if temperatures climb quickly.
5. Inspect airflow paths and physical interference
Power off, switch off the power supply if it has a rear switch, and unplug the power cable. Remove front, top, and bottom dust filters. Check for dust packed between filter mesh and the case frame, cable bundles pressed against intake fans, or front-panel doors that restrict the intake path. Spin each fan gently by hand. It should rotate smoothly without scraping, wobbling, or stopping abruptly.
Fixes by Cause
Fan curve is too aggressive
What causes it: A steep curve makes fans react to small, short-lived CPU temperature changes. This produces annoying ramping even when average system heat is low.
How to check: Enter BIOS with Delete or F2, open the fan-control section, and watch whether the fan speed rises and falls sharply while CPU temperature changes by only a few degrees.
What to do: Select the relevant SYS_FAN or CHA_FAN header and use Manual, Advanced, or Smart Fan mode. A practical starting curve for case fans is 25% to 35% below 40°C, 40% to 50% around 55°C, 60% to 70% around 70°C, and 100% at 80°C or higher. If the BIOS offers Step Up Time, Step Down Time, or Fan Smoothing, use roughly 3 to 8 seconds to prevent sudden surges. Save changes with F10.
How to undo: Return to the same menu and select Default, Standard, Normal, or Load Optimized Defaults for that fan header. Save with F10.
Incorrect PWM or DC mode
What causes it: Fan headers regulate 4-pin and 3-pin fans differently. The wrong mode can leave a fan stuck at high speed.
How to check: Count the metal contact positions in the fan connector: 4-pin fans support PWM; 3-pin fans use voltage regulation. Compare that connector type with the header setting in BIOS.
What to do: In the fan-header configuration page, choose PWM for a 4-pin case fan and DC, Voltage, or Auto for a 3-pin fan. Run the BIOS fan-tuning feature if available; it may be called Q-Fan Tuning, Fan Tuning, or Smart Fan Calibration.
How to undo: Set the header back to Auto mode or restore the prior control mode recorded during diagnosis.
Dust or blocked airflow
What causes it: Clogged filters and heatsinks reduce airflow, so fans must spin faster to move the same amount of air.
How to check: Inspect filters under bright light. If you cannot clearly see through the mesh, clean them. Also inspect the front intake, top exhaust, CPU cooler fins, and GPU heatsink openings.
What to do: Remove washable filters and clean them with water only if the case manual permits it; let them dry completely before reinstalling. Use short bursts of compressed air outdoors for heatsinks and fan blades. Hold fan blades still with a nonmetallic object while blowing dust away so they do not overspin. Route loose cables behind the motherboard tray or secure them with zip ties.
How to undo: Reinstall the original filters and cable routing. Cleaning itself does not require reversal.
Vibration, cable contact, or loose mounting
What causes it: A fan can transmit vibration into a thin steel panel, while a loose cable can tap a blade or grille at a specific speed.
How to check: With power disconnected, inspect all four mounting points. Look for shiny wear marks on blades, fan grilles, or nearby wires. Lightly press the case panel near the noisy area while the PC is running; if the sound changes, panel resonance is likely.
What to do: Tighten fan screws until secure, but do not overtighten plastic fan frames. Move cables at least 10 mm away from blade paths. Reseat side panels and tighten their thumbscrews. If compatible with the case, install rubber fan mounts or silicone corner pads to isolate vibration.
How to undo: Remove the rubber mounts or pads and reinstall the original screws if you prefer the previous setup.
Worn or defective fan bearing
What causes it: Sleeve, rifle, and ball bearings wear out. Bearing noise can be worse after a cold start or at certain orientations.
How to check: A failing fan often makes grinding, chirping, or uneven rumbling even after cleaning and curve adjustments. With power off, compare its hand-spin feel with a known-good fan. Wobble or scraping is a strong replacement signal.
What to do: Replace the individual fan with one of the same size, typically 120 mm or 140 mm, and match the connector type where possible. Install it in the same airflow direction; fan-frame arrows usually show blade rotation and airflow direction.
How to undo: Keep the old fan and reinstall it only for troubleshooting. Do not continue using it if it intermittently stops or scrapes.
When to Replace or Reinstall
Replace a fan when it grinds, wobbles, fails to start consistently, reports zero RPM while visibly spinning, or remains loud at a modest fixed duty level after cleaning. Reinstall rather than replace when the problem began after moving the PC, changing cables, installing a new GPU, or removing a side panel. In those cases, check fan orientation, screw tension, cable clearance, hub connections, and dust-filter seating first.
Also replace a low-quality fixed-speed fan if it has no useful speed control and dominates the system’s noise profile. Do not reduce case airflow simply to achieve silence: maintain at least one intake and one exhaust fan, then tune them conservatively.
FAQ
Why are my case fans loud when the PC is idle?
The most common reasons are an incorrect PWM/DC setting, a fan curve with a high minimum duty, or background CPU activity. Check Task Manager for sustained CPU usage, then inspect the BIOS fan curve and set an appropriate minimum speed.
Is it safe to run case fans at 30%?
Usually, yes, if the fans reliably start at that setting and temperatures remain controlled during gaming and other sustained loads. Some fans stall below 20% to 30%, so use BIOS fan calibration or test the minimum manually.
Why do my fans suddenly ramp up for a few seconds?
Modern CPUs can briefly boost and spike in temperature during ordinary tasks. Add fan smoothing or increase the step-up and step-down delay in BIOS so case fans respond to sustained heat instead of momentary spikes.
Should case fans follow CPU temperature or motherboard temperature?
For general case airflow, motherboard, system, or VRM temperature is often smoother and less prone to sudden fan surges. If your BIOS only allows CPU temperature as a source, use a gentler curve and a longer response delay.